OK, so I don't need anyone to remind me that I haven't exactly been prolific over the past few years when it comes to posting on Gimme LEGO.... That having been said, what I have posted provides a big clue to the identity of possibly my greatest passion when it comes to LEGO, namely space sets. A quick skim of the index of previous posts reveals that even if you exclude Star Wars I've served up significantly more reviews of space sets than of any other theme; vintage space sets such as 924 Space Cruiser, 6896 Celestial Forager and 6897 Rebel Hunter have been particularly well represented. A recent trawl through some of those old reviews whetted my appetite for more, so I thought I'd dig out an old space set from a subtheme that I'd not previously covered on Gimme LEGO and share it with you.
6900 Cyber Saucer was released in 1997 as part of the UFO subtheme of LEGO Space. The front of the box (above) looks frankly psychedelic, showcasing the completed craft flying above a green quasi-organic planet surface which is almost as retina-searing as the trans-neon green accents of the ship itself. Blurred clouds of magenta space dust and stars provide a suitably vivid backdrop. The back of my bashed box (below) is dominated by images of a couple of dubious-looking alternate builds. There are also a couple of panels which illustrate play features of the set, namely a rotation function and what appears to be a temperature-sensitive print on one of the elements.
The front of the instruction booklet (below) features the same image as the front of the box, but with one interesting difference, specifically the inclusion of an alternative set number (6999) alongside the actual set number. I initially assumed that 6999 was the number of the set in the US or elsewhere, but it turns out that 6999 was in fact the set number of a limited edition bundle consisting of a copy of 6900 plus a hard plastic promotional mask. The instruction booklet comprises 15 pages, all of which are occupied by building instructions; there's no advertising, which is always a bit of a shame in older sets, while the back cover is pretty much identical to the back of the box and therefore not shown here.
The set contains a solitary minifigure, designated as UFO Zotaxian Alien - Blue Officer (Commander X) by Bricklink. This minifigure only appears in a single set, 6975 Alien Avenger, in addition to 6900 and 6999. The torso and legs, with their intricate prints, are exclusive to this minifigure. The black breastplate and shoulder protector is shared with a number of other minifigures across the UFO and Insectoids space subthemes, while the light grey printed helmet is shared with a UFO Zotaxian Red Pilot minifigure which appears in a number of other UFO sets.
Beneath the Predator-esque helmet is a printed trans-neon green minifigure head. As was the case for the printed torso and legs, the head print is exclusive to this particular minifigure. There's no back print on the head.
The breastplate and shoulder protector also provides substantial protection for the upper back. In marked contrast to the extensive and complex printing on the front of the minifigure there's no printing at all on the back of the helmet, torso or legs.
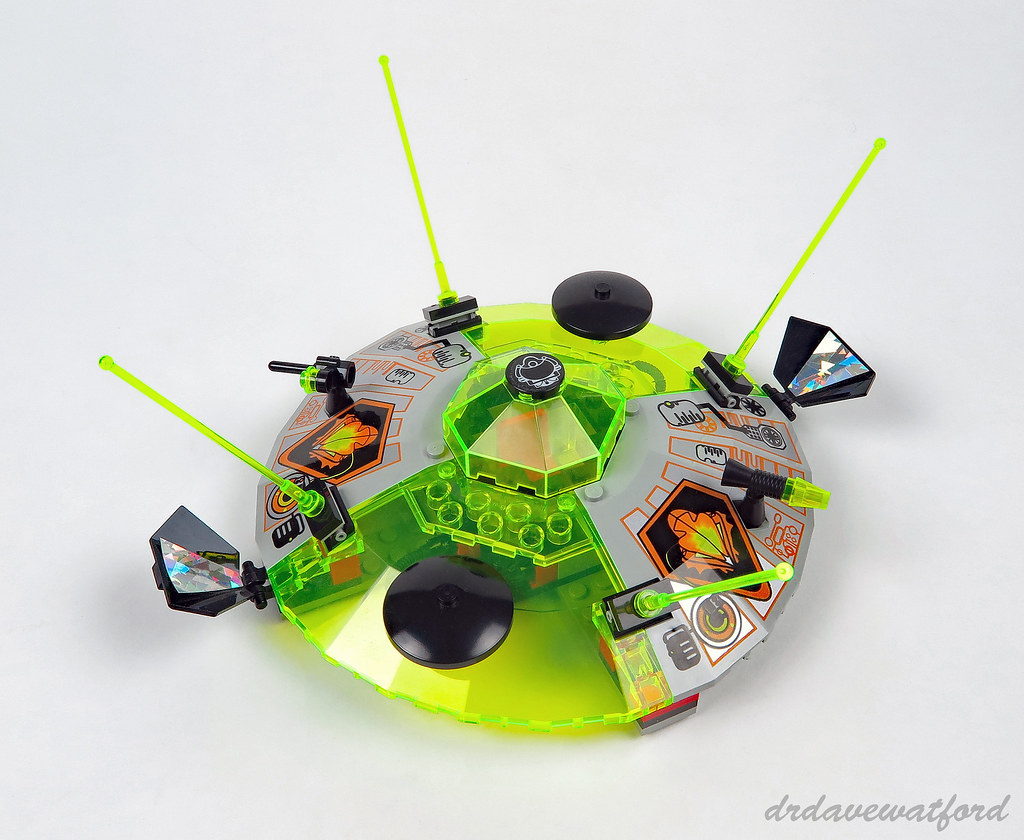
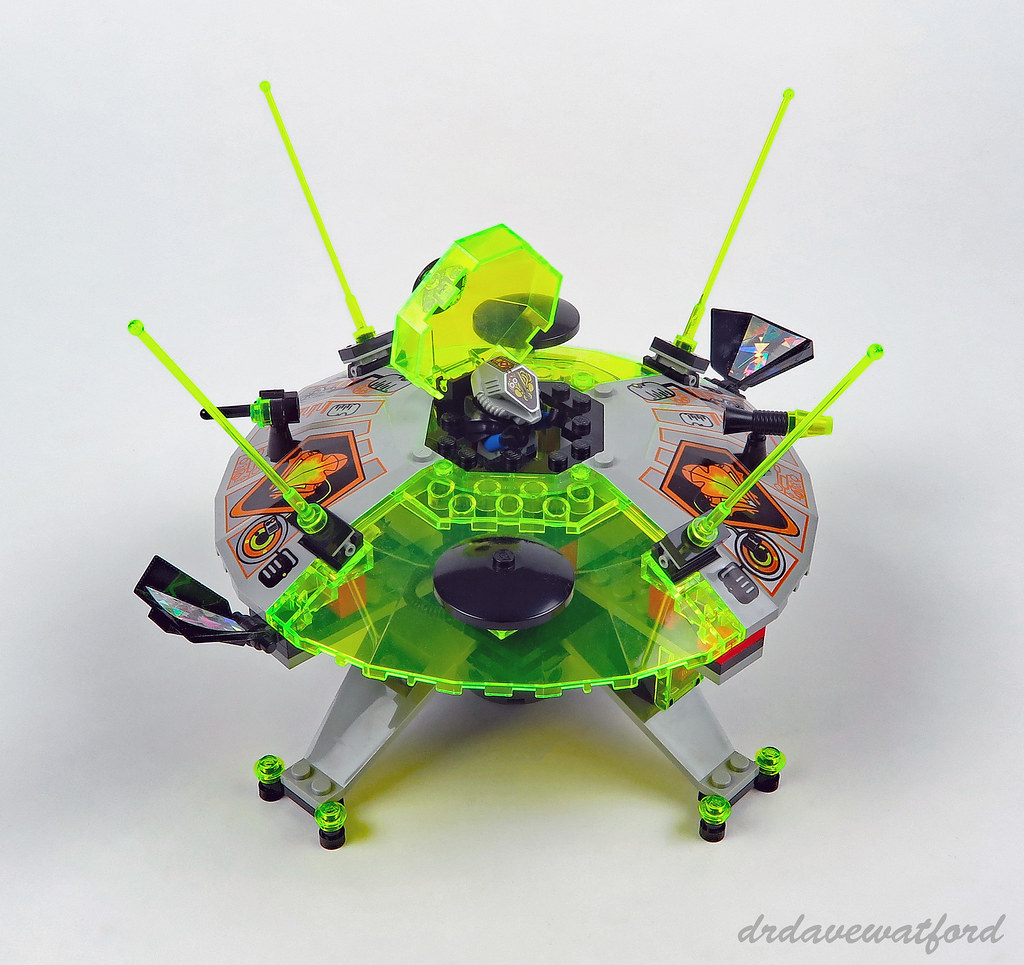
Moving on to the saucer, the shape is largely defined by four 10 x 10 x 2 1/3 quarter saucer top panels. Two of these panels are trans-neon green in colour and have appeared in just 4 sets including this one and 6999, while the other two are printed old grey left and right variants which have each appeared in a total of 5 sets. The orange, black and silver prints on the latter two elements are great, featuring a stylised representation of the alien minifigure helmet from above together with some additional detailing. The quarter panels surround a simple brick-built cockpit containing a solitary red seat. A couple of decorative black 8.5L flexible hoses attach to the sides of the cockpit beneath the panels, while a pair of 3 x 5 deltoid panels attach to the outside edge of the saucer on opposite sides. Given the shiny silver stickers which are attached to them I suspect that they're supposed to be solar arrays. In addition to the deltoid panels, the exterior of the saucer is embellished with numerous other attachments including trans-neon green 8H whip antennae, black 4 x 4 inverted dishes, a minifigure loudhailer tipped with a trans-neon green 1 x 1 cone, and a minifigure space scanner tool. All of the attachments can be either rotated or tilted on small hinges, thus boosting the play value.
The cockpit is enclosed by a trans-neon green 6 x 6 octagonal canopy which is hinged at the rear to provide easy cockpit access. A black 2 x 2 round tile sits on top of the canopy. This tile is decorated with a heat-sensitive sticker, which is something that I've never encountered in a LEGO set before. When the sticker is cold the central area is blank, but when the sticker is pressed and warmed with a fingertip a dark green pattern appears in the central area. This 'play feature' is demonstrated in the instruction booklet (below). The sticker in my copy of the set shows a faint olive green pattern even when untouched, however, similar to what you can see here; I'm not sure whether that's because the ambient temperature is currently quite high in my LEGO room, or just because the sticker is now at least 23 years old and therefore not operating quite as efficiently as it was when it was new.
The saucer sits on top of a simple landing stage. This is supported at its periphery by four light grey bi-level wings and centrally by a pillar which incorporates four black 2 x 2 x 2 stands. The bi-level wings are quite rare in light grey, having appeared in just four sets in this colour including 6900 and 6999. There's a black 2 x 2 x 2 container mounted on one of the peripheral supports. The open face of the container is enclosed by a trans-neon green door which opens to reveal a printed tile that's presumably supposed to represent tech of some sort. The landing stage is topped by a red 4 x 4 turntable with square base.
The neon-green and light grey elements incorporated into the landing stage provide some welcome consistency with the saucer's colour scheme. The saucer fits neatly on top of the landing stage, and since the only point of attachment is the 4 x 4 turntable it can consequently rotate freely through 360 degrees.
I have to admit that I was initially quite sceptical about this set, and was ready to pretty much write off the UFO subtheme as a poor relation of the much-loved Classic Space sets of the late 1970s and early to mid 1980s. The colour scheme is less appealing to me than the palette of the older space sets, and the preponderance of large, prefabricated elements such as the 10 x 10 quarter panels and the landing stage supports made the build all too brief and had me wishing that I had chosen to assemble a set which didn't rely so heavily on such short-cuts. Now that I've built it, however, I'm feeling a little more charitable - I like the minifigure, the saucer is more swooshable than I expected, and the build is crammed with play features - literally everything attached to the upper surface of the saucer can be tilted or rotated and the saucer spins freely on its landing stage. Furthermore, the design does a decent enough job of aping the cliched flying saucer stereotype, and I'm mindful that there are probably legions of twenty-somethings out there who look back misty-eyed at the UFO sets of their youth the same way as older AFOLs revere the Classic Space sets.
Set 6900 Cyber Saucer contains 114 parts and was released back in 1997. There's clearly love for the set out there as at time of writing the cheapest complete boxed example of the set is listed at almost £50 plus shipping on Bricklink. Complete unboxed examples start at about half that, however, and you might also be able to find one cheaper on eBay.
Tuesday, 19 May 2020
Tuesday, 21 April 2020
Unfinished Business
Back in the summer of 2019 I revealed that I'd be exhibiting my 10224 Town Hall-inspired railway station MOC (below) as part of a collaborative display at the 2019 Great Western Brick Show, but that it'd need some fairly substantial modifications in order to fit into the display.
The display, a LEGO city made up of fan-designed modular-style buildings complemented by brick-built roads, roadside structures, a canal and appropriate landscaping, would also feature a working passenger railway. The plan was for the railway to be elevated for part of its course, and Simon the display organiser asked if I'd be willing to modify my MOC to incorporate a platform at the rear in order to serve the elevated section of track. This seemed like an interesting challenge so I agreed. Simon sent over some specifications and a few photographs to illustrate how my station would fit into the overall display, including the exact dimensions of the plot it would occupy and how high the platform needed to be, so I got to work. As usual I worked in LDD, modifying a previous LDD file to reflect the new design brief, and eventually I came up with the sketch below.
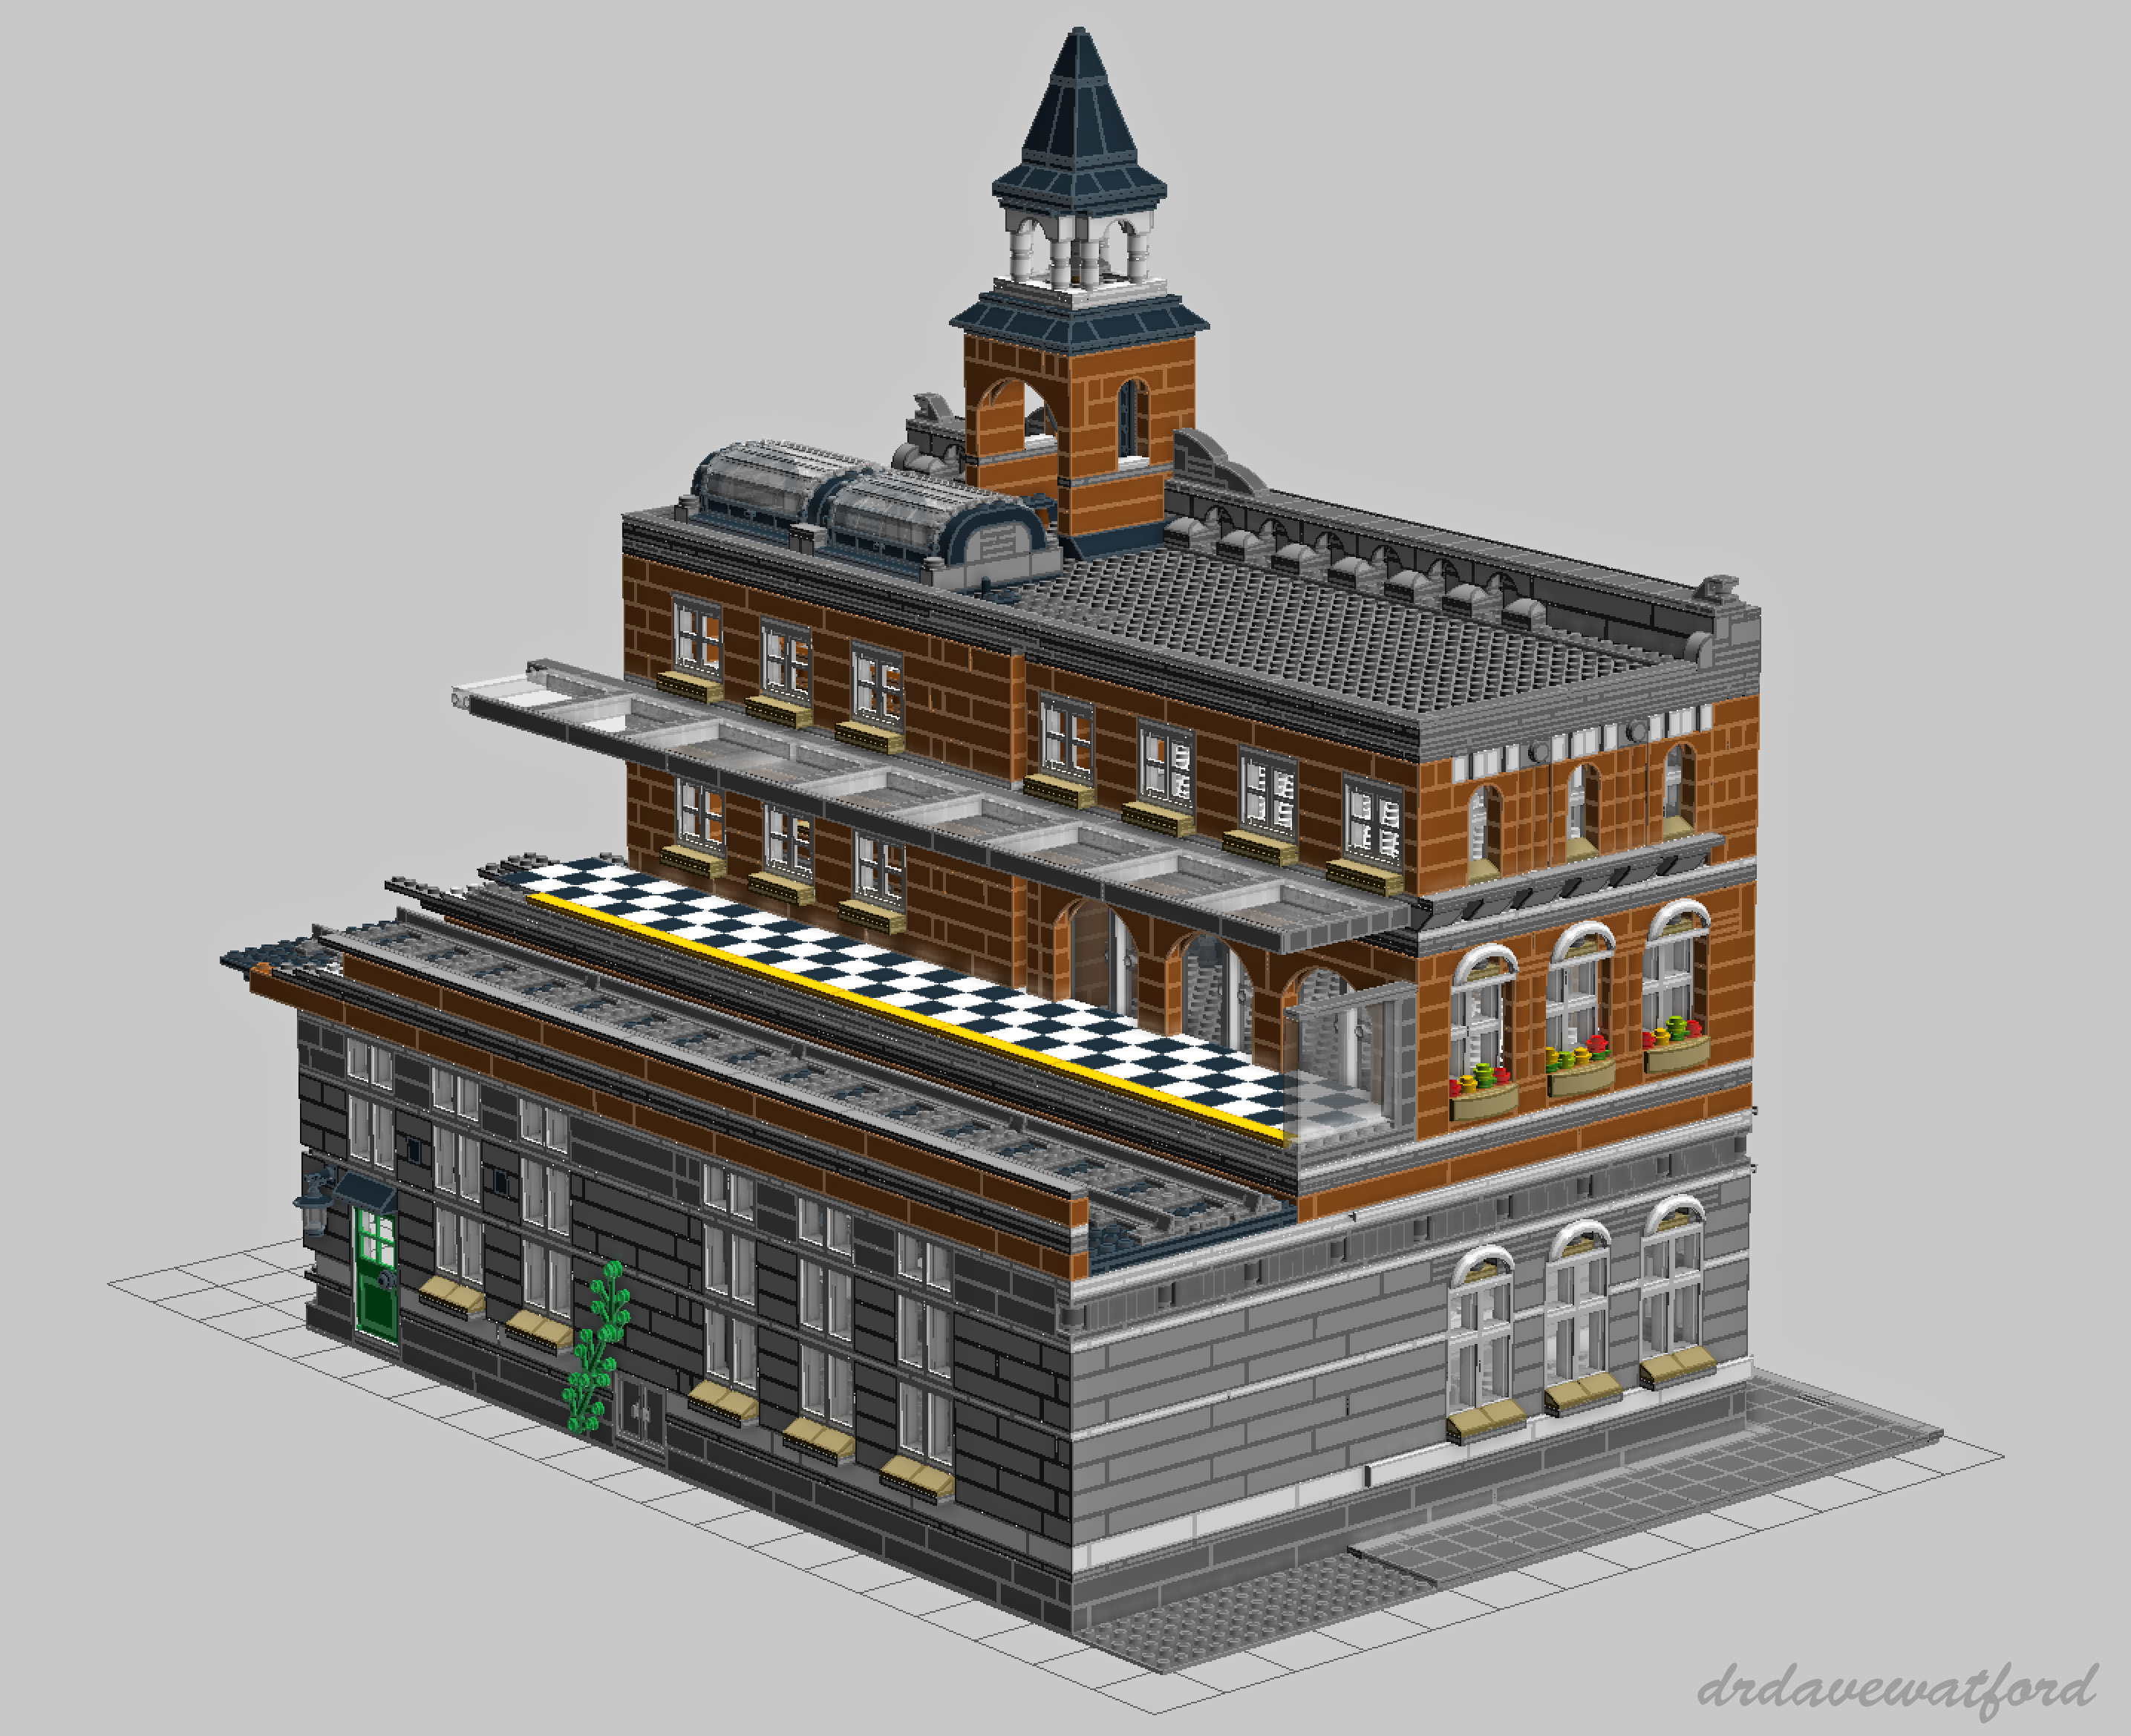
As you can see, my plan was for the elevated section of railway to run on top of the ground floor of the building, which would mean that I had to extend the ground floor backwards to a considerable extent. The roof of the new, extended ground floor section would serve as the track bed, meaning that it would have to bear the weight of the track and train and be constructed accordingly. I'd also need to build a station platform at second floor level and attach a canopy a suitable height above it. The 16 x 6 area of open studs at the rear and to the side would eventually accommodate a bridge support, carrying the rail track from a bridge onto the station. From a purely technical perspective the build would be pretty straightforward, but the existing rear of the station (below) would nevertheless require substantial modification.
After double- and triple-checking that my design would fit the specified dimensions I sent an LDD screengrab to Simon for his approval, and after a bit of back-and-forth he was happy with it and I had the green light to get cracking with the modifications. To my surprise it turned out that I already had most of the LEGO elements that I needed for the build, but there were inevitably a few parts that I didn't have. This necessitated a gratifyingly small, if depressingly expensive, Bricklink order. Still, at least the parts arrived quickly and in perfect condition, so I was soon ready to build. It was the first meaningful LEGO project that I'd undertaken for a while on account of work, holidays and family commitments and it felt great to get my head down and do some building, so much so that I really got into it, burned the midnight oil and managed to complete most of the work in just a couple of nights.
As you can see from the picture above, I didn't make any modifications to the front of the building. The rear (below) was however much altered. I followed my LDD sketch pretty much to the brick, although I did make a couple of additional minor tweaks at the end, supporting the floating platform canopy with four lengths of black rigid 3mm hose and swapping out the old window sills with tan 2 x 4 tiles to make them look a bit less chunky. The building remains modular and splits into four sections, namely the expanded ground floor complete with track bed, the second floor which includes the station platform, a third floor to which the canopy attaches, and the roof which features the clock tower.
With the modified station now complete my next job was to figure out how to get it to the Great Western Brick Show venue in Swindon intact, and transporting it turned out to be a bigger challenge than I had anticipated. While the upper levels of the building just about squeezed into a large plastic crate, the expanded lower level was too big to fit into any box or crate that I owned or could lay my hands at short notice. I therefore ended up having to wrap it in a bed sheet and shoehorn it into the pitifully inadequate boot/trunk of my car and just pray that it survived the 80 mile journey without disintegrating, which it thankfully did, just about. Simon had arrived at the venue the previous evening, as had many of the other exhibitors, so the display was already in an advanced state of completion when I arrived at the venue on the morning of the show. All that was left for me to do was drop the station into the vacant plot, stand back and admire the view.
My station was assigned a nice central position in the display. Thanks to some impressive planning by Simon the station was flawlessly integrated into the display's rail loop by way of a pair of elegant dark green railway bridges complete with tan bridge supports which flanked the station on either side as you can see in the picture above. The narrow pavement in front of the station conceals electrical wiring which supplies a number of working LED street lamps, and beyond the pavement lies a section of brick-built road, some more pavement, and then a canal which is spanned by a pair of brick-built humpback bridges. A small courtyard completely enclosed by a number of buildings lies to the rear of the station beyond the rail track (below).
In addition to the integration of new features such as a working railway loop, an automated level crossing and LED street lights, the display had also physically expanded to a significant degree since its debut appearance at the 2018 Great Western Brick show. Click on the image below for a brief video tour of the city; if you're having difficulty viewing the embedded video then click here to watch it on Flickr or here to watch it on YouTube.
To my knowledge there aren't any plans to display the modular city at any further events. Even if future displays materialise I'd probably be hesitant to include my station as I don't think it's ideal for the same MOCs to keep appearing at multiple events over an extended period. It's therefore time for my station to come home and once again grace my own MOC City Layout. That'll mean that a lot of the recent changes will need to be reversed in order for the station to fit into its allocated space, but hey - it's all part of the fun!
Stay at home if you can, and keep safe.
Labels:
10224,
City layout,
Great Western Brick Show,
lego,
MOC,
Railway Station,
STEAM,
Town Hall
Monday, 13 April 2020
Taxi!
Given everything that's going on in the world right now, I've felt in desperate need of some light relief to lift the spirits. One thing that works for me is to take solace in an old LEGO set and wallow in some much-needed nostalgia. My latest trip down memory lane was 368 Taxi Garage, released in 1976. I spotted my copy of the set perched atop of a bunch of other sets on a bookcase and I thought it would fit the bill nicely.
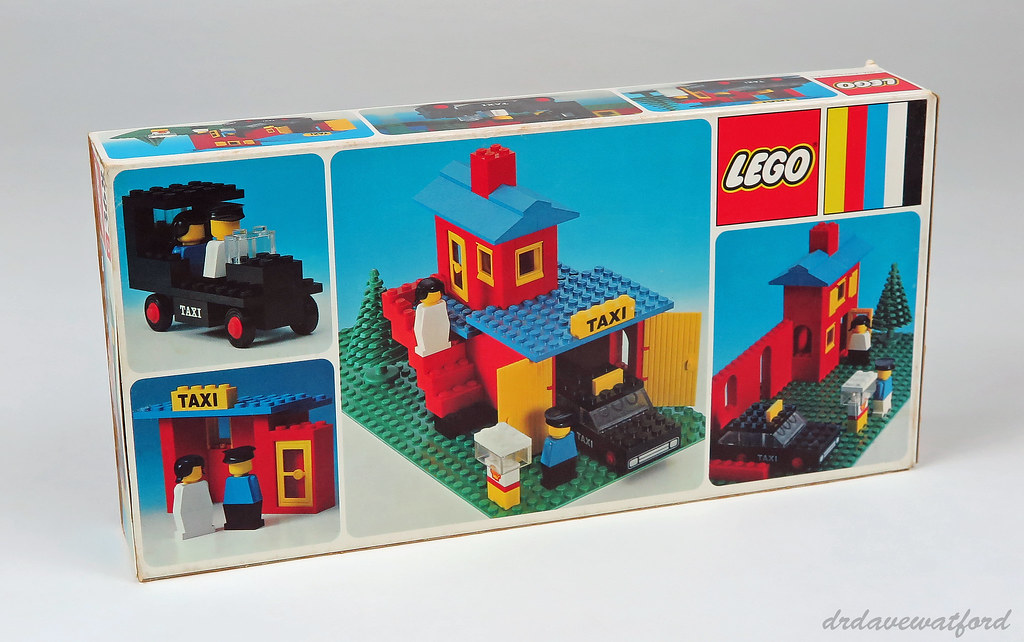
The front of the box is dominated by a simple image of the set contents assembled and ready to be played with, together with a 6+ age recommendation. The back of the box features a number of panels containing images of alternate builds including a small taxi stand, a vintage taxi and two quite respectable reimagined versions of the taxi garage. The alternate builds don't stop there, either - there's also a horse-drawn taxi carriage on one of the side panels of the box.
To open the box you just slide off the outer sleeve. This reveals a white inner tray containing the parts and an instruction sheet.
The building instructions are printed on a large double-sided sheet more than half a metre long and 27 cm wide. This folds down into a square measuring around 13.5 cm x 13.5 cm, and once folded the image above appears on the front 'cover', while the back 'cover' (below) showcases a selection of the alternate builds which adorn the box.
The set includes a pair of what LEGO have termed "stage extra" figures (below) which are I assume supposed to be a taxi driver and his female passenger. Figures like these were the precursors of modern minifigures and started to appear in sets in 1975. Unlike their modern counterparts they don't have moveable arms and legs, and there isn't any printing on their heads or torsos, although they did occasionally feature stickered torsos as you can see here. They were superseded by modern minifigures in 1978 so weren't produced for long, but they remain an interesting and important evolutionary step in the development of the minifigure. While the individual elements making up these particular figures could be found in numerous sets, this is the only set which included the taxi driver figure, while the female passenger only ever appeared in two sets in addition to this one.
According to Brickset 368 Taxi Garage contains 156 elements, although Bricklink reckons the part count is 144 plus an additional 8 elements for the figures. The garage itself is constructed on a green 16 x 32 baseplate with rounded corners which only ever appeared in two sets including this one. The set also includes a number of printed elements. The 1 x 4 yellow brick with black 'TAXI' print is unique to this set, as are a pair of black 2 x 3 bricks with white sans-serif 'TAXI' print; of note, a black 2 x 3 brick with white serif 'TAXI' print was produced in 1971 and can also only be found in one set, 605 Taxi. Other notable printed elements include a black 1 x 4 brick embossed with a chrome car grille print and a white 1 x 2 brick printed with the Shell logo.
I built the taxi first. In most respects it's identical to the vehicle in the 605 Taxi set but there are a couple of differences. Firstly, as mentioned above a different font is used for the 'TAXI' print on the side. More notably, however, the rear end has been redesigned; the older standalone taxi is just two studs long behind the rear wheels, but the newer taxi has been inexplicably lengthened by a stud and the rear looks dreadful. A yellow 1 x 2 tile is wedged between studs on the roof of the vehicle, indicating that the taxi is available for hire; this building technique wasn't uncommon back in the day but was later deemed "illegal" by LEGO as it places undue stress on the elements concerned.
By 1976 LEGO had stopped printing a dot pattern on baseplates (like you can see here, for instance) to guide placement of elements so the 16 x 32 baseplate supplied with this set is consequently unprinted. Construction of the taxi garage is predictably quick and straightforward, requiring only 12 steps on the instruction leaflet. As previously stated the yellow 1 x 4 brick with 'TAXI' print on the garage roof is exclusive to this set, while the pair of 1 x 4 x 6 yellow doors which enclose the garage appeared for the first time ever in this set before going on to appear in a further 9 sets between 1976 and 1990.
With the notable exception of the modular buildings, most buildings which appear in modern sets tend to be open at the back, ostensibly to facilitate play, but also to minimise the parts count and hence the cost. Here, while the rear of the building is undoubtedly simpler than the front, it is at least enclosed, and efforts have been made to embellish the appearance of side and rear walls via the use of red 1 x 4 brick arches which only started to appear in sets the year this set was released.
With the building finished all that was left to do was to construct the Shell-branded petrol pump and attach it to the baseplate along with a 4 x 4 x 6 2/3 large pine tree and the figures. Lovely! While I have no doubt that the warm fuzzy feeling I experienced while inspecting the completed build was largely driven by nostalgia, it's undoubtedly an attractive set and still looks almost brand new; I picked it up from eBay almost 10 years ago as part of a job lot of older sets and can't believe how pristine most of the elements are.
368 Taxi Garage contains 156 elements and was released in 1976. At time of writing, complete boxed examples can be had for less than £30 plus shipping on Bricklink, and if you're willing to forego the box then you'll potentially pay less than £20. Bargain!
Labels:
1976,
4-wide,
alternate builds,
Classic LEGO,
lego,
LEGOLAND,
stage extra figures,
Taxi,
vintage LEGO
Thursday, 12 September 2019
End of the Road?
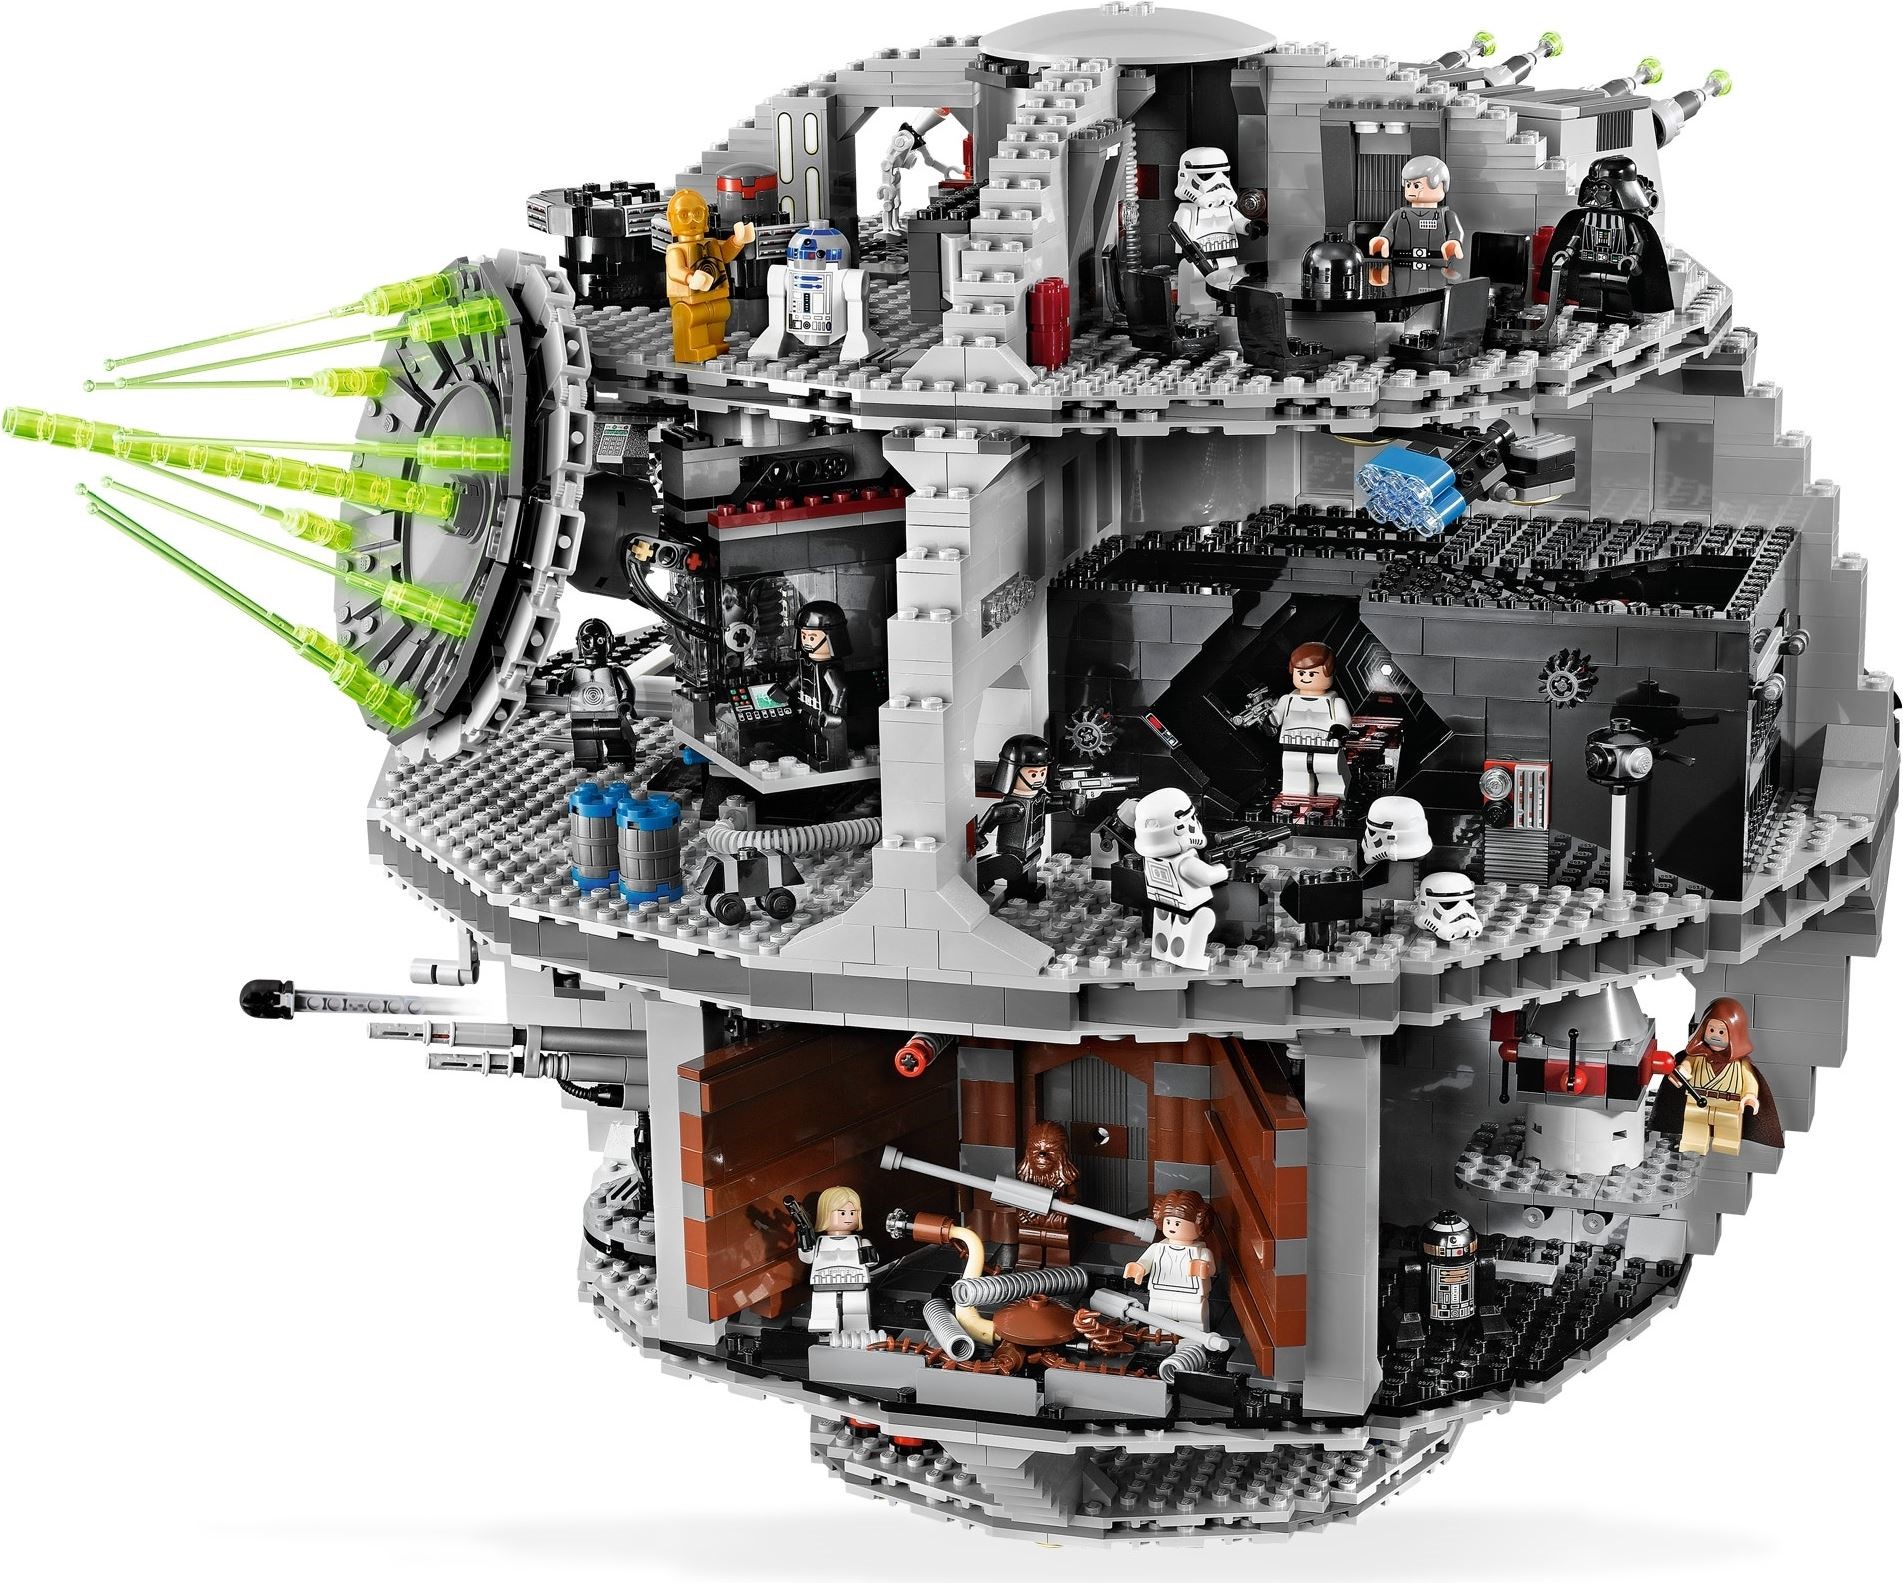
As I've previously mentioned on these pages, I have LEGO Star Wars to thank for rescuing me from my LEGO Dark Ages. Specifically, it was the arrival of 10188 Death Star in 2008 which started my slide down the slippery slope. My wife bought me the set as a Christmas present, and I bet she's regretted that decision ever since....
Following the arrival of 10188 and its construction over the Christmas holidays I was basically hooked. With my passion for both LEGO and Star Wars rekindled I became gripped by a mania of sorts and decided to try and get hold of complete, boxed examples of all of the LEGO Star Wars sets going back to the first appearance of the theme in 1999.
As it turned out, however, securing a copy of every retail set to date was only the start of the story. Because while I was picking up old retired Star Wars sets, LEGO was hard at work releasing an ever-increasing number of new sets every year, and after you've invested the time, effort and expense of tracking down the full back catalogue, you feel almost obliged to pick up all the new sets too in order to stay up to date. LEGO released 13 Star Wars sets back in 1999 when the theme first appeared, and 19 sets were released the year I started my collection, so staying up to date wasn't as financially prohibitive back then. The problem is that since then the number of releases has continued to increase to a point where there were 69 LEGO Star Wars releases in 2018. Not all of those were retail sets, granted, but if I'd known how the release schedule would explode over time I might have thought twice about starting to collect the theme back in 2008....
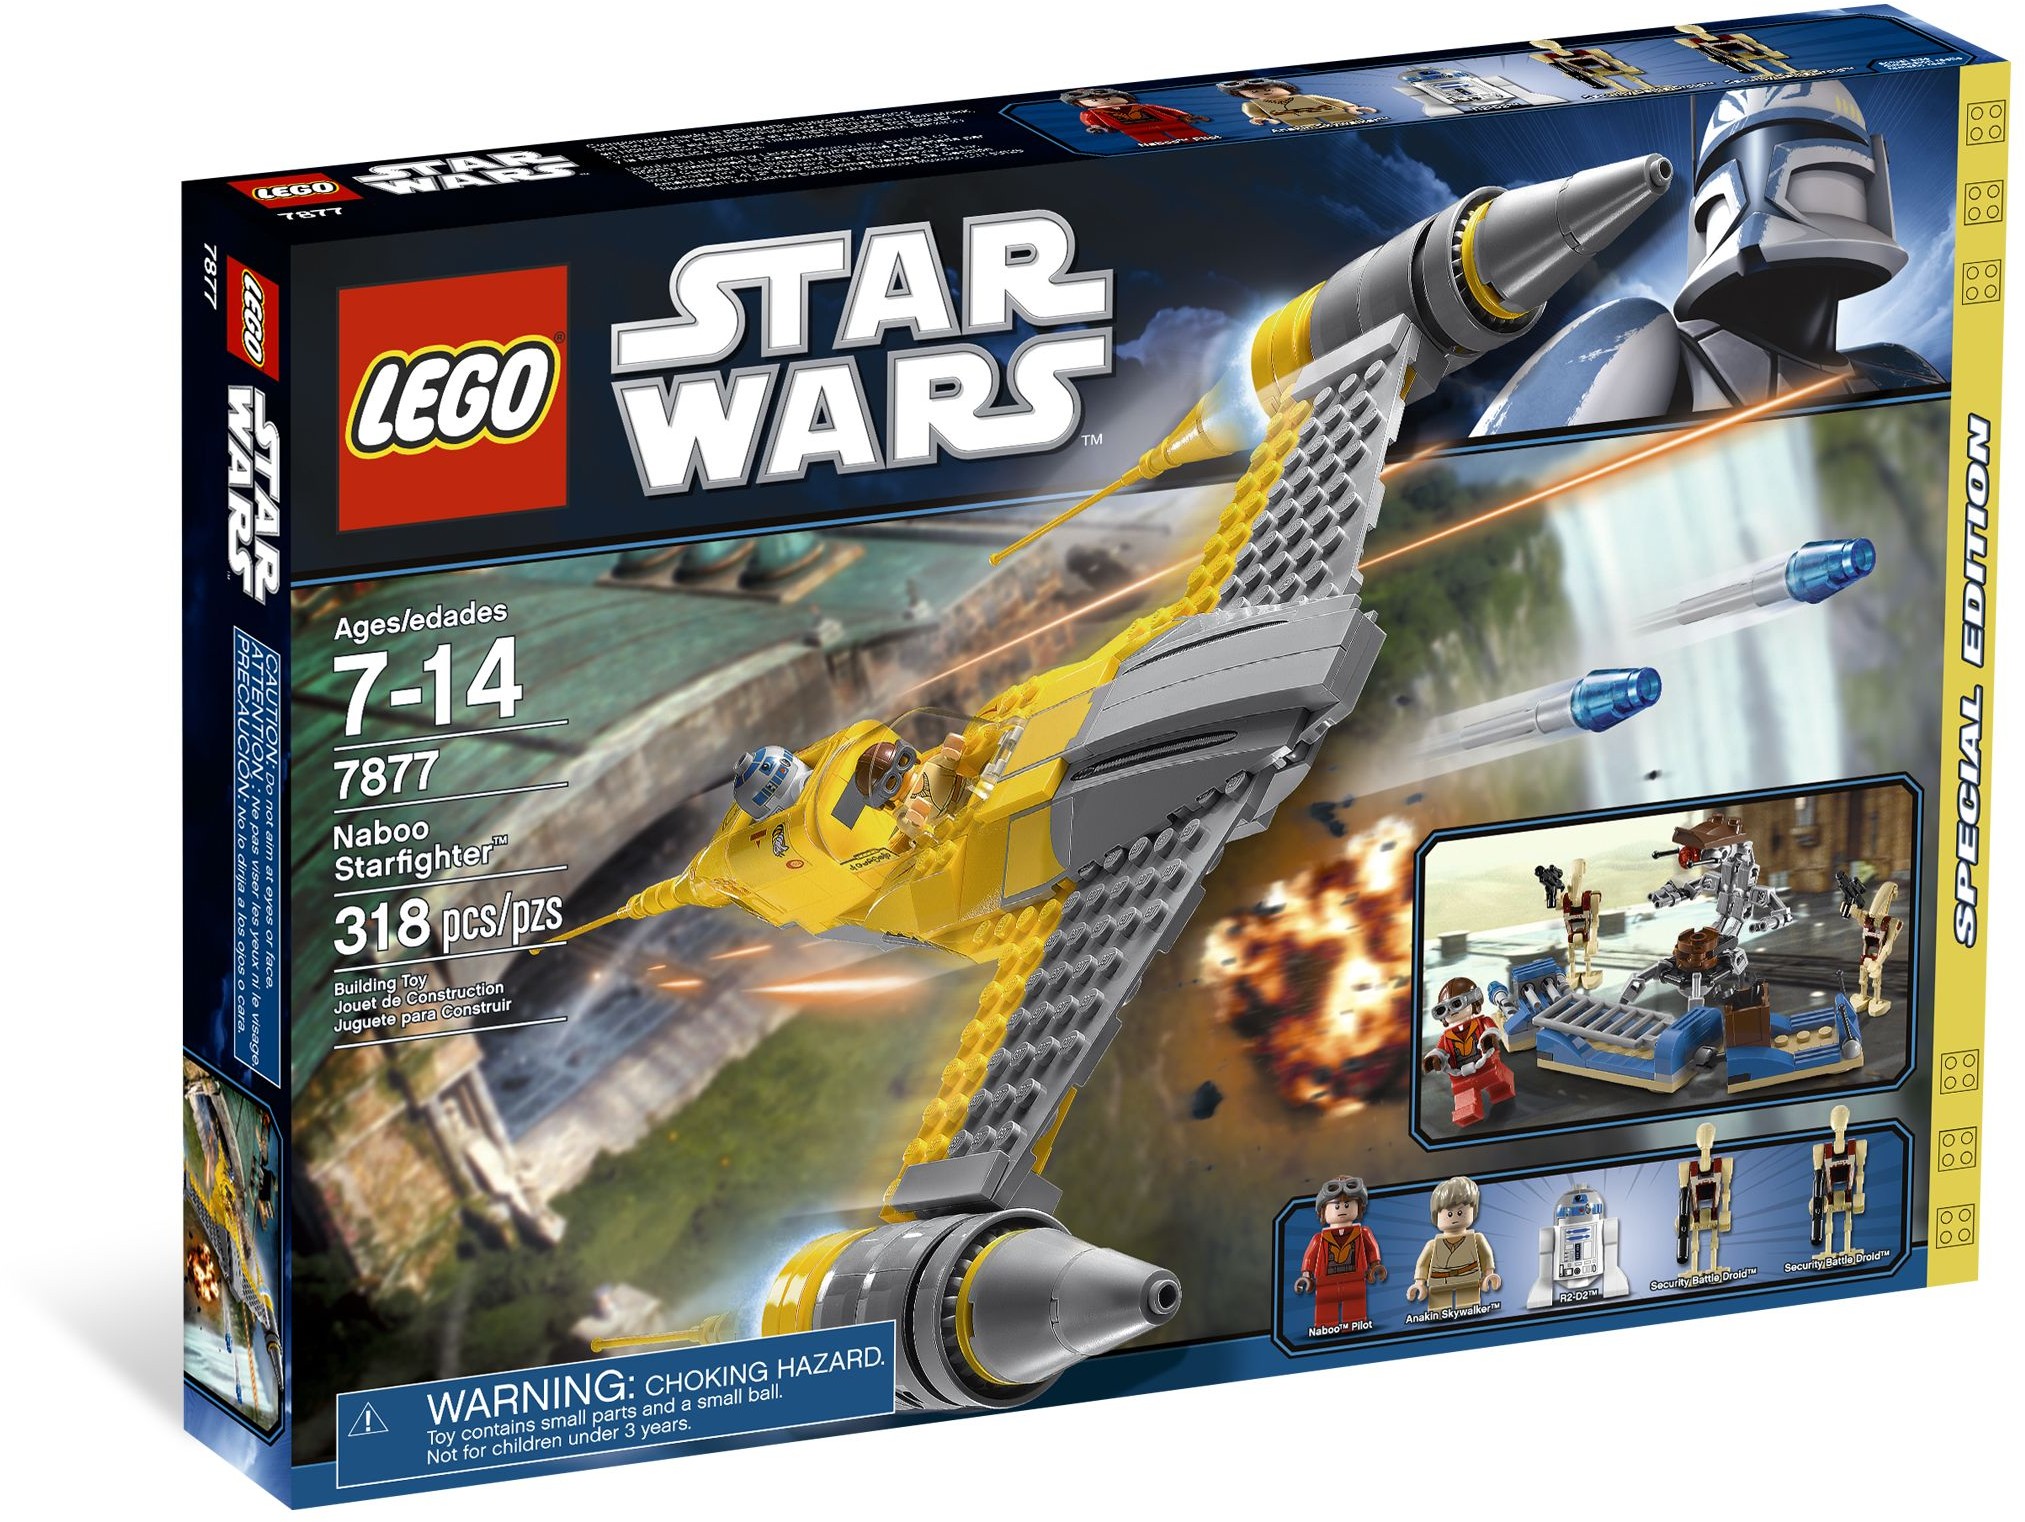
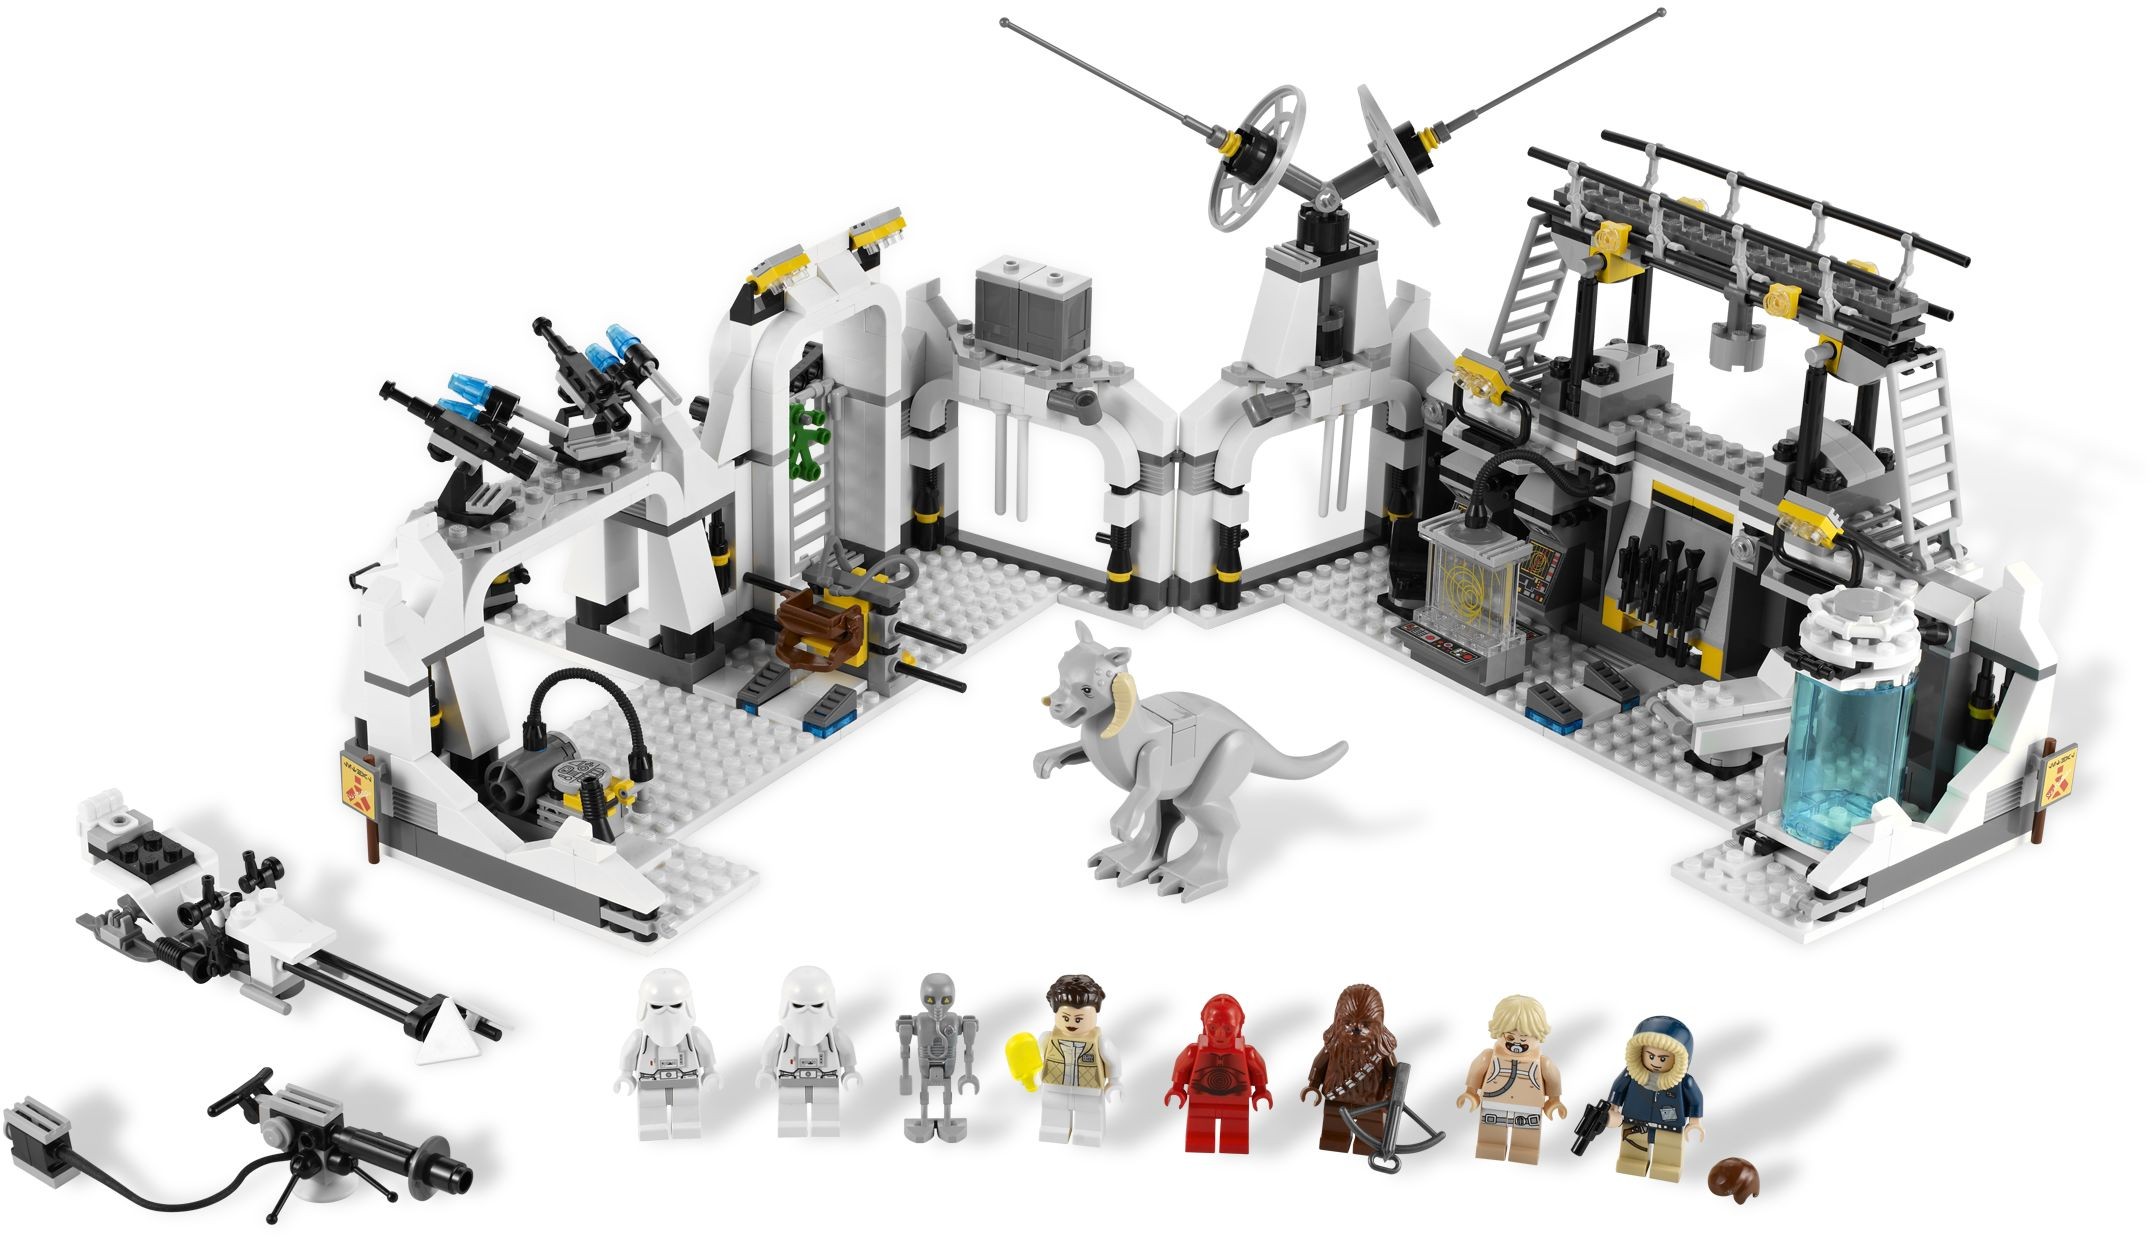
Looking back, even prior to the announcement of the LEGO Star Wars licence extension in February 2012 my enthusiasm was starting to wane, as I confessed in this posting in 2011. Central to my disaffection was the sheer number of remakes of previously-released sets. Many of these remakes, such as 7877 Naboo Starfighter above, were arguably not even a meaningful improvement on previous versions, unless of course you consider an increase in price to be an upgrade. A growing focus on minifigures in Star Wars sets was also becoming a frustration; my love of LEGO is principally founded on the building experience rather than which minifigures a set contains, and it was starting to feel like the build was being included as an afterthought in some sets (for example 7879 Hoth Echo Base below) with the minifigures being the main driver for the release.
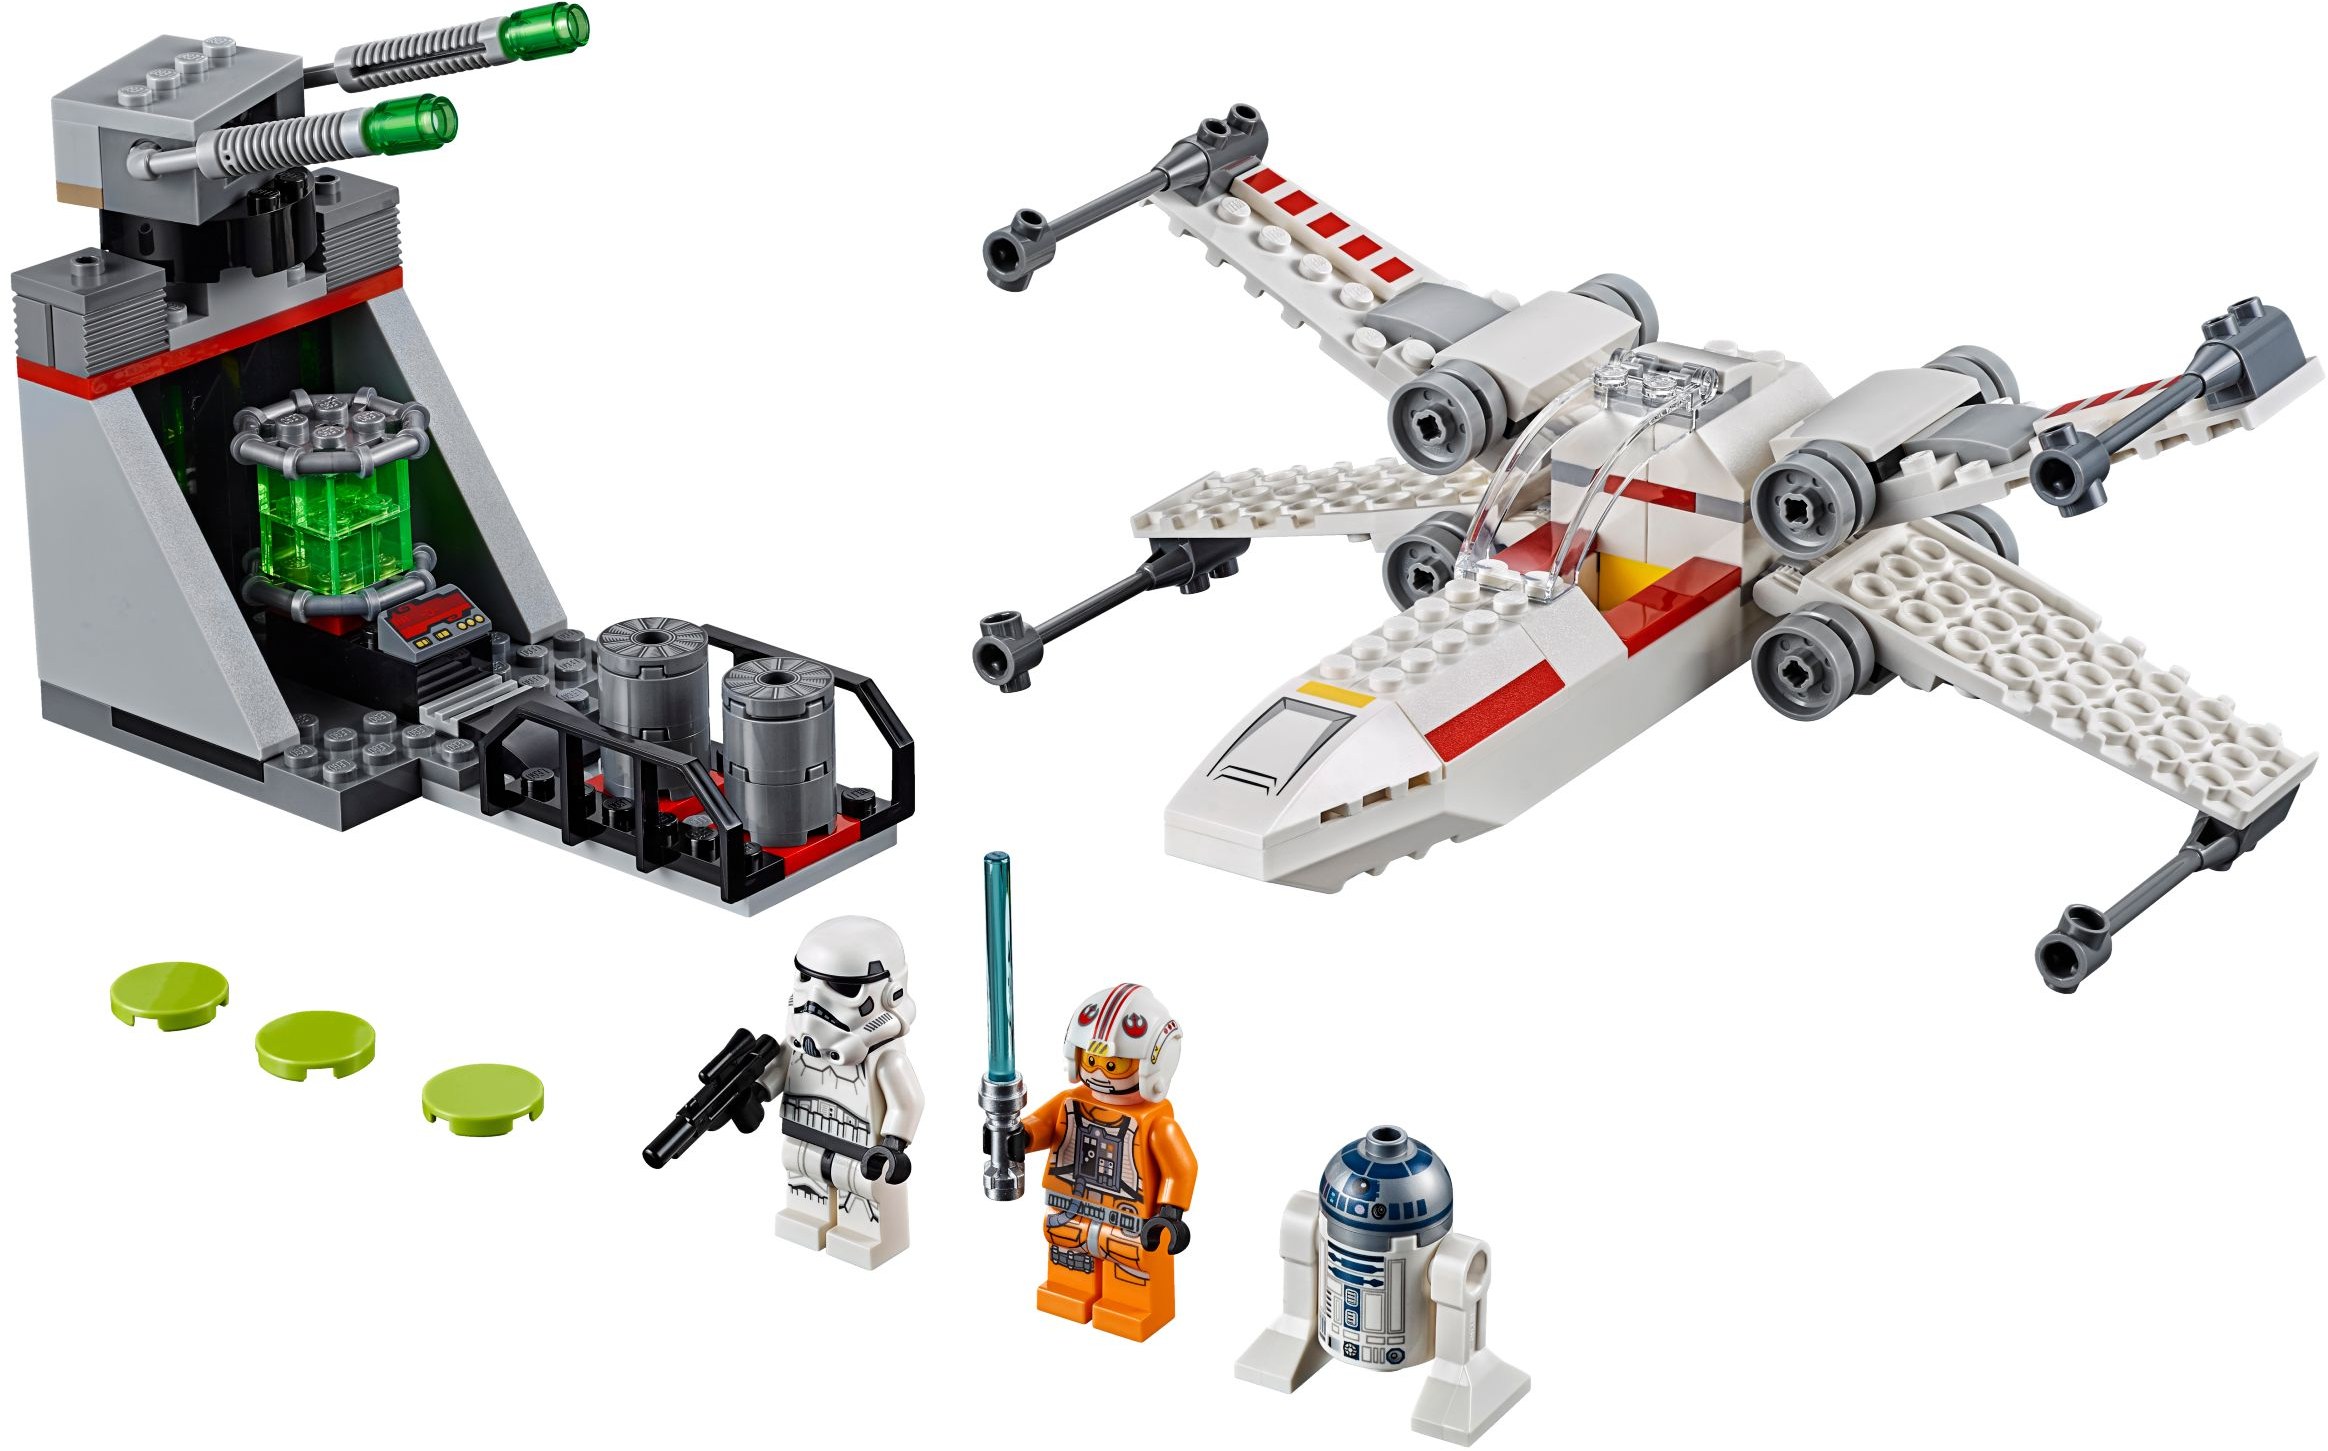
And yet despite my misgivings I've continued to dutifully pick up all of the LEGO Star Wars retail offerings year after year up to and including 2018, and I've also made a start on the 2019 sets. The thing is, however, it's felt like a particular slog this year, with relatively few sets really getting me excited. And so it is that with no end in sight to the annual tidal wave of Star Wars sets I've finally made the decision to stop collecting them. It stops right now, so no 75235 X-wing Starfighter Trench Run (below) for me....
Obviously this decision has been a long time coming. While there hasn't been anything in particular that has finally forced my hand, my previous complaints about the number of remakes and preponderance of minifigure-focused sets are as relevant as ever this year. To that you can add my lack of enthusiasm for the increased number of sets aimed at younger children, particularly the 4+ and Microfighters offerings, and the prevalence of sets such as 75235 above and 75237 TIE Fighter Attack below which feature crude, basic builds. All things considered, there seem to be fewer and fewer Star Wars sets of interest to me this year, so it's time to see sense and call a halt to this expensive and space-occupying obsession.
Before anybody points out the obvious, namely that I'm no longer the target audience for LEGO Star Wars, let me be clear that I'm not criticising LEGO for their continuation of the theme. While I have concerns about the way that the company does things sometimes, for instance lining the pockets of scalpers by releasing hard-to-find promo items as discussed here and here, Star Wars continues to be an extremely popular and successful product line for the company, so you can hardly blame them for continuing to pump out sets year after year. After all, youngsters are discovering the Star Wars universe for the first time every day, and the remakes of classic vehicles are serving their needs. Furthermore, LEGO can hardly be faulted for the disappointing and uninspired vehicle designs which populate the newer Star Wars movies and series'.
While my unhealthy need to collect all the Star Wars sets is now hopefully over, I do still anticipate picking up some of the Star Wars offerings. There's a good chance that I'll continue to acquire the UCS sets, for instance - the soon-to-be-released Imperial Star Destroyer above will surely be impossible to resist - and any sets featuring genuinely interesting new vehicles from the Star Wars universe (assuming we actually get some) will also be fair game. I might even be tempted by the occasional remake, providing that it genuinely offers something over and above previous iterations other than just a higher purchase price. What I won't be doing, however, is just buying Star Wars sets to keep my collection 100% up to date, and that thought fills me with relief. I really should have made this decision years ago.
Following the arrival of 10188 and its construction over the Christmas holidays I was basically hooked. With my passion for both LEGO and Star Wars rekindled I became gripped by a mania of sorts and decided to try and get hold of complete, boxed examples of all of the LEGO Star Wars sets going back to the first appearance of the theme in 1999.
Most of the sets were reasonably easy to find on eBay back then if you were patient, and the majority weren't particularly expensive either. A few, such as 10123 Cloud City with its exclusive Boba Fett minifigure (above) turned out to be harder to track down than most and/or painfully expensive, but they were thankfully in the minority. As chronicled in this old post I also had to make some tricky decisions about exactly what to collect, for instance whether to restrict my growing collection to retail sets alone or whether to also pursue rare promotional items such as the 2012 New York Comic Con model of Luke's Landspeeder below. I eventually opted to focus on collecting the retail sets. Promo sets would be welcomed with open arms when the opportunity arose, but they'd be considered "nice to have" additions rather than a part of the core collection.
As it turned out, however, securing a copy of every retail set to date was only the start of the story. Because while I was picking up old retired Star Wars sets, LEGO was hard at work releasing an ever-increasing number of new sets every year, and after you've invested the time, effort and expense of tracking down the full back catalogue, you feel almost obliged to pick up all the new sets too in order to stay up to date. LEGO released 13 Star Wars sets back in 1999 when the theme first appeared, and 19 sets were released the year I started my collection, so staying up to date wasn't as financially prohibitive back then. The problem is that since then the number of releases has continued to increase to a point where there were 69 LEGO Star Wars releases in 2018. Not all of those were retail sets, granted, but if I'd known how the release schedule would explode over time I might have thought twice about starting to collect the theme back in 2008....
Looking back, even prior to the announcement of the LEGO Star Wars licence extension in February 2012 my enthusiasm was starting to wane, as I confessed in this posting in 2011. Central to my disaffection was the sheer number of remakes of previously-released sets. Many of these remakes, such as 7877 Naboo Starfighter above, were arguably not even a meaningful improvement on previous versions, unless of course you consider an increase in price to be an upgrade. A growing focus on minifigures in Star Wars sets was also becoming a frustration; my love of LEGO is principally founded on the building experience rather than which minifigures a set contains, and it was starting to feel like the build was being included as an afterthought in some sets (for example 7879 Hoth Echo Base below) with the minifigures being the main driver for the release.
And yet despite my misgivings I've continued to dutifully pick up all of the LEGO Star Wars retail offerings year after year up to and including 2018, and I've also made a start on the 2019 sets. The thing is, however, it's felt like a particular slog this year, with relatively few sets really getting me excited. And so it is that with no end in sight to the annual tidal wave of Star Wars sets I've finally made the decision to stop collecting them. It stops right now, so no 75235 X-wing Starfighter Trench Run (below) for me....
Obviously this decision has been a long time coming. While there hasn't been anything in particular that has finally forced my hand, my previous complaints about the number of remakes and preponderance of minifigure-focused sets are as relevant as ever this year. To that you can add my lack of enthusiasm for the increased number of sets aimed at younger children, particularly the 4+ and Microfighters offerings, and the prevalence of sets such as 75235 above and 75237 TIE Fighter Attack below which feature crude, basic builds. All things considered, there seem to be fewer and fewer Star Wars sets of interest to me this year, so it's time to see sense and call a halt to this expensive and space-occupying obsession.
Before anybody points out the obvious, namely that I'm no longer the target audience for LEGO Star Wars, let me be clear that I'm not criticising LEGO for their continuation of the theme. While I have concerns about the way that the company does things sometimes, for instance lining the pockets of scalpers by releasing hard-to-find promo items as discussed here and here, Star Wars continues to be an extremely popular and successful product line for the company, so you can hardly blame them for continuing to pump out sets year after year. After all, youngsters are discovering the Star Wars universe for the first time every day, and the remakes of classic vehicles are serving their needs. Furthermore, LEGO can hardly be faulted for the disappointing and uninspired vehicle designs which populate the newer Star Wars movies and series'.
While my unhealthy need to collect all the Star Wars sets is now hopefully over, I do still anticipate picking up some of the Star Wars offerings. There's a good chance that I'll continue to acquire the UCS sets, for instance - the soon-to-be-released Imperial Star Destroyer above will surely be impossible to resist - and any sets featuring genuinely interesting new vehicles from the Star Wars universe (assuming we actually get some) will also be fair game. I might even be tempted by the occasional remake, providing that it genuinely offers something over and above previous iterations other than just a higher purchase price. What I won't be doing, however, is just buying Star Wars sets to keep my collection 100% up to date, and that thought fills me with relief. I really should have made this decision years ago.
Labels:
10188,
collecting,
Dark Ages,
Death Star,
lego,
LEGO Star Wars,
star wars
Wednesday, 31 July 2019
Letting Off STEAM
It feels like a lifetime since I last posted (here). On that occasion I was preparing to finish up my railway station MOC in preparation for its appearance as part of a display of modular buildings at the Great Western Brick Show a.k.a. STEAM in Swindon. I'm pleased to report that all the elements that I ordered from Bricklink to complete the build duly arrived as promised, and the MOC (below) was completed in good time for its public unveiling.
In addition to completing the sides and rear of the station, a couple of modifications were necessary in order to accommodate the transition from my LEGO city layout to the STEAM display. Firstly, I needed to mount the build on baseplates and tile around the edges. Then I needed to figure out what to do about the area under the two arches at the front of the building. In my city layout each of these arches encloses a stairway which descends to a subway platform on the lower level, but this wasn't an option for the STEAM display which is on a single level. In the end I blocked off each arch with a door, using reddish-brown tiles to mimic a wood effect as you can see in the picture below.
The rear of the building (below) follows the LDD design that I shared in my previous post. It's something of a temporary solution - while in place in my city layout the station has track running behind it, and the plan is ultimately to build a station platform at the rear of the building together with a canopy over the platform. Also, if I hadn't been in such a rush to complete the build for STEAM then I'd have embedded a few more skylights into the roof; unfortunately this'll have to wait until I have more time.
The left and right sides of the building take their design cues from the front, with almost identical designs employed for the various windows, sills and decorative lintels (below).
With the build complete it was time to pack up the station in preparation for the drive down to Swindon. I was planning to separate the building's four floors and pack them into a pair of large rectangular crates, but it turned out that the crates were too small to accommodate the ground floor so I ended up wrapping that section in an old bed sheet and carefully wedging it in the boot of my car. Thankfully all sections survived the journey and arrived at the venue relatively unscathed on the Saturday morning. Many of the exhibitors had already arrived and set up the day before, so I had the simple task of locating the station-sized plot in the almost-complete modular display and re-assembling my build in the allotted space.
You can see the station in position above (thanks to Jamie Douglas for the picture). As well as mobilising Brickish members such as myself to contribute a variety of modular buildings, display organiser Simon Kennedy did an impressive job of recruiting members to construct sections of brick-built road and pavement, vehicles, trees and various roadside structures which really brought the display to life. The lime green Porsche 911 that you can see in front of the station in the picture above was taken from set 75888 Porsche 911 RSR and 911 Turbo 3.0 and is the very car that I built for my Brickset review of the set. More pictures of the completed modular display, together with images of other LEGO creations that were shown at STEAM, can be found here on Jamie's Flickr stream.

Embarrassingly, it's taken me so long to write and publish this post that the 2018 event has long passed and the 2019 Great Western Brick Show is now fast approaching.... I'm pleased to report that thanks to the positive reaction to the 2018 modular display there will be an improved and expanded modular display on show at the 2019 event. This will feature a number of new modulars together with modified versions of some of the existing buildings, and there are also plans to add a canal, a railway and working street lighting. As a result of the inclusion of a railway I've been asked to modify my station to include a platform at the rear. As it passes behind the station the track will be elevated, so my next challenge is to figure out how best to attach a platform halfway up the rear of the building and somehow integrate it into the overall structure. STEAM 2019 will take place on the 5th and 6th of October so I'd better get on with it....
In addition to completing the sides and rear of the station, a couple of modifications were necessary in order to accommodate the transition from my LEGO city layout to the STEAM display. Firstly, I needed to mount the build on baseplates and tile around the edges. Then I needed to figure out what to do about the area under the two arches at the front of the building. In my city layout each of these arches encloses a stairway which descends to a subway platform on the lower level, but this wasn't an option for the STEAM display which is on a single level. In the end I blocked off each arch with a door, using reddish-brown tiles to mimic a wood effect as you can see in the picture below.
The rear of the building (below) follows the LDD design that I shared in my previous post. It's something of a temporary solution - while in place in my city layout the station has track running behind it, and the plan is ultimately to build a station platform at the rear of the building together with a canopy over the platform. Also, if I hadn't been in such a rush to complete the build for STEAM then I'd have embedded a few more skylights into the roof; unfortunately this'll have to wait until I have more time.
The left and right sides of the building take their design cues from the front, with almost identical designs employed for the various windows, sills and decorative lintels (below).
With the build complete it was time to pack up the station in preparation for the drive down to Swindon. I was planning to separate the building's four floors and pack them into a pair of large rectangular crates, but it turned out that the crates were too small to accommodate the ground floor so I ended up wrapping that section in an old bed sheet and carefully wedging it in the boot of my car. Thankfully all sections survived the journey and arrived at the venue relatively unscathed on the Saturday morning. Many of the exhibitors had already arrived and set up the day before, so I had the simple task of locating the station-sized plot in the almost-complete modular display and re-assembling my build in the allotted space.
You can see the station in position above (thanks to Jamie Douglas for the picture). As well as mobilising Brickish members such as myself to contribute a variety of modular buildings, display organiser Simon Kennedy did an impressive job of recruiting members to construct sections of brick-built road and pavement, vehicles, trees and various roadside structures which really brought the display to life. The lime green Porsche 911 that you can see in front of the station in the picture above was taken from set 75888 Porsche 911 RSR and 911 Turbo 3.0 and is the very car that I built for my Brickset review of the set. More pictures of the completed modular display, together with images of other LEGO creations that were shown at STEAM, can be found here on Jamie's Flickr stream.

Embarrassingly, it's taken me so long to write and publish this post that the 2018 event has long passed and the 2019 Great Western Brick Show is now fast approaching.... I'm pleased to report that thanks to the positive reaction to the 2018 modular display there will be an improved and expanded modular display on show at the 2019 event. This will feature a number of new modulars together with modified versions of some of the existing buildings, and there are also plans to add a canal, a railway and working street lighting. As a result of the inclusion of a railway I've been asked to modify my station to include a platform at the rear. As it passes behind the station the track will be elevated, so my next challenge is to figure out how best to attach a platform halfway up the rear of the building and somehow integrate it into the overall structure. STEAM 2019 will take place on the 5th and 6th of October so I'd better get on with it....
Labels:
10224,
Great Western Brick Show,
lego,
LEGO city layout,
MOC,
Modular Building,
STEAM,
Town Hall
Tuesday, 25 September 2018
Modular Row
Remarkably, in November of this year it'll be fully eight years since I booted up LDD and started to design my own LEGO City. To say that progress has been slow would be an understatement of epic proportions - you could probably have built a real city in the time that it's taken me to build mine so far.... My last update, which described the partial construction and installation of a 10224 Town Hall-inspired railway station MOC (below), was posted a year and a half ago, and since then the project has ground to a halt for the umpteenth time as my LEGO room has once again had to serve as a storage room during a protracted period of real-life building work.
Even though my LEGO room has yet to return to normality, an opportunity to work on the project, albeit in a roundabout way, has nevertheless presented itself. As previously described on these pages (for instance here and here), there's an annual event hosted by the Museum of the Great Western Railway in Swindon which showcases LEGO creations built by members of UK LEGO User Group The Brickish Association. As a Brickish member I'm eligible to exhibit my builds at the show, affectionately known as STEAM. This year one of the displays will be a collaborative display of more than thirty modular buildings designed and built by Brickish members. Anyway, I figured that if I signed up my railway station for the collaborative build then I'd have extra incentive to get off my backside and finish it off. It seemed like an excellent idea at the time, so I went ahead and signed up as a participant, figuring that it shouldn't take too much work to make my build display-ready. In hindsight, however, perhaps I should have taken a closer look at the back of my work-in-progress MOC (below) before being quite so dismissive about the amount of work involved....
With no clear idea of how to complete the build I powered up LDD, dug out the LDD file for the build thus far, and had a play with it. Ultimately I'm planning to replace the back of the building with a full length station platform complete with a canopy which will overhang the platform and railway track. With STEAM fast approaching, however, and with elements to source and little time to play with I decided to keep things simple for the upcoming display and follow the design used for the back of 10224 Town Hall, extending it for the full width of the expanded building. The side walls, meanwhile, would take inspiration from the front of the station which I'd already completed. Having settled on a plan of action I went ahead and completed two-thirds of the building in LDD, both to reassure myself that I'd be happy with the overall look, and also to help me estimate what additional elements I'd need; you can see an LDD screen grab of part of the back of the building below.
With the design now sketched out in LDD I was ready to crack on with the actual build. In order to integrate the railway station into my City layout I'd had to mount it on an idiosyncratic arrangement of small baseplates, so my first job was to strip these away and replace them with standard 32 x 32 baseplates. When it came to the rest of the building I thankfully already had most of the basic bricks and plates required to construct the outer shell, but I was predictably lacking when it came to the huge number of windows that I'd need, not to mention the larger white plates for the individual floors and various other bits and pieces. I therefore built as much as I could before diving into Bricklink to order the elements that I didn't have. All told I ended up having to order almost 450 elements to complete the build, but at least I was able to find a single EU-based seller who had everything I needed (thanks, Kepes!)
My Bricklink order duly arrived a few days ago which leaves me with the best part of 2 weeks to finish my railway station. I'll post pictures of the build on Gimme LEGO after the event, so stay tuned. Or better still why not come to STEAM a.k.a. the Great Western Brick Show and see it for yourself?!
Labels:
10224,
Great Western Brick Show,
lego,
LEGO city layout,
MOC,
STEAM,
Town Hall
Tuesday, 5 June 2018
Hen's Teeth
Lapsed LEGO fans can emerge from their Dark Ages and re-enter the hobby via any number of different routes, but one of the most common motivations seems to be a desire to rediscover the beloved sets of their youth. That was certainly a major factor for me; while the initial trigger was the arrival of 10188 Death Star as a Christmas present, the next stage was a protracted trawl through my childhood LEGO collection and the painstaking restoration of my childhood sets. The desire to replace missing parts lead to the discovery of Bricklink, while building instructions were secured from the likes of Brickset and Peeron; the realisation that boxed examples of my childhood favourites could be secured, at a price, from the likes of eBay and Bricklink lead to ever more expensive competition with fellow AFOLs, and thus was my descent into obsessive LEGO fandom confirmed....
I think the first set that I scraped together from my childhood collection and then subsequently purchased a boxed example of was probably 928 Galaxy Explorer (above). Over time I gradually tracked down boxed examples of other childhood Classic Space favourites via eBay and Bricklink, after which I started to home in on sets that I'd never owned as a child in order to try and expand my collection. A number of Classic Space sets have remained stubbornly elusive over the years, however, with reasonably priced boxed examples being hard to come by, but I did recently manage to track down one of them, 924 Space Cruiser, so I thought I'd share it with you here.
According to Brickset the name of the set is Space Transporter, while Bricklink calls it Space Cruiser. I'd normally side with Brickset, out of loyalty to my favourite LEGO site if nothing else, but in this case I consulted the excellent LEGO Collector's Guide, Second Edition which calls it Space Cruiser so I went with that. The front of the box (above) consists of a flap which lifts up to reveal the set contents. The flap is printed with a slightly over-exposed image of the LL 924 Space Cruiser spacecraft in flight over the surface of a barren planetoid. A blurry forklift, the set's small ancilliary build, is pictured in the background along with one of the set's two minifigures. Unfortunately, my copy of the set features the unwelcome 'bonus' of an unsightly mark caused by ancient adhesive tape running across the front of the box; normally such an addition would discourage me from parting with my cash, but when boxed examples of a set are in such short supply you sometimes just have to bite the bullet. The back of the box (below) showcases a number of alternative builds which can be assembled from the set contents.
The A4-sized instruction booklet arrived folded in half in order to fit into the box but has been unfolded here so I could photograph it. The front cover (below) features an upper panel which reproduces the artwork from the front of the box, while the lower panel contains assembly instructions for the set's two minifigures together with a small cargo container.
The back of the instruction booklet (below) showcases a number of Classic Space sets from 1978 and 1979, a sight sure to bring joy to the hearts of nostalgic AFOLs worldwide!
The box also contains a folded promotional leaflet which advertises offerings from a myriad of different LEGO themes from Duplo to Castle, Technic and beyond. You can see the panels promoting a selection of Classic Space sets below, and I've also scanned a few of the other panels which you can see on the Gimme LEGO Flickr stream here.
As mentioned above the set contains two minifigures. I've waxed lyrical about these guys in previous reviews, for instance here and here, but I make no apology for reiterating how much affection I still have for them almost 40 years after my first encounter. The iconic Classic Space torso print, which has launched a thousand t-shirts, has predictably faded somewhat on the red figure but looks surprisingly fresh and sharp on the white figure even if the torso has yellowed a little over the years.
Most notable from the rear are the air tanks, the design of which is the same now as it was back in 1979. There's no backprinting on the torsos or the classic smiley heads.
With the minifigures assembled it's time to start on the build proper. First to be constructed is a small cargo container. This consists of white left and right 1 x 3 x 1 doors and little else, although at least the doors can be opened to provide access to the cargo, a trans-green 1 x 1 round brick. A simple forklift is provided to move the cargo around; while only consisting of seven elements, the vehicle features an impressive light grey spring-loaded fork assembly at the front which only ever appeared in this set, its U.S. doppelganger (487) and a rare Service Pack which I wasn't even aware existed until I wrote this article.
The ship itself is built on a light grey 16 x 6 plate, upon which various other light grey plates are progressively stacked in order to form the distinctive Classic Space silhouette. As in the likes of 918 and 928 light grey left and right 8 x 4 wedge plates play a key role in defining the outline of the ship, while even early on in the build further nods to other Classic Space offerings are provided by way of the yellow and black detailing on the wings and the trans-green and trans-red 1 x 1 plates. The ship is supported underneath by four 2 x 2 x 2 stands, and a couple of 2 x 2 round bricks are also attached to the underside, presumably representing vertical thrusters.
I'm not sure there's such a thing as a 'beloved LEGO element' but if there was then the blue 33 degree 3 x 6 slope printed with the Classic Space Logo at the front of the ship would surely qualify. Both sides of the fuselage incorporate a blue 1 x 4 brick printed with the ship's 'LL 924' identifier; these printed elements are predictably unique to this set and its U.S. equivalent. The cockpit contains a couple of light grey 45 degree printed 2 x 2 slopes (this one and this one) which make up an instrument panel, and there's more than enough room for both minifigures despite the presence of a steering wheel. The cockpit is enclosed by a number of delicious trans-yellow elements including a pair of uncommon 33 degree 3 x 6 slopes which form the windscreen, 1 x 2 and 1 x 4 bricks, and a rare 4 x 10 plate. The fuselage walls also incorporate a pair of blue 1 x 2 bricks printed with the Classic Space logo.
From behind the view is dominated by a pair of light grey 4 x 4 x 2 cones which serve as the main engines. These have only ever appeared in a total of seven sets in this colour. They're mounted on the back of the brick-built cargo bay doors which swing open on swivel hinge bricks to reveal a compact cargo bay. The cargo bay doors incorporate a pair of blue 1 x 2 bricks printed with a down arrow. The blue 1 x 2 tile on top of the tail prevents the cargo doors from swinging open unintentionally.
The completed LL 924 build together with the forklift, cargo and minifigures can be seen in the picture below. The cockpit roof is attached via a pair of hinges which enable it to be tilted, thus providing cockpit access. The cargo bay can just about accommodate the cargo, but is nowhere near big enough for the forklift to fit into.
Having now built LL 924 and had the opportunity to compare it with its baby brother (918) and big brother (928) I reckon that in terms of its overall proportions it arguably looks the best of the bunch. For all its obvious splendour and deserved iconic status, LL 928 is maybe just a fraction too big and bulky to be considered sleek, while LL 918 is a bit of an ugly duckling. I think LL 924 hits the sweet spot in terms of size, however, and aside from the awkward transition from the light grey wedge plates to the modified 1 x 2 plate with handles at the front of the ship, and the row of exposed, open studs on top of the 4 x 2 x 2 tails on either side, I reckon it looks damn-near perfect.
Given the obvious merits of LL 924, it's interesting that boxed examples of the set seem to be so much harder to come by compared with 918 or 928, the implication being that the set didn't sell well. Maybe that's because it lacks the grandeur and playability of 928, with its landing pad, crater baseplate, moon base and moon buggy which fits inside the cargo hold, while simultaneously lacking the affordability of 918. Regardless of the reason, it's still well worth picking up if you can find it at a reasonable price.
Set 924 Space Cruiser was released in 1979 and contains 170 pieces. I purchased my copy from eBay for around £90, having waited a long time for an affordable boxed example to be listed there. If however you're not willing to wait, various sellers have the set listed for sale on Bricklink, with prices for a boxed example starting at £125 plus shipping. At time of writing there are only three complete boxed copies available, however, so be quick!
Labels:
924,
Classic Space,
lego
Subscribe to:
Comments (Atom)


