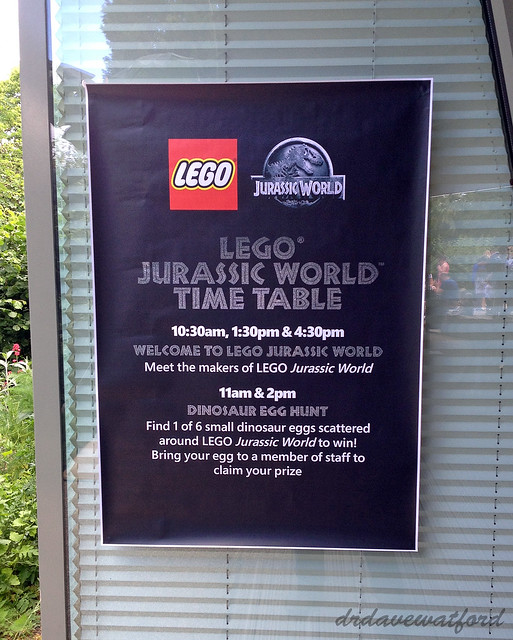
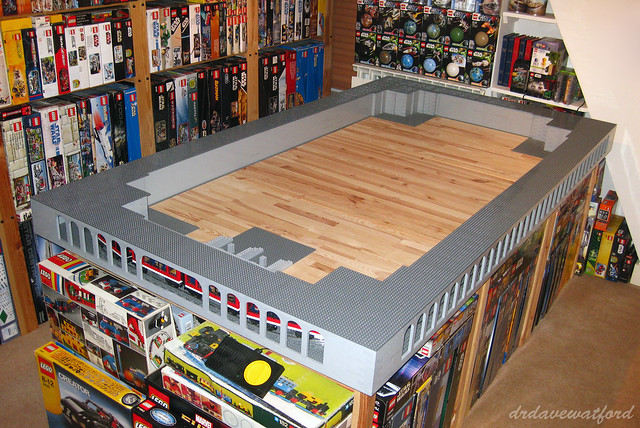
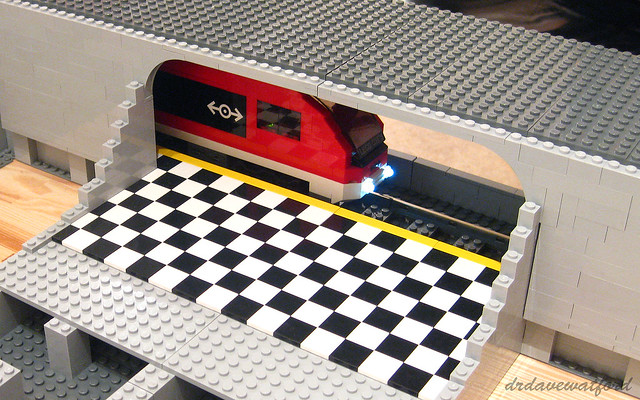
The event took place at The Lookout (above), a sizeable, self-contained eco-sustainable building in the middle of London's Hyde Park. On what turned out to be a pleasant, sunny day we took a tube to one of the nearby stations and after a 5-10 minute walk through the park we were greeted by event security who ushered us through. The Lookout is located within a fenced compound and surrounded by a number of walkways; these pass alongside small rockeries and water features and in some areas cut through thick undergrowth. Traversing the walkways was therefore the perfect start to the event as it wasn't difficult for anyone familiar with the Jurassic Park movies to suspend belief and pretend that prehistoric predators might be lurking in the undergrowth.... At the top of the walkways was an area of wooden decking, alongside which was the imposing sight below.

Refreshments and snacks were available on the decked area, as were a couple of skilled face painters who busied themselves decorating attendees with a variety of dinosaur-related designs. It was heartening to see so many adults getting in line with their kids and partaking in the face painting experience, although some folks such as myself opted to get other body parts painted instead (my arm, in case you're wondering....) with designs such as the diplodocus below and patches of colourful dinosaur skin.

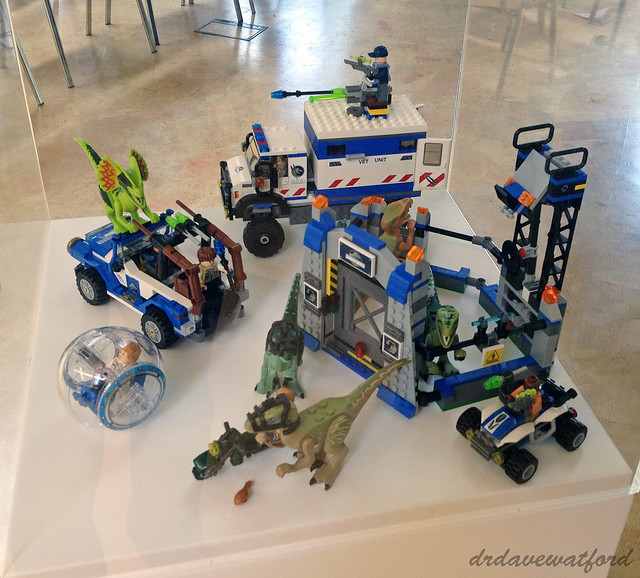
The main space inside the venue was loosely split into two halves. One half contained a number of gaming stations running the LEGO Jurassic World demo, of which more later, while the other half was laid out with rows of seating and a large screen at the front connected to a laptop; this was used by one of the team responsible for the design of the LEGO Jurassic World game who at set times throughout the day gave attendees a brief presentation on the making of the game and demonstrated various gameplay features. A number of perspex display stands such as the one below were dotted aound the room; these contained the completed builds from the various Jurassic World retail sets. Having already built and reviewed a number of the Jurassic World sets, for instance here, I was obviously familiar with them but this didn't appear to be the case for some of the attendees who seemed to be encountering them for the first time.
One of the highlights of the event from my son's perspective was a dinosaur egg hunt. Prior to the arrival of the attendees a number of LEGO dinosaur eggs (below) had been hidden around the venue. Children, aided and abetted by their parents, were tasked with exploring the compound and finding the eggs, with prizes of Jurassic World LEGO retail sets and polybags on offer for the successful sleuths. Cue a mad scramble through the undergrowth to try and locate the eggs. I'm pleased to report that my son found one of the eggs, no thanks to his hopeless dad who managed to find absolutely nothing.....

As previously mentioned, a number of stations kitted out with a screen, a Playstation 4 and a pair of PS4 controllers were available for attendees to play on. The stations were running the LEGO Jurassic World game demo. LEGO Jurassic World is the latest in a long line of LEGO-themed offerings from developer Traveller's Tales including a number of LEGO Star Wars, LEGO Indiana Jones and LEGO Batman games amongst others. Having completed some of these games cooperatively, my son and I are pretty familiar with them, and after spending some time playing through the LEGO Jurassic World demo stages at the event both cooperatively and individually, I think it's fair to say that that the latest game sticks to the tried and tested formula with few obvious detours. It predictably looks great running on the PS4, and the gameplay seems very similar to that of previous TT LEGO releases. The demo levels we saw thankfully included scenes from the original Jurassic Park movies as well as Jurassic World rather than just focusing on the new movie.

Apart from the designer presentations and egg hunt the day was relatively unstructured, with attendees free to wander around both inside and outside the venue, help themselves to refreshments, make use of the gaming stations and chat to other attendees; I didn't recognise many of the people there. although it was good to catch up with Richard Hayes from Brick Fanatics and chat to Christina from the LEGO Press Office while my son burned his way through the LEGO Jurassic World demo levels.
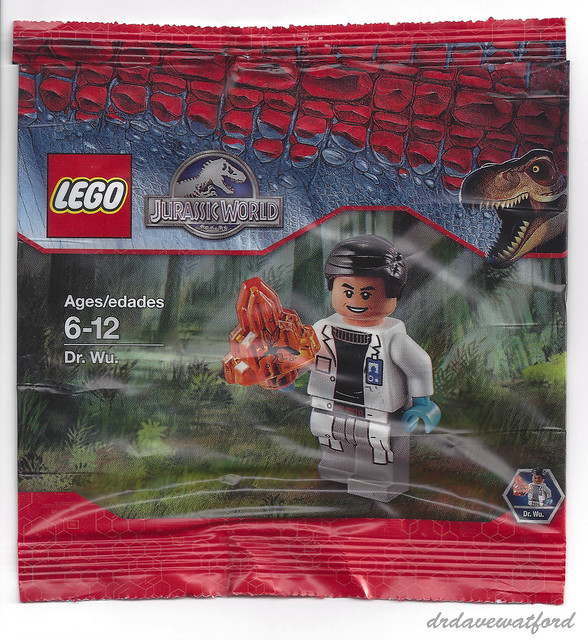
All told my son and I spent an enjoyable 2-3 hours at the event, and when it was time to leave we were handed a goodie bag. As a collector I always look forward to digging through the contents of these bags after events to see if there's anything unusual within and I wasn't disappointed. Pride of place goes to the Dr Wu polybag below which carries the set number 5000193818. In addition to the Dr Wu minifigure the poly also contains a trans-orange 1 x 2 crystal printed with a black mosquito pattern. As far as I can tell the Dr Wu minifigure is identical to that which appears in Set 75919 Indominus Rex Breakout (you can see the minifigure here), as is the trans-orange crystal, but I'd not previously been aware of this particular polybag. My understanding is that a free Dr Wu minifigure is available from some retailers with orders of the LEGO Jurassic World game, although I have no idea if it's packaged in the same way as the one below.
Other freebies included a LEGO Jurassic World sticker sheet (you can see a scan of this below), a couple of LEGO Jurassic World postcards, an A3-Sized poster, a press release providing information on the LEGO Jurassic World sets, and a copy of Set 75915 Pteranodon Capture, all contained within a Warner Brothers Home Entertainment Group cloth bag.
I'm well aware that I'm not the only collector who likes to get their hands on interesting LEGO-related items, and I'm therefore pleased to tell you that Christina gave me a few extra Dr Wu polybags for readers of Gimme LEGO. If you'd like one of them, please e-mail the answer to the question below plus your name and full address to me at gimmelego@virginmedia.com; I'll draw a few names out of a hat, and those people will get a poly each. The question is as follows:
On which island was the original Jurassic Park located?
You can enter the competition regardless of which country you live in and I'll cover the cost of posting out the prizes. Only one entry per household, please, and the decision of the judge (that's me) is final. Entrants must agree to their names being announced on Gimme LEGO if they win. Closing date is midnight GMT on Tuesday 30th June 2015. Good luck, folks!