Tuesday 29 March 2011

Lazy

I love the LEGO Star Wars Ultimate Collector Series (UCS) sets, but there just aren't enough of them for my liking. LEGO have been pumping them out at a rate of just 1-2 per year since they secured the Star Wars licence in 1999. Arguments rage among LEGO Star Wars collectors about the exact definition of a UCS set, but according to Brickset there have been a total of 17 of them to date. They are the daddy of LEGO Star Wars as far as I'm concerned, and every new UCS set is a cause for minor celebration. Well, for me at least.

Problem is, what's the LEGO Star Wars enthusiast to do to get his UCS fix when he's already got all the UCS sets ? Well, some talented builders indulge in a spot of D.I.Y., designing and building their own UCS models. There are some absolutely stunning efforts out there from the likes of Cavegod, Anio and others (click pics below to enlarge).

Cavegod's stunning UCS AT-AT
I stumbled across some of Anio's creations while browsing Eurobricks a while back. What was especially cool was that he had not only designed some excellent models but he also collaborated with fellow enthusiast Oxycrest who produced a set of building instructions, an inventory of parts, and even a UCS sticker design, for some of the models.

As someone who was crying out for more UCS models to build, this seemed like an interesting challenge. I therefore downloaded the building instructions and part inventories for a couple of models and eventually managed to source all the parts I needed to build two of Anio's superb unofficial UCS models - Anakin's Podracer and the TIE Fighter.

First Anakin's Podracer. This MOC consists of 532 parts, some of which it must be said were a total pain to source and cost a fortune (actually mostly fairly common parts but in unusual colours, and hence the cost).

Anio's UCS Podracer
Podracer Engine
Anakin at the Controls


UCS-inspired 'sticker' designed by Oxycrest


I have to say I love this model - horribly fragile, but beautiful. It's about a million times better than 'official' Set 7131 Anakin's Podracer released in 1999, and I suspect that the new 'official' Podracer set due this Summer will also struggle to get close.

And so to the TIE Fighter. This model consists of more than 600 parts, which were generally cheaper to source compared with the Podracer, with only the cockpit window making a significant dent in my bank account.

Anio's UCS TIE Fighter
The cockpit window hinges forward to reveal a detailed cockpit including a flight yoke, seat and instrument panels. The hatch on top of the craft also opens.


The model is nicely finished off by another of Oxycrest's UCS-inspired 'stickers' which attaches to some 1x8 black tiles and sits neatly on the display stand.


I wrote an article on Eurobricks describing the process of sourcing the parts for the TIE Fighter and building it, so if you want to read more then click here.

So there you have it - if you're too lazy, time-challenged or just lacking in skill to design your own UCS Star Wars models, there is still a way to expand your collection.... Of course, sourcing the parts is itself a pretty time-consuming business requiring more than a modicum of organisation and planning to carry it off. What then, if you're even too lazy or just plain hopeless to manage that ? Well, there is another solution....

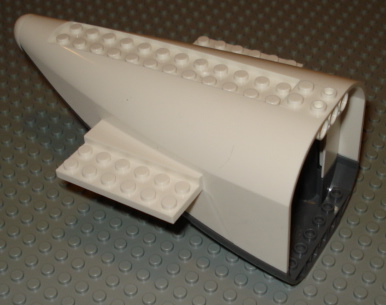
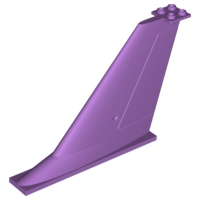
Parts for the Mystery MOC......
Above is a large box of pieces that I recent bought from eBay. But these are not just any pieces - there are more than 2,500 of them, and when you put them together as directed by the building instructions (also supplied) you end up with a spectacular unofficial Star Wars UCS model. The seller basically did all the hard work for me - he sourced all the necessary parts from Bricklink, burned the building instructions onto a memory stick, supplied a sticker for the obligatory UCS plaque, and packaged the whole lot up into a large box with a picture of the finished model stuck on the front. All I had to do was cough up the cash and wait for the postman. Really the height of laziness, I guess, but your scorn may turn into grudging admiration when you actually see the finished model.... Not sure when I'll have a chance to build it, however, but when it's done I'll post pics on here and everything will be revealed. Until then you'll just have to wait....!

Would anyone care to hazard a guess at what the finished model will be ?

                                                                                    And the Mystery MOC is..... -->

Wednesday 23 March 2011

Humble Pie

I've got a bit of a thing about LEGO space shuttles, always have done. I've therefore made it my mission to track down and aquire all the different space shuttle sets that LEGO have produced, which I think reached an all time high with last year's awesome Shuttle Adventure set.

As luck would have it, LEGO gave us another new space shuttle this year, which is part of a range of four 2011 City Space sets. I posted a few first impressions of these sets a couple of months back, and was I confess pretty lukewarm about the newest space shuttle, mainly due to the large, one piece cockpit which is just the latest in a long line of big, ugly, unnecessary parts (POOP) included in modern sets.

Anyway, POOP or not, I had to get the shuttle - it would have been rude not to given my love affair with the subject matter - and so it was that I sent £24.35 of my hard-earned cash to Amazon.co.uk and they were kind enough to send me Set 3367 Space Shuttle in return.


The first thing that struck me was the box - it seemed slimmed-down compared with recent sets of a similar size. This is most welcome; while I'm familar with the argument that bigger boxes make more of a splash at retail, smaller boxes are kinder to the environment and take up less space in my already over-stuffed LEGO repository, so I'm a huge fan of this latest packaging development - bravo, LEGO.

On carefully opening the box, out fell two numbered bags of pieces. As well as the previously-identified cockpit POOP there was further POOP in the form of the rather large tail section. Also present were a crumpled instruction booklet and a Dreaded Sticker Sheet, or DSS. I was delighted to recently learn that LEGO are now packaging the instruction booklets of larger sets in plastic bags stiffened with cardboard so as to avoid them getting damaged. Unfortunately this treatment doesn't extend to the smaller sets like 3367.

The build was predictably quick and simple given the relatively modest 231 piece count and the 5-12 age recommendation. Due to the simplicity of the set and the POOP within I was not expecting to be particularly impressed when I was done, but I have to confess that once built, I quite liked it.

First thing to like : the minifigure. Although only one is provided, I think he's great ! His default attire is a regulation helmet with clear visor, but when a zero-G spacewalk is on the cards, the standard helmet comes off and he's able to don a serious heavy-duty helmet with a huge gold visor (pics below; click to enlarge). The interchangeable helmets are a nice touch, and there's even somewhere to store the bulky alternative helmet and visor in the shuttle's cargo bay when it's not in use.


Next thing to like : the satellite, which can be manouevred to some extent using an arm which rises out of the open cargo bay. OK. so it's pretty rudimentary, but given the size of the set it's nice that the shuttle has a vaguely functional Canadarm. It's also good how the satellite and arm fold up neatly inside the cargo bay, allowing the cargo doors to close completely over the payload.

"Houston, we have a problem...."
And finally, the ship itself. Notwithstanding the one-piece cockpit and tail, it's an infinitely swooshable little model with a rotating front wheel, opening cargo bay doors, moveable flaps and room inside the cockpit for the astronaut. And it actually looks like a shuttle to boot, which also helps.....


So in summary, a relatively inexpensive and swooshable model with some nice play features and a cool minifigure. Better than I expected, and worth getting if you're an inveterate LEGO space-head.

Thursday 17 March 2011

Big......and finished !

OK, so I'm a slow builder, but I got there in the end...... After seemingly spending weeks building for an hour here and 30 minutes there (I was about a third of the way through when I last posted about it) Tower Bridge is complete, and stunning it is too !

Having got to the end of instruction booklet one, I set about booklet two where my next task was to complete the first tower up to level of the horizontal walkway (pic below; click all pics to enlarge).


Then came the dreaded "x 2" where I had to go back to the start of booklet one and do it all over again, building the second tower from scratch. I'm aware that people deal with repetitive builds differently, some like myself constructing the repeating parts of the build one after the other, while others build them in parallel. I don't think there's a right way - it can get a bit dull whichever way you do it.

Once I'd also completed the second tower up to the level of the horizontal walkway, I was able to put the two towers and the road bridge together, at which point the model really started to take shape (below).


The next task was to construct the horizontal walkway. This includes some interesting parts such as the white lattice fences and a couple of lovely printed shields. There's also some nice colours on view, particularly Medium Blue and a smattering of Pearl Gold. Once constructed, the walkway can be moved into place, joining the two towers together (below).


Once the walkway is in place, the tops of the towers can be completed, at which point the model is almost finished. All that's left to be done is to build and attach (using Technic pins) the approaches leading up to the bridge on either side, and finally construct the four 'chains' (I'm not quite sure what they're called) which run from high up on the towers to the approaches on either side. These are probably the weakest part of the build, looking a bit clunky and crude against the beautifully detailed splendour of the rest of the model.


Except we're not quite done yet. The final finishing touch is four scale vehicles - a red bus, a yellow truck, a black cab and a green convertible (below) to add some authenticity in the form of the notorious London traffic.....


Once the vehicles are built and placed on the bridge we're done, and I have to say it was worth the time and effort. Beautifully designed, interesting to build (apart from the unavoidable repetition), and it now has pride of place in my home in the hallway atop the piano. This in itself speaks volumes - the fact that my wife is happy for it to be prominently displayed in a communal area is testament to how beautiful the model is.....


One slightly disappointing post-script is some possible quality issues affecting the Tan bricks in the set. On a number of occasions I noticed that areas of the build involving Tan parts weren't 'flush' with each other. At first I thought it might just be a trick of the light as I was building under strong spotlights shining directly from above which I thought might have been casting shadows and fooling my eyes. I believe however that it's more than that.


Looking closely at the Tan brick below, I reckon that the plastic forming the sides of the brick denoted by the numbers 1 and 2 in the picture (click to enlarge) is thicker than the plastic forming the sides of the brick denoted by the numbers 3 and 4. I don't have a micrometer, but my distinctly amateurish attempts at measuring the thickness of the plastic would tend to bear out my suspicions. Furthermore, this seems to be the case for all the Tan bricks I examined, and would explain the appearance of ridges or overhangs when the Tan bricks are stacked on top of plates.


Has anyone else noticed this, either with this set or with Tan bricks in other sets ? Or am I imagining it ?! It thankfully doesn't detract from the finished model, but it's noticeable and I think a little unsightly close up. Let me know.

Anyway, the final verdict ? Notwithstanding the possible quality issues highlighted above, this is a magnificent model, and if you can afford it, buy it !

Saturday 12 March 2011

More POOP

Having moaned a few times now on this blog about my hatred of large, unnecessary pieces, also known as POOP, or Parts Out of Other Parts, my ranting went into overdrive a couple of weeks ago. If you've been paying attention, you may recall the subject of my ire on previous occasions - a huge one-piece wing section from the Indiana Jones-themed "Fight on the Flying Wing" set (pic below, courtesy of Bricklink).

Part Number 54093 Wing - not my favourite part....
OK, so let me explain. Set 7734 Cargo Plane was one of those sets which I didn't pay much attention to when it was available at retail - I was too busy spending my time and money trying to complete my LEGO Star Wars collection at that point. As is the way of such things, however, once the set was retired, I started seeing pictures of it and wishing I'd bought it when it was available. One thing lead to another, and before long I was watching auctions on eBay, dismayed at the realization that used examples were often selling for £50+ and MISB ones for even more. I struck lucky a little while back however when I found a copy of the set listed on eBay in used condition but boxed and complete for £30 as a Buy It Now auction. I predictably snapped it up, and it arrived soon afterwards.
Set 7734 Cargo Plane
It's certainly a handsome-looking aircraft and no mistake. Problem is, the compromises made to ensure that it's sleek and sexy had me shaking my head in dismay. Firstly, hated part number 54093 Wing rears its ugly head once again in this set, which was really not a good start to proceedings. And astonishingly, the set also contains 2 further pieces that managed to cause me even more consternation, impossible though that may seem. Ladies and gentlemen, I present to you my new least favourite big ugly unnecessary piece - the snappily-named Part Number 54701c02 Aircraft Fuselage Curved Aft Section with Dark Bluish Gray Base (pic below).

You've got to be joking, right ?
Where do I start with this ? Well, aside from its undoubted monstrous bulk, the thing which had me frothing at the mouth the most was the fact that the upper section and lower section are joined together by 3 small screws. Screws ! To join LEGO pieces together ! Not studs. Not technic pins. Screws. That's just blasphemy. What were LEGO thinking ? And if that's not enough, there's also a bulbous, rubbery cap stuck on the rear of the piece. It really is a horror show. 

Once I'd recovered my composure, I found another part which contained screws - Part Number 54092c01 Aircraft Fuselage Curved Forward 8x16x5 with Trans-Black Glass (pic below).


In this case, the Trans-Black glass is attached to the rest of the piece using 3 small screws. And if that wasn't enough, the aircraft's tail is not much better either - admittedly no screws, but absolutely enormous nonetheless.

My wife took one look and said it looked like a Playmobil plane, which got me wondering whether that was the intention all along. It's hard to know whether the use of pieces like this is driven by a desire to speed up the building process, or whether it's a cost-saving measure given the large number of individual pieces that large, prefabricated monstrosities like these are capable of replacing in one fell swoop.

Anyway, sensitive soul that I am, I don't think I can bear the thought of encountering too many more pieces like this. In order to avoid such stress, therefore, I'd appreciate suggestions from readers as to which other sets I ought to avoid in order to ensure I don't have a similarly traumatic experience.....

Friday 4 March 2011

Grand Opening

One of the best things about being a member of the Brickish Association (BA) is that you get the chance to do cool stuff, and I've previously posted about a couple of model builds I've participated in, as well as last year's BA Christmas party at LEGOLAND Windsor.

BA, which describes itself as a "UK-based community of Adult Fans of LEGO (AFOLs)", is often the first port of call when organisations or individuals want access to adult LEGO enthusiasts in the UK, and when a request arrived from the LEGO organisation for BA members to help with the grand opening events for the UK's latest two LEGO brand stores, a number of us answered the call.

Both new stores, Cardiff and London Westfields, actually opened their doors late last year, but the official grand openings for the stores didn't take place until February of this year. The grand opening event for each store lasted for 3 days and featured giveaways plus an opportunity for anybody to come down to the stores, lay their hands on lots and lots of LEGO bricks, and show the world what they could build. BA members were asked to join in with the public building events and construct some large local landmarks, presumably to provide some building inspiration for the other attendees. So no pressure then ! An interesting twist was that only red 2x4 bricks were made available to builders, encouraging building on a larger scale.

I was able to get along for the last day of the London Westfield event, and it was immediately evident that people had been busy for the 2 previous days, judging by the number of completed creations already on display in the building area (click pics below to enlarge).

London cityscape at Westfield
Photographs of London landmarks were scattered around the building area to provide us with inspiration, and after a few moments deliberation I decided to take a crack at building Big Ben. Or, to be more precise, the iconic clock tower at the north end of the Houses of Parliament. Big Ben, for anyone that's interested, is actually the name of the great bell itself, rather than the clock tower which houses it. One of my BA brethren had already constructed their take on the Houses of Parliament (a clever diagonal build - nice one, Jason !) which was prominently on display (see below) so I figured I needed something bigger so as not to be completely upstaged.

Houses of Parliament by Jason Railton (thanks to David Tabner for the pic)
I have to admit that these days I tend to solve building challenges by delving into the huge catalogue of available LEGO parts and finding a specialized brick to do the job. I therefore initially found it very restricting to build with just 2x4 bricks, particularly bricks in just one colour. In some ways, the large variety of specialized pieces that are available these days, together with the fact that I now have some cash to be able to buy what I need, has taken some of the challenge away from building my own creations - when I was a child I just had to make do with what I had, which forced me to be more creative. Anyway, after a while spent grappling with the limitations, the lack of a parts palette started to become quite liberating and the rules became clearer - think big, accept the limitations of what can reasonably be achieved with 2x4 bricks, and just build....

Building proceeded quickly - one of the advantages of just building with 2x4 bricks - and other than a few headaches when trying to figure out how best to reproduce the 4 clock faces at the top of the tower it was pretty straightforward. I finally completed the build after about 3 and a half hours, and you can see the finished result below.

Finished !
Once Big Ben was built, I took some time to look around. There were, it must be said, some pretty excellent creations on display. These including David Tabner's Tube Train and Gary Davis' London Bus (pics of both below), the latter of which nicely complemented the exclusive model produced in honour of the opening of the London Westfield store and which was given away to the first 300 visitors to the store on the Sunday who spent £20 or more.

Big Ben alongside a superb Tube Train built by David Tabner
London Bus by Gary Davis
I have to say it was fascinating watching the kids and their parents building. In general, the parents initially just watched and encouraged their kids, but before long many of the adults were up to their elbows in bricks and producing some pretty respectable creations themselves. A few asked enviously if I built LEGO models for a living and I had to confess that I was just an enthusiastic amateur. :-(

So an excellent event, then, and a great way to launch a new LEGO store. I'm just glad I didn't have to clear up all the LEGO afterwards....