Remarkably, in November of this year it'll be fully eight years since I booted up LDD and started to design my own LEGO City. To say that progress has been slow would be an understatement of epic proportions - you could probably have built a real city in the time that it's taken me to build mine so far.... My last update, which described the partial construction and installation of a 10224 Town Hall-inspired railway station MOC (below), was posted a year and a half ago, and since then the project has ground to a halt for the umpteenth time as my LEGO room has once again had to serve as a storage room during a protracted period of real-life building work.
Even though my LEGO room has yet to return to normality, an opportunity to work on the project, albeit in a roundabout way, has nevertheless presented itself. As previously described on these pages (for instance here and here), there's an annual event hosted by the Museum of the Great Western Railway in Swindon which showcases LEGO creations built by members of UK LEGO User Group The Brickish Association. As a Brickish member I'm eligible to exhibit my builds at the show, affectionately known as STEAM. This year one of the displays will be a collaborative display of more than thirty modular buildings designed and built by Brickish members. Anyway, I figured that if I signed up my railway station for the collaborative build then I'd have extra incentive to get off my backside and finish it off. It seemed like an excellent idea at the time, so I went ahead and signed up as a participant, figuring that it shouldn't take too much work to make my build display-ready. In hindsight, however, perhaps I should have taken a closer look at the back of my work-in-progress MOC (below) before being quite so dismissive about the amount of work involved....
With no clear idea of how to complete the build I powered up LDD, dug out the LDD file for the build thus far, and had a play with it. Ultimately I'm planning to replace the back of the building with a full length station platform complete with a canopy which will overhang the platform and railway track. With STEAM fast approaching, however, and with elements to source and little time to play with I decided to keep things simple for the upcoming display and follow the design used for the back of 10224 Town Hall, extending it for the full width of the expanded building. The side walls, meanwhile, would take inspiration from the front of the station which I'd already completed. Having settled on a plan of action I went ahead and completed two-thirds of the building in LDD, both to reassure myself that I'd be happy with the overall look, and also to help me estimate what additional elements I'd need; you can see an LDD screen grab of part of the back of the building below.
With the design now sketched out in LDD I was ready to crack on with the actual build. In order to integrate the railway station into my City layout I'd had to mount it on an idiosyncratic arrangement of small baseplates, so my first job was to strip these away and replace them with standard 32 x 32 baseplates. When it came to the rest of the building I thankfully already had most of the basic bricks and plates required to construct the outer shell, but I was predictably lacking when it came to the huge number of windows that I'd need, not to mention the larger white plates for the individual floors and various other bits and pieces. I therefore built as much as I could before diving into Bricklink to order the elements that I didn't have. All told I ended up having to order almost 450 elements to complete the build, but at least I was able to find a single EU-based seller who had everything I needed (thanks, Kepes!)
My Bricklink order duly arrived a few days ago which leaves me with the best part of 2 weeks to finish my railway station. I'll post pictures of the build on Gimme LEGO after the event, so stay tuned. Or better still why not come to STEAM a.k.a. the Great Western Brick Show and see it for yourself?!
Tuesday, 25 September 2018
Tuesday, 5 June 2018
Hen's Teeth
Lapsed LEGO fans can emerge from their Dark Ages and re-enter the hobby via any number of different routes, but one of the most common motivations seems to be a desire to rediscover the beloved sets of their youth. That was certainly a major factor for me; while the initial trigger was the arrival of 10188 Death Star as a Christmas present, the next stage was a protracted trawl through my childhood LEGO collection and the painstaking restoration of my childhood sets. The desire to replace missing parts lead to the discovery of Bricklink, while building instructions were secured from the likes of Brickset and Peeron; the realisation that boxed examples of my childhood favourites could be secured, at a price, from the likes of eBay and Bricklink lead to ever more expensive competition with fellow AFOLs, and thus was my descent into obsessive LEGO fandom confirmed....
I think the first set that I scraped together from my childhood collection and then subsequently purchased a boxed example of was probably 928 Galaxy Explorer (above). Over time I gradually tracked down boxed examples of other childhood Classic Space favourites via eBay and Bricklink, after which I started to home in on sets that I'd never owned as a child in order to try and expand my collection. A number of Classic Space sets have remained stubbornly elusive over the years, however, with reasonably priced boxed examples being hard to come by, but I did recently manage to track down one of them, 924 Space Cruiser, so I thought I'd share it with you here.
According to Brickset the name of the set is Space Transporter, while Bricklink calls it Space Cruiser. I'd normally side with Brickset, out of loyalty to my favourite LEGO site if nothing else, but in this case I consulted the excellent LEGO Collector's Guide, Second Edition which calls it Space Cruiser so I went with that. The front of the box (above) consists of a flap which lifts up to reveal the set contents. The flap is printed with a slightly over-exposed image of the LL 924 Space Cruiser spacecraft in flight over the surface of a barren planetoid. A blurry forklift, the set's small ancilliary build, is pictured in the background along with one of the set's two minifigures. Unfortunately, my copy of the set features the unwelcome 'bonus' of an unsightly mark caused by ancient adhesive tape running across the front of the box; normally such an addition would discourage me from parting with my cash, but when boxed examples of a set are in such short supply you sometimes just have to bite the bullet. The back of the box (below) showcases a number of alternative builds which can be assembled from the set contents.
The A4-sized instruction booklet arrived folded in half in order to fit into the box but has been unfolded here so I could photograph it. The front cover (below) features an upper panel which reproduces the artwork from the front of the box, while the lower panel contains assembly instructions for the set's two minifigures together with a small cargo container.
The back of the instruction booklet (below) showcases a number of Classic Space sets from 1978 and 1979, a sight sure to bring joy to the hearts of nostalgic AFOLs worldwide!
The box also contains a folded promotional leaflet which advertises offerings from a myriad of different LEGO themes from Duplo to Castle, Technic and beyond. You can see the panels promoting a selection of Classic Space sets below, and I've also scanned a few of the other panels which you can see on the Gimme LEGO Flickr stream here.
As mentioned above the set contains two minifigures. I've waxed lyrical about these guys in previous reviews, for instance here and here, but I make no apology for reiterating how much affection I still have for them almost 40 years after my first encounter. The iconic Classic Space torso print, which has launched a thousand t-shirts, has predictably faded somewhat on the red figure but looks surprisingly fresh and sharp on the white figure even if the torso has yellowed a little over the years.
Most notable from the rear are the air tanks, the design of which is the same now as it was back in 1979. There's no backprinting on the torsos or the classic smiley heads.
With the minifigures assembled it's time to start on the build proper. First to be constructed is a small cargo container. This consists of white left and right 1 x 3 x 1 doors and little else, although at least the doors can be opened to provide access to the cargo, a trans-green 1 x 1 round brick. A simple forklift is provided to move the cargo around; while only consisting of seven elements, the vehicle features an impressive light grey spring-loaded fork assembly at the front which only ever appeared in this set, its U.S. doppelganger (487) and a rare Service Pack which I wasn't even aware existed until I wrote this article.
The ship itself is built on a light grey 16 x 6 plate, upon which various other light grey plates are progressively stacked in order to form the distinctive Classic Space silhouette. As in the likes of 918 and 928 light grey left and right 8 x 4 wedge plates play a key role in defining the outline of the ship, while even early on in the build further nods to other Classic Space offerings are provided by way of the yellow and black detailing on the wings and the trans-green and trans-red 1 x 1 plates. The ship is supported underneath by four 2 x 2 x 2 stands, and a couple of 2 x 2 round bricks are also attached to the underside, presumably representing vertical thrusters.
I'm not sure there's such a thing as a 'beloved LEGO element' but if there was then the blue 33 degree 3 x 6 slope printed with the Classic Space Logo at the front of the ship would surely qualify. Both sides of the fuselage incorporate a blue 1 x 4 brick printed with the ship's 'LL 924' identifier; these printed elements are predictably unique to this set and its U.S. equivalent. The cockpit contains a couple of light grey 45 degree printed 2 x 2 slopes (this one and this one) which make up an instrument panel, and there's more than enough room for both minifigures despite the presence of a steering wheel. The cockpit is enclosed by a number of delicious trans-yellow elements including a pair of uncommon 33 degree 3 x 6 slopes which form the windscreen, 1 x 2 and 1 x 4 bricks, and a rare 4 x 10 plate. The fuselage walls also incorporate a pair of blue 1 x 2 bricks printed with the Classic Space logo.
From behind the view is dominated by a pair of light grey 4 x 4 x 2 cones which serve as the main engines. These have only ever appeared in a total of seven sets in this colour. They're mounted on the back of the brick-built cargo bay doors which swing open on swivel hinge bricks to reveal a compact cargo bay. The cargo bay doors incorporate a pair of blue 1 x 2 bricks printed with a down arrow. The blue 1 x 2 tile on top of the tail prevents the cargo doors from swinging open unintentionally.
The completed LL 924 build together with the forklift, cargo and minifigures can be seen in the picture below. The cockpit roof is attached via a pair of hinges which enable it to be tilted, thus providing cockpit access. The cargo bay can just about accommodate the cargo, but is nowhere near big enough for the forklift to fit into.
Having now built LL 924 and had the opportunity to compare it with its baby brother (918) and big brother (928) I reckon that in terms of its overall proportions it arguably looks the best of the bunch. For all its obvious splendour and deserved iconic status, LL 928 is maybe just a fraction too big and bulky to be considered sleek, while LL 918 is a bit of an ugly duckling. I think LL 924 hits the sweet spot in terms of size, however, and aside from the awkward transition from the light grey wedge plates to the modified 1 x 2 plate with handles at the front of the ship, and the row of exposed, open studs on top of the 4 x 2 x 2 tails on either side, I reckon it looks damn-near perfect.
Given the obvious merits of LL 924, it's interesting that boxed examples of the set seem to be so much harder to come by compared with 918 or 928, the implication being that the set didn't sell well. Maybe that's because it lacks the grandeur and playability of 928, with its landing pad, crater baseplate, moon base and moon buggy which fits inside the cargo hold, while simultaneously lacking the affordability of 918. Regardless of the reason, it's still well worth picking up if you can find it at a reasonable price.
Set 924 Space Cruiser was released in 1979 and contains 170 pieces. I purchased my copy from eBay for around £90, having waited a long time for an affordable boxed example to be listed there. If however you're not willing to wait, various sellers have the set listed for sale on Bricklink, with prices for a boxed example starting at £125 plus shipping. At time of writing there are only three complete boxed copies available, however, so be quick!
Labels:
924,
Classic Space,
lego
Tuesday, 1 May 2018
Great Balls of Fire
OK, so when I last wrote I was preparing to take my first, faltering steps into the world of Great Ball Contraptions, or GBCs. I'd found instructions online to a GBC which could be constructed using only the elements contained in a single Technic set, 42049 Mine Loader, and prior to cannabalising the parts I'd built and reviewed both the Mine Loader and the alternate build, a Rock Cutter.
My next job was to disassemble the Rock Cutter, after which it was time to get to work on my first GBC. I had initially planned to reverse engineer the GBC, which was designed by Great Ball Pit, from a video clip but I ended up paying to download a set of instructions instead which, as it turned out, made my life a whole lot easier. The download, which is in .pdf format, consists of a total of 62 pages and you can see a full listing of the content in the screengrab below. As well as a 54-page building guide the document also incorporates other content including hints for fine-tuning the GBC mechanisms and instructions for upgrading the module with Power Functions. The building guide is fairly easy to follow; at each stage the parts you need to add are highlighted in pink, and the build is logically sequenced.
I was about a third of the way through the build when I took the photograph below. The GBC module has been designed to be mounted onto a trailer, and the trailer chassis is pretty much done by this point. A pair of wheels will later be attached to the axle that you can see in the foreground, while the various gears embedded into the chassis are part of the mechanism that makes a single cylinder move up and down in the chassis-mounted engine block when the GBC module is activated. The stickers that you can see here and in subsequent pictures are a reminder that we're using recycled elements from a donor 42049 Mine Loader set, and they don't have any significance with respect to the GBC module.
With the chassis complete it's time to get to work on the section of the GBC which is responsible for moving the balls (below). The mechanism consists of a series of sweeper arms which pass the balls along the line as they rotate. The arms obviously need to work together in perfect harmony to make this happen, and in order for the arms move in unison they're connected underneath via a system of gears. Timing is critical - one sweeper arm can't pass the ball to the next unless the rotation of the arms is carefully coordinated - and for this reason specific instructions are provided to ensure that the sweeper arms are correctly positioned relative to each other.
Another important part of the module can be seen on the left side of the picture above. A black 1 x 6 Technic link connects the spindle of the first sweeper arm to a pivoting structure; as the spindle turns it rocks the structure backwards and forwards, which has the effect of feeding balls from the "in-basket" to the first sweeper arm in the finished module.
You can see how everything fits together in the pictures above and below which show the completed GBC module from the front and the back. The GBC mechanism is activated by turning a crank which is located to the left of the wheel in the picture above. Once the balls are swept to the top of the slope by the arms they're 'recycled' along a rear return channel and roll back down into the in-basket, thus creating a perpetual loop. The light bluish grey exhaust pipe element at the top of the slope diverts the balls down the return channel, but if you want the balls to be transferred to an adjacent GBC module instead then the exhaust pipe can be removed and the balls will then drop off the end of the conveyor and into the in-basket of the next module.
You can motorise the module quickly and easily by replacing the hand crank with a LEGO Power Functions motor. I used a standard XL Motor powered by a Battery Box containing six rechargeable eneloop AA batteries and you can see the result in the video clip below; if you're having difficulty viewing the embedded video clip then you can watch it here instead.
Occasionally the ball at the front of the queue needs a nudge from one of the returning balls in order to launch it onto the conveyer, but otherwise the mechanism runs smoothly and the balls are quickly and efficiently whisked up the slope. Watching the module operate is actually quite hypnotic, and it's certainly given me a taste for more. There's still the issue that I don't have many loose Technic elements, but having now built a GBC with the aid of instructions I at least have a better idea of what I'll need in order to build one of my own design and I've also picked up a few techniques that I can potentially make use of so overall it was a valuable learning experience.
If you'd like to build this GBC then you can purchase instructions from here for €9.95. I don't have any financial interest in the sale of these instructions, incidentally, and I paid for my own copy.
Labels:
42049,
akiyuky,
GBC,
Great Ball Contraptions,
Mine Loader
Monday, 26 March 2018
Mined Out
One of the great things about the LEGO hobby is the sheer number and variety of niches to be found within it. Although I entered the fray as a big LEGO Star Wars fan, my areas of interest have expanded since then to encompass Modular Buildings, constructing my own MOCs, collecting various other LEGO themes and even dabbling with the odd bit of Technic.
One niche that I haven't previously dipped my toe into, however, is Great Ball Contraptions, or GBCs. GBCs are machines built from LEGO and usually powered by LEGO motors which transport small balls from one place to another. Multiple GBCs are typically chained together, with balls being passed from one GBC module to another, sometimes over considerable distances. In order to facilitate collaboration between GBC builders so that their modules are compatible with each other, a GBC standard has been defined. This standard legislates for various factors such as the size and location of a module's 'in-basket' and the rate of ball flow into the machine, amongst others.
I'd been largely oblivious to the GBC scene until recently when a GBC discussion thread on the Brickset Forum caught my eye. Particularly interesting were postings which linked to a selection of spectacular GBC modules such as the Strain Wave Gearing GBC Module (above) built by akiyuky who was also responsible for the incredible collection of GBC modules that you can see here. I was so impressed that I decided I wanted to have a go at building a GBC myself, but where to start? I've built a few Technic sets, for instance this one, but have never built a Technic MOC. Also, pretty much all of my Technic elements are tied up in official sets, so I initially wasn't sure how best to proceed.
Thankfully the community came to my rescue in the form of a posting by Brickset Forum member greatballpit who linked to this video that he'd posted on YouTube. The video showcases a fully functional GBC module that can be constructed in its entirety using the elements contained in just one recent Technic set, 42049 Mine Loader. I initially assumed that I'd need to reverse-engineer the build by studying the video clip, but it later transpired that instructions are available to download for €9.95 so I decided to take the plunge, pay the money and make my life a whole lot easier. In addition to getting me started in the world of GBCs, the project would also give me the perfect excuse to review the mine loader set, an official LEGO offering that I hadn't previously paid much attention to.
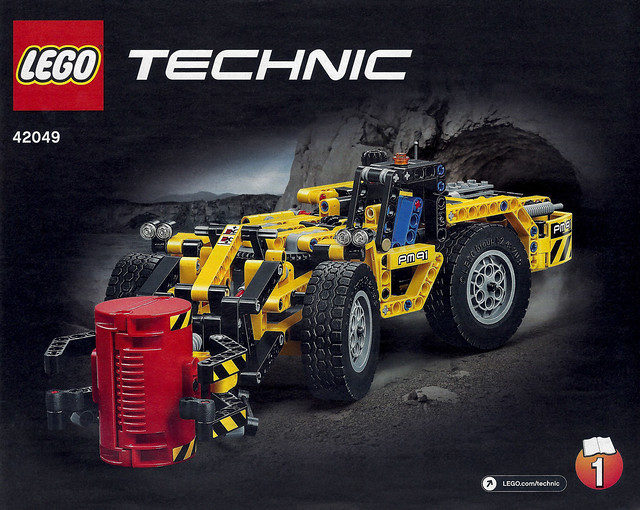
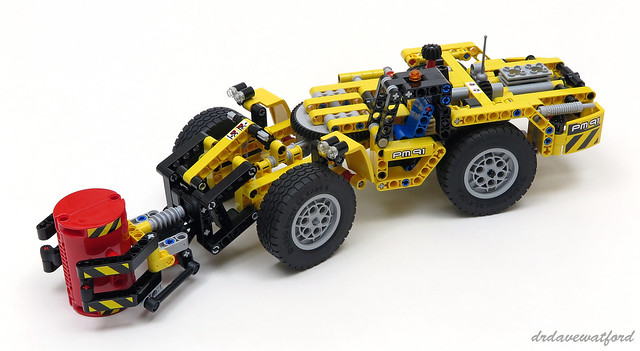
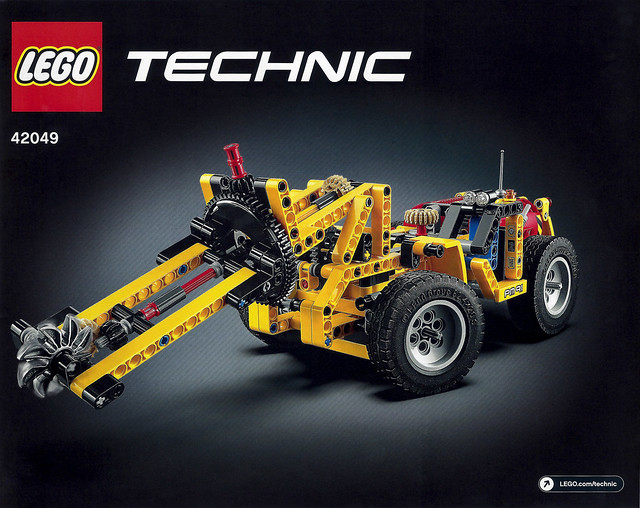
The front of the box (above) showcases the finished mine loader model which is a decidedly odd-looking vehicle - I did a quick internet search and couldn't actually find its exact real-world equivalent, although Caterpillar do manufacture a variety of underground mine loaders which appear broadly similar apart from the attachment at the front. Technic sets characteristically feature an alternate build which can be constructed with the elements contained within the set. In the case of 42049 the 'B' model is a rock cutting vehicle and this is shown on the back of the box (below).
The box opens via a couple thumb tabs on the left side, although as usual I ignored these and instead carefully slid a knife under the seams and opened the left side, thus minimising damage to the box. The box contains four unnumbered bags of elements, three instruction booklets and a sticker sheet (below). There are also four huge rubber tyres loose in the box.
The mine loader is the larger of the two builds and has two instruction booklets as against one for the rock cutter. Both mine loader booklets have front covers which are identical apart from the booklet number in the bottom right corner.
I seldom build Technic. It's therefore not surprising that when I do I should encounter elements that I haven't seen before. This time it was red 6L and yellow 7L axles that caught my eye, although it turns out that these have been around for years and have appeared in multiple sets. Genuinely uncommon elements appearing in the set include a yellow Technic 3 x 3 T-shaped thick liftarm which is only appearing in a set for the tenth time in this colour, and a light bluish grey large Technic turntable base plus its black large Technic turntable top counterpart, both of which have only appeared in a total of 10 sets to date.
In terms of notable features, the build incorporates a 2-cylinder engine; it's actually not the first time that I've built a LEGO Technic engine but I still find it impressive the way that the LEGO crankshaft smoothly drives the pistons in the engine block. The crankshaft also attaches to a flat silver 8 blade propeller which represents a cooling fan and which has only previously appeared in seven sets in this colour. By the end of the first instruction booklet we're well beyond the halfway point in the build (below).
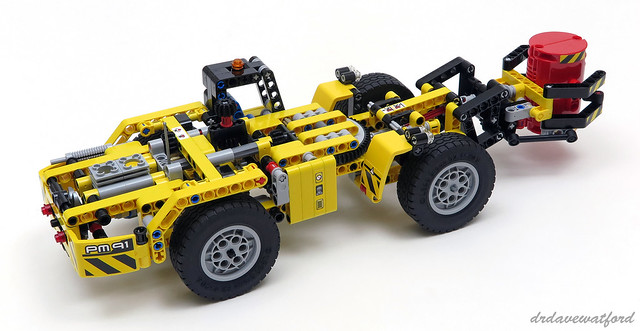
With the bulk of the internal structure and Technic mechanisms already completed, much of the remaining build consists of predominantly cosmetic details. The mudguards behind the front wheels consist of yellow Technic curved 3 x 6 x 3 panels which are only appearing in a set for the third time. These are decorated with black and yellow striped warning stickers and provide the attachment point for bilateral twin headlights. The driver's cab bolts on to the left side of the vehicle and includes a single seat which is made up of a couple of blue 2 x 4 L-shaped thick Technic liftarms. A single exhaust represented by a light bluish grey vehicle exhaust pipe with Technic pin emerges from the left side of the engine, and a couple more of the yellow Technic curved 3 x 6 x 3 panels are used to create the corners of the rear bumper which also incorporates a pair of trans-red tail lights.
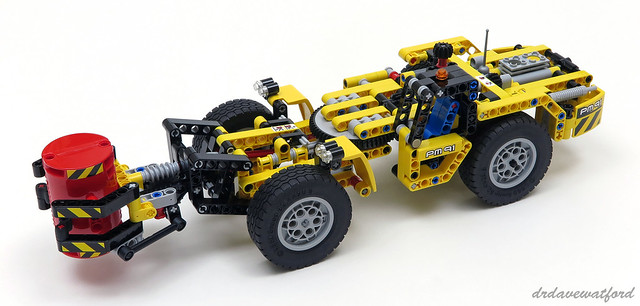
The build is nearly complete now. An aerial, represented by a flat silver rapier, attaches just in front of the engine, after which the four wheels with their huge 62.4mm tyres are attached. Finally a red drum, made up of a pair of stickered interlocking red 3 x 5 x 8 cylinder halves which are exclusive to the set in this colour, is assembled and we're finished (below).
I asked my ten year old what he thought of the finished build and I have to report that he wasn't particularly impressed with the look of it; I'd have to agree that it's rather underwhelming from an aesthetic point of view. The build does however incorporate a number of functions, and all of the mechanisms work well.
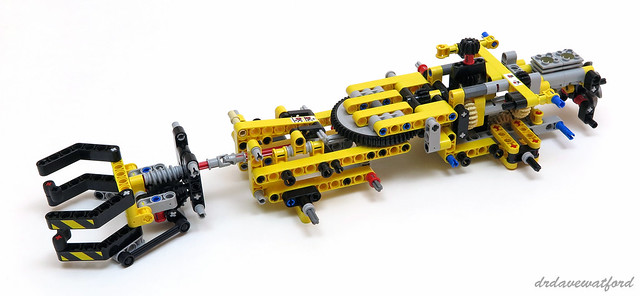
The large Technic turntable I mentioned earlier connects the front and rear sections of the vehicle. Turning the small black gear next to the cab rotates the turntable; this pivots the entire front section and thus steers the vehicle as you can see in the picture below. Meanwhile, pushing the vehicle forwards or backwards causes the pistons in the engine block to smoothly rise and fall, and the cooling fan at the back to rotate. At the front of the vehicle the claw can be raised and lowered; it's in the fully raised position in the picture above, and the lowered position below. The claw can also be closed and opened so as to grab and subsequently drop the red drum; this is accomplished by rotating another small black gear which is located just in front of the engine. The gear connects to the claw via a long axle assembly running almost the whole length of the vehicle.
With the mine loader completed and photographed it was time to take it apart in preparation for building the 'B' model. One of the reasons that I've struggled to love Technic over the years is the misery of deconstructing the builds, which is both time consuming and a cause of physical discomfort. Thankfully the mine loader is modestly sized so taking it apart didn't take too long, although as ever it was not a comfortable experience for my fingers.
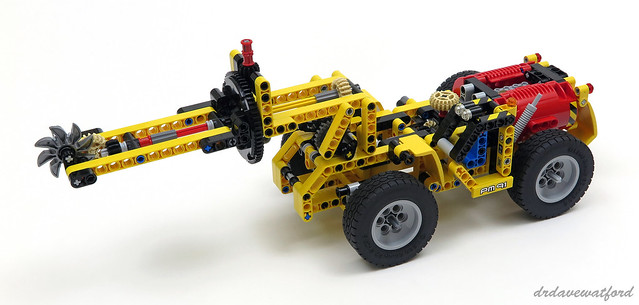
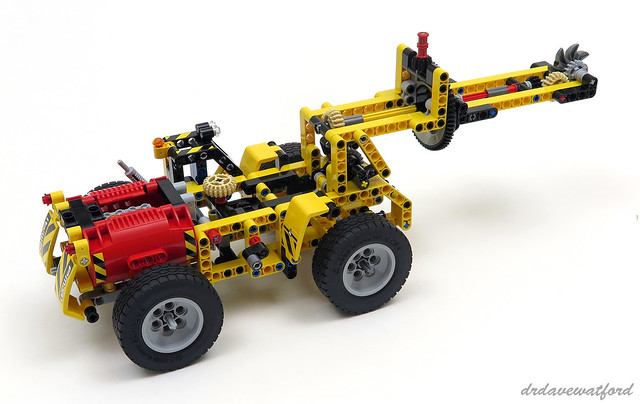
The 'B' model, a rock cutter, is another curious-looking vehicle and a quick online search didn't reveal any real-world examples of machines that looked remotely similar. Like the mine loader it incorporates a 2-cylinder engine, with the pair of red cylinder halves which were previously used to fashion the drum being repurposed as engine covers that wrap around either side of the engine block. The turntable assembly, previously utilised as a steering mechanism for the mine loader, is incorporated into the boom of the rock cutter.
Attaching the boom doubles the length of the vehicle and makes it predictably unwieldy. Despite this, the weight of the body ensures that the centre of gravity is far enough back for the vehicle to be nice and stable, although like the mine loader it's a decidedly strange-looking beast. Following completion of the rock cutter there are 57 elements left over, of which 11 are spares. The rock cutter therefore utilises more than 90% of the set's total of 476 elements.
Function-wise I found the rock cutter to be more interesting than the mine loader. The vehicle can be steered by rotating the prominent tan gear in front of the engine which turns the front wheels, and similar to the mine loader the pistons in the engine block smoothly rise and fall when the rear wheels rotate. The boom can be raised and lowered by turning a crank on the right side of the vehicle, and unlike the claw at the front of the mine loader it has a substantial range of vertical movement. As you can see in the picture below the orientation of the blade can be changed; a pair of red bushes are attached to an axle just above the turntable, and turning these bushes rotates the turntable which changes the angle of the front section of the boom and hence the blade. Finally, you can spin the blade itself by rotating the tan gear at the base of the boom.
So that's both the 'A' and 'B' models built, then. Overall, while neither of these strange-looking vehicles will ever win a beauty contest, they were both enjoyable to assemble. Furthermore, they both manage to cram in a fair number of functions, all of which operate smoothly and reliably.
42049 Mine Loader was released in 2016 at a price of £29.99 / US$49.99 / 39.99€. You may struggle to find this set at retail now, but at time of writing new sealed examples can still be acquired at or below the RRP over at Bricklink which is where I bought my copy from.
Right, now to disassemble the rock cutter in preparation for my first attempt at building a Great Ball Contraption. Check back in a couple of weeks to find out how I got on....
One niche that I haven't previously dipped my toe into, however, is Great Ball Contraptions, or GBCs. GBCs are machines built from LEGO and usually powered by LEGO motors which transport small balls from one place to another. Multiple GBCs are typically chained together, with balls being passed from one GBC module to another, sometimes over considerable distances. In order to facilitate collaboration between GBC builders so that their modules are compatible with each other, a GBC standard has been defined. This standard legislates for various factors such as the size and location of a module's 'in-basket' and the rate of ball flow into the machine, amongst others.
Thankfully the community came to my rescue in the form of a posting by Brickset Forum member greatballpit who linked to this video that he'd posted on YouTube. The video showcases a fully functional GBC module that can be constructed in its entirety using the elements contained in just one recent Technic set, 42049 Mine Loader. I initially assumed that I'd need to reverse-engineer the build by studying the video clip, but it later transpired that instructions are available to download for €9.95 so I decided to take the plunge, pay the money and make my life a whole lot easier. In addition to getting me started in the world of GBCs, the project would also give me the perfect excuse to review the mine loader set, an official LEGO offering that I hadn't previously paid much attention to.
The front of the box (above) showcases the finished mine loader model which is a decidedly odd-looking vehicle - I did a quick internet search and couldn't actually find its exact real-world equivalent, although Caterpillar do manufacture a variety of underground mine loaders which appear broadly similar apart from the attachment at the front. Technic sets characteristically feature an alternate build which can be constructed with the elements contained within the set. In the case of 42049 the 'B' model is a rock cutting vehicle and this is shown on the back of the box (below).
The box opens via a couple thumb tabs on the left side, although as usual I ignored these and instead carefully slid a knife under the seams and opened the left side, thus minimising damage to the box. The box contains four unnumbered bags of elements, three instruction booklets and a sticker sheet (below). There are also four huge rubber tyres loose in the box.
The mine loader is the larger of the two builds and has two instruction booklets as against one for the rock cutter. Both mine loader booklets have front covers which are identical apart from the booklet number in the bottom right corner.
I seldom build Technic. It's therefore not surprising that when I do I should encounter elements that I haven't seen before. This time it was red 6L and yellow 7L axles that caught my eye, although it turns out that these have been around for years and have appeared in multiple sets. Genuinely uncommon elements appearing in the set include a yellow Technic 3 x 3 T-shaped thick liftarm which is only appearing in a set for the tenth time in this colour, and a light bluish grey large Technic turntable base plus its black large Technic turntable top counterpart, both of which have only appeared in a total of 10 sets to date.
In terms of notable features, the build incorporates a 2-cylinder engine; it's actually not the first time that I've built a LEGO Technic engine but I still find it impressive the way that the LEGO crankshaft smoothly drives the pistons in the engine block. The crankshaft also attaches to a flat silver 8 blade propeller which represents a cooling fan and which has only previously appeared in seven sets in this colour. By the end of the first instruction booklet we're well beyond the halfway point in the build (below).
With the bulk of the internal structure and Technic mechanisms already completed, much of the remaining build consists of predominantly cosmetic details. The mudguards behind the front wheels consist of yellow Technic curved 3 x 6 x 3 panels which are only appearing in a set for the third time. These are decorated with black and yellow striped warning stickers and provide the attachment point for bilateral twin headlights. The driver's cab bolts on to the left side of the vehicle and includes a single seat which is made up of a couple of blue 2 x 4 L-shaped thick Technic liftarms. A single exhaust represented by a light bluish grey vehicle exhaust pipe with Technic pin emerges from the left side of the engine, and a couple more of the yellow Technic curved 3 x 6 x 3 panels are used to create the corners of the rear bumper which also incorporates a pair of trans-red tail lights.
The build is nearly complete now. An aerial, represented by a flat silver rapier, attaches just in front of the engine, after which the four wheels with their huge 62.4mm tyres are attached. Finally a red drum, made up of a pair of stickered interlocking red 3 x 5 x 8 cylinder halves which are exclusive to the set in this colour, is assembled and we're finished (below).
I asked my ten year old what he thought of the finished build and I have to report that he wasn't particularly impressed with the look of it; I'd have to agree that it's rather underwhelming from an aesthetic point of view. The build does however incorporate a number of functions, and all of the mechanisms work well.
The large Technic turntable I mentioned earlier connects the front and rear sections of the vehicle. Turning the small black gear next to the cab rotates the turntable; this pivots the entire front section and thus steers the vehicle as you can see in the picture below. Meanwhile, pushing the vehicle forwards or backwards causes the pistons in the engine block to smoothly rise and fall, and the cooling fan at the back to rotate. At the front of the vehicle the claw can be raised and lowered; it's in the fully raised position in the picture above, and the lowered position below. The claw can also be closed and opened so as to grab and subsequently drop the red drum; this is accomplished by rotating another small black gear which is located just in front of the engine. The gear connects to the claw via a long axle assembly running almost the whole length of the vehicle.
With the mine loader completed and photographed it was time to take it apart in preparation for building the 'B' model. One of the reasons that I've struggled to love Technic over the years is the misery of deconstructing the builds, which is both time consuming and a cause of physical discomfort. Thankfully the mine loader is modestly sized so taking it apart didn't take too long, although as ever it was not a comfortable experience for my fingers.
The 'B' model, a rock cutter, is another curious-looking vehicle and a quick online search didn't reveal any real-world examples of machines that looked remotely similar. Like the mine loader it incorporates a 2-cylinder engine, with the pair of red cylinder halves which were previously used to fashion the drum being repurposed as engine covers that wrap around either side of the engine block. The turntable assembly, previously utilised as a steering mechanism for the mine loader, is incorporated into the boom of the rock cutter.
Attaching the boom doubles the length of the vehicle and makes it predictably unwieldy. Despite this, the weight of the body ensures that the centre of gravity is far enough back for the vehicle to be nice and stable, although like the mine loader it's a decidedly strange-looking beast. Following completion of the rock cutter there are 57 elements left over, of which 11 are spares. The rock cutter therefore utilises more than 90% of the set's total of 476 elements.
Function-wise I found the rock cutter to be more interesting than the mine loader. The vehicle can be steered by rotating the prominent tan gear in front of the engine which turns the front wheels, and similar to the mine loader the pistons in the engine block smoothly rise and fall when the rear wheels rotate. The boom can be raised and lowered by turning a crank on the right side of the vehicle, and unlike the claw at the front of the mine loader it has a substantial range of vertical movement. As you can see in the picture below the orientation of the blade can be changed; a pair of red bushes are attached to an axle just above the turntable, and turning these bushes rotates the turntable which changes the angle of the front section of the boom and hence the blade. Finally, you can spin the blade itself by rotating the tan gear at the base of the boom.
So that's both the 'A' and 'B' models built, then. Overall, while neither of these strange-looking vehicles will ever win a beauty contest, they were both enjoyable to assemble. Furthermore, they both manage to cram in a fair number of functions, all of which operate smoothly and reliably.
42049 Mine Loader was released in 2016 at a price of £29.99 / US$49.99 / 39.99€. You may struggle to find this set at retail now, but at time of writing new sealed examples can still be acquired at or below the RRP over at Bricklink which is where I bought my copy from.
Labels:
42049,
akiyuky,
GBC,
Great Ball Contraptions,
Mine Loader,
Rock Cutter
Thursday, 22 February 2018
Still on Track
One of the cool things about working for the LEGO company is that it gives presents to its employees in the form of LEGO sets. These aren't just any LEGO sets either - they're exclusive employee sets. These sets are typically given out at Christmas, and they're almost invariably well worth having. Highlights from the past few years have included 4002014 LEGO HUB Birds (below) which was given to employees as a Christmas gift back in 2014, and 4002017 Nutcracker which employees received at Christmas 2017.
While these employee sets aren't available at retail, it's nevertheless fairly easy for non-employees to get hold of them as some LEGO employees view them as an opportunity to make a quick buck and consequently sell them on eBay, Bricklink or elsewhere. They're not cheap, though - with the increase in popularity of LEGO and the rise of LEGO collecting as a hobby there's a ready market for such exclusive items, meaning that employees can get good money for them.
Of all the sets gifted to employees over the past few years, perhaps the most desirable of all from my perspective is 4002016 50 Years on Track from 2016 which is a celebration of 50 years of LEGO trains. The set contains predominantly 4-wide miniature versions of six different trains released by LEGO over the years, most of which can be considered noteworthy or iconic. As a fan and collector of LEGO trains I was predictably drawn to this set, and eventually took the plunge on a sealed copy from Bricklink which I bought for myself as a belated Christmas present!
The box leaves little to the imagination, showcasing all six miniature builds on the front (above). These images are accompanied by a black and white picture of Kjeld Kirk Kristiansen, former president and CEO of The LEGO Group, playing trains with a young girl. The same image appears on the back of the box (below), next to a picture of Kjeld's father Godtfred Kirk Christiansen playing trains with a young boy. I did wonder whether the youngsters might be family members, but the identities of the children are not stated. Given how much I paid for the set, I had to smile ruefully at a 'Not for sale' message printed in eight languages on the right side of the box....
The box opens in a similar fashion to a typical LEGO Architecture set. Cutting a couple of tape seals allows the front of the box to be lifted up, revealing Christmas greetings printed in a variety of languages on the front edge of the box. Nestled inside the box are six sealed bags of LEGO elements and six booklets containing building instructions. There's no sticker sheet.
Each individual build has its own numbered bag of elements and booklet. You can see the cover of the first booklet above; this 36-page booklet provides instructions for building a miniature version of the locomotive from 113 Motorized Train Set which was the first train that LEGO ever released back in 1966. All six booklets contain a brief introduction to the set which inspired their particular miniature build. The first booklet also contains a short introduction to the entire 50 Years On Track collection, while the sixth booklet contains an inventory of all the elements appearing in the set. All six booklets have the same back cover (below).
Construction of the miniature Motorized Train commences with the assembly of a display base. This incorporates a pair of light bley rails which have only previously appeared in four sets in this colour. The rails are mounted on dark bley 6 x 6 plates and are accompanied by an arrangement of reddish brown tiles which serve as sleepers. A display plaque consisting of a modified 4 x 4 tile with studs on one edge printed with the words 'Motorized Train Set 1966' is mounted on the edge of the display base by way of a reddish brown A-shape wedge plate with 2 rows of 4 studs and an uncommon reddish brown 2 x 2 top hinge plate.
The miniature locomotive itself is a fairly straightforward build which doesn't employ any particularly rare elements apart from small red train wheels which are exclusive to this set. Even so, it's a pretty good representation of the crudely-styled original locomotive, thanks in part to the use of a variety of modern elements such as single and double cheese slopes and jumper plates. You can see the original 1966 locomotive running in this video clip.
We jump forward 10 years for the subject of our second miniature train which is the locomotive from 726 Western Train released in 1976. According to the corresponding booklet (below) it's believed that set 726 was the inspiration for the Western locomotives that appeared in LEGOLAND shortly afterwards.
Once again the build commences with construction of a display base which is identical to that employed for the miniature Motorized Train apart from the printing on the display plaque. Similar to the previous build the train's headlights are fashioned from a pair of modified 1 x 1 headlight bricks which are laid on their backs thus making them 2- rather than 3-plates high, and again there's liberal use of jumper plates and cheese slopes which help to neatly mimic the original design at a smaller scale. The windows are formed from stacks of yellow modified 1 x 1 plates with vertical clip. This element exists in a number of different variants, and irritatingly those supplied with my copy of the set are a mixture of two different types and this is evident in the build as the clips don't line up as neatly as they should.
The sides of the boiler are fashioned from blue and black 45 degree 2 x 1 slopes with 2/3 cutout.
An uncommon yellow 1 x 2 x 2 panel with side supports makes an appearance at the front of the cab, while the back of the locomotive is made up of a red 1 x 4 x 2 panel with side supports; this element is only appearing in a set for the sixth time ever in this colour. The attention to detail is laudable - even the buffers and magnetic couplings of the original locomotive are modeled via the use of black Technic ball joints and red & blue 1 x 1 round tiles respectively. The coupling rods are also reproduced via the use of yellow 6L bars with stop ring which have only previously appeared in five sets in this colour. Overall, it's an excellent representation of 726 Western Train and a nice little display model in its own right.
AFOLs have been clamouring for the return of monorail for more than a decade now, and LEGO has steadfastly refused to bring it back, so it's perhaps ironic that the next set chosen to be immortalised in miniature form is the classic 6990 Monorail Transport System from 1987....
Consistent with the other builds the display base is first to be assembled, although uniquely in this case the base incorporates a section of elevated monorail track. The stanchions which support the single light bluish grey 16L track section upon which the monorail rests are represented by modified 1 x 2 plates with long towball.
The designers have done a cracking job of reproducing the full size monorail in miniature form, managing to nicely capture the overall shape and include most of the pertinent exterior details. Construction of the 3-wide chassis is facilitated by the use of an uncommon black 3 x 3 plate which is only appearing in a set for the tenth time in this colour and which forms a part of the floor of the monorail. Bionicle Barraki eyes are used to represent the characteristic trans-dark blue and trans-red lights on either side of the monorail. The full-sized monorail's 9V motor and connecting cable are particularly impressively reproduced, utilising a white robot body and a black flexible whip, while a pair of white hockey sticks, which were only previously available in eight sets in this colour, cleverly mimic the flexible hose which forms a loop at the front of the original model. There's also ingenious use of pairs of flat silver ice skates which attach to the underside of the body and are perfectly spaced to ensure that the monorail fits snugly on the single rail beneath and can smoothly slide backwards and forwards.
The classics just keep on coming with the much-loved 4558 Metroliner from 1991 next up for miniaturisation. Such was its popularity that the Metroliner was re-released in 2001 with a new set number (10001).
For the miniature Metroliner build we're back to using the same style of ground-level display base that was previously used for the Motorized Train Set and Western Train.
This is another great-looking miniature build which is once again pleasingly faithful to the original design. The distinctive red, white and blue stripes along the sides of the locomotive appropriately survive the miniaturisation process, as do various other prominent external landmarks. The front of the locomotive is fashioned from a variety of 45 degree slopes including black 2 x 1 45 degree slopes with 2/3 cutout and a trans-black 3 x 4 x 1 1/3 windscreen with 2 studs on top; all that's missing is a slope printed with the LEGO train logo from the 1990's. The attention to detail extends to the construction of twin bogies, each of which attaches to the underside of the train via a modified 2 x 2 tile with pin. This allows the bogies to rotate, which is impressive but ultimately unnecessary given that the train will never have to navigate a section of curved track. Black minifig handlebars representing a pantograph attach to the roof and complete the build.
We now come to the build that I was most looking forward to, the miniature version of 10194 Emerald Night which is one of my all-time favourite sets. Released in 2009, Emerald Night set a new standard for LEGO trains, and the high aftermarket prices are testament to its enduring popularity - it's an absolutely beauty!
Once again the same ground-level display base is utilized, and as a consequence there's only space to reproduce and display the locomotive itself - a miniature version of the tender is unfortunately not included in the build. That having been said, I don't think it would be particularly difficult to increase the length of the display base and design your own tender should you feel so inclined.
I'm pleased to report that the miniature Emerald Night doesn't disappoint - it's an excellent little build. Pretty much all of the key exterior detailing is reproduced apart from the connecting and coupling rods over the drive wheels. The front of the locomotive is cleverly sculpted by way of a black 4 x 3 wedge open with cutout and 4 studs, while the sides of the boiler are shaped via the use of 3 x 1 and 2 x 2 dark green curved slopes. Stickers featuring the set number in gold print are attached to the sides of the driver's cab in the original set; this detail is crudely reproduced here via the use of pearl gold 1 x 1 plates. The miniature build utilises six spoked train wheels with Technic axle hole and rubber friction band; fitting these is tricky as they need to be squeezed beneath tight overhangs, and in addition the 4L axles that attach them to the chassis are a very tight fit. The original Emerald Night features a total of six smaller front and trailing wheels in addition to its six large driving wheels, and these are also faithfully reproduced in the miniature version via more of the black small train wheels seen previously in the Metroliner miniature build.
The final build is a miniature version of 10254 Winter Holiday Train which was released in late 2016. This is in some ways a slightly surprising choice for inclusion in this collection given that it's such a recent offering and arguably not in the 'classic' bracket. Even so, it certainly brings the collection bang up to date.
After building the now-familiar ground-level display base for the fifth and final time, attention quickly shifts to the locomotive. Two sand green modified 1 x 1 bricks with studs on opposite sides, which are only appearing in a set for the second time, form part of the internal structure of the boiler, while the exterior of the boiler is shaped via the use of green 1 x 2 and 2 x 2 curved slopes with no studs. The roof of the driver's cab is made up of more green curved slopes, and a pearl gold modified 1 x 2 with handle on side - closed ends provides some decoration at the front of the cab.
The main drive wheels consist of a pair of red spoked train wheels with Technic axle hole and rubber friction band which are only appearing in a set for the second time in this colour, while four of the exclusive red small train wheels mimic the original's front wheels. The original Winter Holiday Train build featured a cow catcher at the front, and a black modified 1 x 2 plate with angled handles on the side does a good job of representing this in the miniature build.
With the miniature Winter Village Train build finished the full 50 Years on Track collection is complete and can be seen laid out below.
As a longstanding fan of LEGO trains I found this set to be an absolute joy to build. All six miniature models are superb representations of the full-size originals, and the attention to detail lavished on each of the builds is commendable. The set isn't quite perfect - given the choice I would probably have dropped the miniature Western Train and Winter Village Train and replaced them with miniature versions of any two of 396 Thatcher Perkins Locomotive, 7740 Inter-City Passenger Train Set, 6399 Airport Shuttle, or even 10233 Horizon Express. Minor gripes aside, however, the selection is undoubtedly varied and interesting, and I suspect that any longstanding fan of LEGO trains is pretty much guaranteed to find at least one of their favourites among them.
Similar to 41498 Boba Fett and Han Solo in Carbonite which I reviewed a few weeks back, it's a real shame that 4002016 50 years on Track was never available at retail and is thus destined to remain out of reach for many LEGO fans. If you want to acquire a copy of the set you'll need to venture on to the likes of Bricklink, which is what I did, or eBay; at time of writing, Bricklink prices start at around £125/$175 plus shipping for a new, sealed copy of the set. Not cheap, but I have no regrets - outstanding!
Once again the build commences with construction of a display base which is identical to that employed for the miniature Motorized Train apart from the printing on the display plaque. Similar to the previous build the train's headlights are fashioned from a pair of modified 1 x 1 headlight bricks which are laid on their backs thus making them 2- rather than 3-plates high, and again there's liberal use of jumper plates and cheese slopes which help to neatly mimic the original design at a smaller scale. The windows are formed from stacks of yellow modified 1 x 1 plates with vertical clip. This element exists in a number of different variants, and irritatingly those supplied with my copy of the set are a mixture of two different types and this is evident in the build as the clips don't line up as neatly as they should.
The sides of the boiler are fashioned from blue and black 45 degree 2 x 1 slopes with 2/3 cutout.
An uncommon yellow 1 x 2 x 2 panel with side supports makes an appearance at the front of the cab, while the back of the locomotive is made up of a red 1 x 4 x 2 panel with side supports; this element is only appearing in a set for the sixth time ever in this colour. The attention to detail is laudable - even the buffers and magnetic couplings of the original locomotive are modeled via the use of black Technic ball joints and red & blue 1 x 1 round tiles respectively. The coupling rods are also reproduced via the use of yellow 6L bars with stop ring which have only previously appeared in five sets in this colour. Overall, it's an excellent representation of 726 Western Train and a nice little display model in its own right.
AFOLs have been clamouring for the return of monorail for more than a decade now, and LEGO has steadfastly refused to bring it back, so it's perhaps ironic that the next set chosen to be immortalised in miniature form is the classic 6990 Monorail Transport System from 1987....
Consistent with the other builds the display base is first to be assembled, although uniquely in this case the base incorporates a section of elevated monorail track. The stanchions which support the single light bluish grey 16L track section upon which the monorail rests are represented by modified 1 x 2 plates with long towball.
The designers have done a cracking job of reproducing the full size monorail in miniature form, managing to nicely capture the overall shape and include most of the pertinent exterior details. Construction of the 3-wide chassis is facilitated by the use of an uncommon black 3 x 3 plate which is only appearing in a set for the tenth time in this colour and which forms a part of the floor of the monorail. Bionicle Barraki eyes are used to represent the characteristic trans-dark blue and trans-red lights on either side of the monorail. The full-sized monorail's 9V motor and connecting cable are particularly impressively reproduced, utilising a white robot body and a black flexible whip, while a pair of white hockey sticks, which were only previously available in eight sets in this colour, cleverly mimic the flexible hose which forms a loop at the front of the original model. There's also ingenious use of pairs of flat silver ice skates which attach to the underside of the body and are perfectly spaced to ensure that the monorail fits snugly on the single rail beneath and can smoothly slide backwards and forwards.
The classics just keep on coming with the much-loved 4558 Metroliner from 1991 next up for miniaturisation. Such was its popularity that the Metroliner was re-released in 2001 with a new set number (10001).
For the miniature Metroliner build we're back to using the same style of ground-level display base that was previously used for the Motorized Train Set and Western Train.
This is another great-looking miniature build which is once again pleasingly faithful to the original design. The distinctive red, white and blue stripes along the sides of the locomotive appropriately survive the miniaturisation process, as do various other prominent external landmarks. The front of the locomotive is fashioned from a variety of 45 degree slopes including black 2 x 1 45 degree slopes with 2/3 cutout and a trans-black 3 x 4 x 1 1/3 windscreen with 2 studs on top; all that's missing is a slope printed with the LEGO train logo from the 1990's. The attention to detail extends to the construction of twin bogies, each of which attaches to the underside of the train via a modified 2 x 2 tile with pin. This allows the bogies to rotate, which is impressive but ultimately unnecessary given that the train will never have to navigate a section of curved track. Black minifig handlebars representing a pantograph attach to the roof and complete the build.
We now come to the build that I was most looking forward to, the miniature version of 10194 Emerald Night which is one of my all-time favourite sets. Released in 2009, Emerald Night set a new standard for LEGO trains, and the high aftermarket prices are testament to its enduring popularity - it's an absolutely beauty!
Once again the same ground-level display base is utilized, and as a consequence there's only space to reproduce and display the locomotive itself - a miniature version of the tender is unfortunately not included in the build. That having been said, I don't think it would be particularly difficult to increase the length of the display base and design your own tender should you feel so inclined.
I'm pleased to report that the miniature Emerald Night doesn't disappoint - it's an excellent little build. Pretty much all of the key exterior detailing is reproduced apart from the connecting and coupling rods over the drive wheels. The front of the locomotive is cleverly sculpted by way of a black 4 x 3 wedge open with cutout and 4 studs, while the sides of the boiler are shaped via the use of 3 x 1 and 2 x 2 dark green curved slopes. Stickers featuring the set number in gold print are attached to the sides of the driver's cab in the original set; this detail is crudely reproduced here via the use of pearl gold 1 x 1 plates. The miniature build utilises six spoked train wheels with Technic axle hole and rubber friction band; fitting these is tricky as they need to be squeezed beneath tight overhangs, and in addition the 4L axles that attach them to the chassis are a very tight fit. The original Emerald Night features a total of six smaller front and trailing wheels in addition to its six large driving wheels, and these are also faithfully reproduced in the miniature version via more of the black small train wheels seen previously in the Metroliner miniature build.
The final build is a miniature version of 10254 Winter Holiday Train which was released in late 2016. This is in some ways a slightly surprising choice for inclusion in this collection given that it's such a recent offering and arguably not in the 'classic' bracket. Even so, it certainly brings the collection bang up to date.
After building the now-familiar ground-level display base for the fifth and final time, attention quickly shifts to the locomotive. Two sand green modified 1 x 1 bricks with studs on opposite sides, which are only appearing in a set for the second time, form part of the internal structure of the boiler, while the exterior of the boiler is shaped via the use of green 1 x 2 and 2 x 2 curved slopes with no studs. The roof of the driver's cab is made up of more green curved slopes, and a pearl gold modified 1 x 2 with handle on side - closed ends provides some decoration at the front of the cab.
The main drive wheels consist of a pair of red spoked train wheels with Technic axle hole and rubber friction band which are only appearing in a set for the second time in this colour, while four of the exclusive red small train wheels mimic the original's front wheels. The original Winter Holiday Train build featured a cow catcher at the front, and a black modified 1 x 2 plate with angled handles on the side does a good job of representing this in the miniature build.
With the miniature Winter Village Train build finished the full 50 Years on Track collection is complete and can be seen laid out below.
As a longstanding fan of LEGO trains I found this set to be an absolute joy to build. All six miniature models are superb representations of the full-size originals, and the attention to detail lavished on each of the builds is commendable. The set isn't quite perfect - given the choice I would probably have dropped the miniature Western Train and Winter Village Train and replaced them with miniature versions of any two of 396 Thatcher Perkins Locomotive, 7740 Inter-City Passenger Train Set, 6399 Airport Shuttle, or even 10233 Horizon Express. Minor gripes aside, however, the selection is undoubtedly varied and interesting, and I suspect that any longstanding fan of LEGO trains is pretty much guaranteed to find at least one of their favourites among them.
Subscribe to:
Comments (Atom)

