Showing posts with label lego trains. Show all posts

Monday, 9 May 2016

Strange Cargo

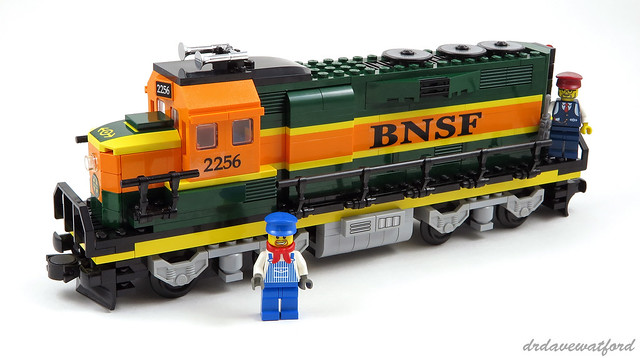
Having built and reviewed the Burlington Northern Santa Fe locomotive (below) in my previous post I was keen to see it in action on my work-in-progress city layout, but there were a couple of things I had to attend to first.


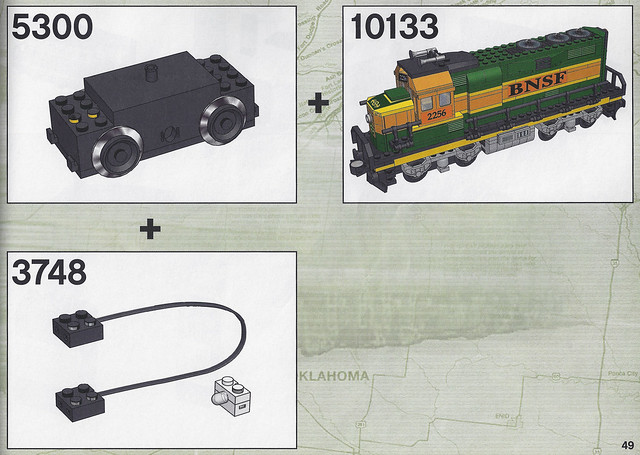
Firstly, the set isn't motorised out of the box, so I needed to incorporate a motor in order to get it running. Thankfully, LEGO has helpfully devoted a few pages of the BNSF instruction booklet to the incorporation of a 9V motor into the locomotive, and since I'd recently laid 9V track on my layout this was exactly what I was looking to do. As an added bonus, I discovered that the instruction booklet also includes instructions (sample page below) for incorporating a working light at the front of the locomotive; LEGO even previously produced a service pack, 3748 Light Unit for Train, which includes all the required elements to do this. Unfortunately, at the time of writing there were only 5 Bricklink sellers anywhere in the world with copies of this service pack for sale; given that the lowest asking price was around £13 + shipping for a service pack containing just 4 elements I figured I could probably pick up the elements I needed individually on Bricklink for a lot less, and that was indeed the case.

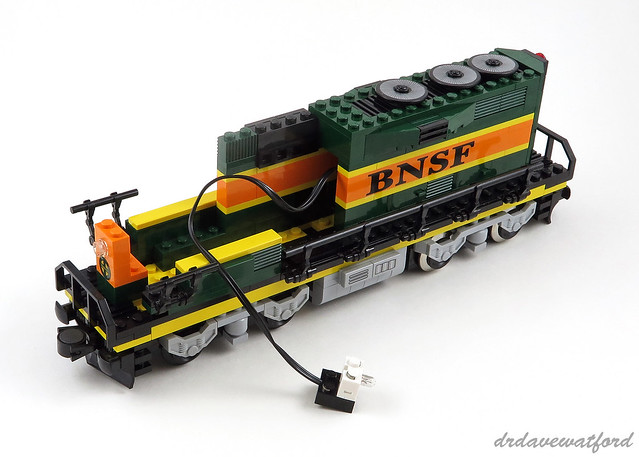
Fitting a 9V motor to the BNSF locomotive turned out to be very straightforward, basically just a case of detaching the rear wheel assembly and clicking the 5mm pin at the top of the motor into the now-vacant hole in the underside of the train base. Anticipating the desire of purchasers to motorise the locomotive, LEGO included a pair of decorative sides in the BNSF set which attach to the sides of motor and give it the appearance of a standard brick-built wheel assembly. Installing a light at the front of the locomotive required a little more effort, however, necessitating the removal of the driver's cab and part of the bodywork. One end of a 36 stud-long wire is attached to the 9V motor, while the other end is threaded through the train base into the body of the locomotive (below) and attached to a 1 x 2 light brick which is installed immediately behind the orange 1 x 2 Technic brick at the front of the loco. The cab is then replaced and the body reconstructed.

With the locomotive now motorised and a light brick installed, the other question I had to address was what rolling stock it should haul. My assumption has always been that the BNSF locomotive is supposed to be paired with Set 10170 TTX Intermodal Double-Stack Car (below) on the basis of the similar set branding plus the fact that both sets were released at around the same time; further evidence is provided by the BNSF Railway Company itself which claims on its website to transport more intermodal units each year than any other railroad in the U.S.. The problem is that I only have a single copy of Set 10170, and a train consisting of the BNSF locomotive plus just a single intermodal double-stack car would look a bit rubbish I reckon. Of course there's always eBay or Bricklink, but with complete examples of Set 10170 regularly changing hands for anything up to £100 or more plus shipping I wasn't overjoyed at the prospect of paying out £300+ to lay my hands on a few more of them....


An alternative was therefore needed, and I immediate thought of Set 10016 Tanker Truck which was released in 2001. I've long had a soft spot for this set, perhaps as a result of its nostalgia-inducing Octan branding, and in fact you may already have seen one of these trucks in some of the more recent pictures of my layout such as this one. Anyway, as well as having a couple of 'official' copies of the set I also bought up the necessary elements from Bricklink and elsewhere a few years back to build a few more of them, so I certainly have enough to provide my BNSF locomotive with a worthwhile cargo to haul.
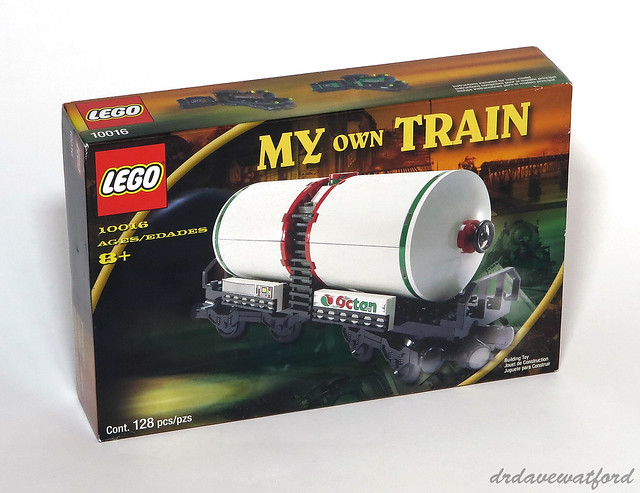

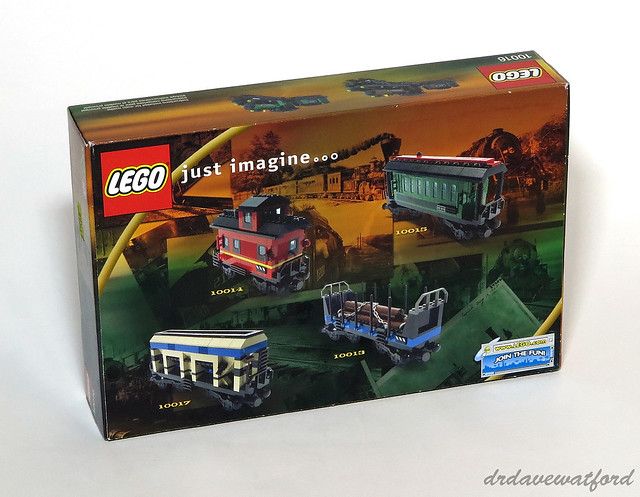
The front of the 10016 box (above) features an image of the assembled tanker truck and carries the My Own Train branding which graced more than forty 9V train-related sets between 2001 and 2004. A number of other 2001 My Own Train releases such as 10013 Open Freight Wagon and 10017 Hopper Wagon are showcased on the back of the box (below).

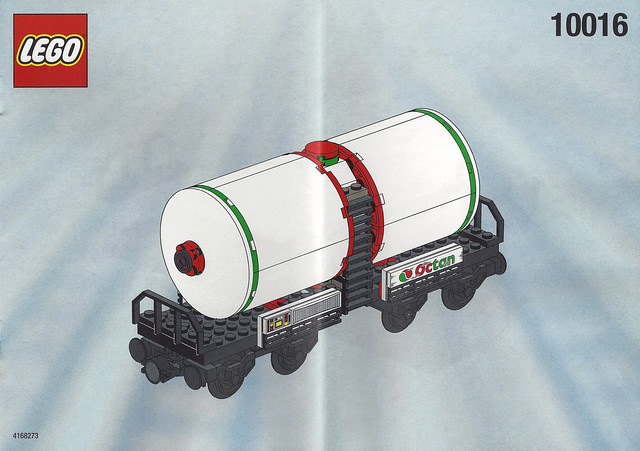
The set's 128 elements are supplied in three sealed bags, and the set box also contains a 16-page instruction booklet, the cover of which you can see below. Similar to the instruction booklet for the BNSF locomotive (reviewed by me here), there's no advertising or other filler included in the booklet at all - every page apart from the front cover is occupied by building instructions.

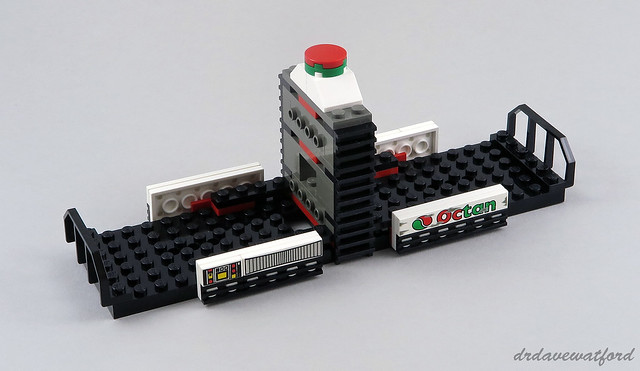
The set doesn't include any minifigures, and the build is quick and straightforward. The foundation of the tanker truck is a black 6 x 24 train base. Modified 1 x 6 plates with train wagon end are installed at either end of the train base, and brackets are placed along the sides to which a variety of printed tiles are attached (picture below). The 1 x 6 tile printed with 'distressed' Octan branding is rare, having only ever appeared in two sets including this one, while the white 1 x 4 tile with black stripes has featured in just 8 sets in total. The central structure which supports the tank is then constructed and a number of black 1 x 2 modified plates with ladder are attached on either side of it.

The tank is constructed in two identical halves which predominantly consist of white 4 x 4 x 6 quarter cylinders. These elements are quite rare in white, having only ever appeared in a total of 8 sets. The quarter cylinders are held together by red and green 4 x 4 round corner plates together with a central core of stacked 2 x 2 bricks. White 8 x 8 inverted dishes are attached at either end; similar to the cylinders these are surprisingly uncommon in this colour, having only ever appeared in five sets including this one. The two halves of the tank are then attached to the rest of the truck by way of a number of 1 x 4 modified bricks with 4 studs on one side which are incorporated into the central supporting structure. With the tank installed it's then just a case of constructing a couple of identical wheel assembies topped off with train bogie plates and clicking the wheel assemblies into the underside of the train base, at which point we're done.
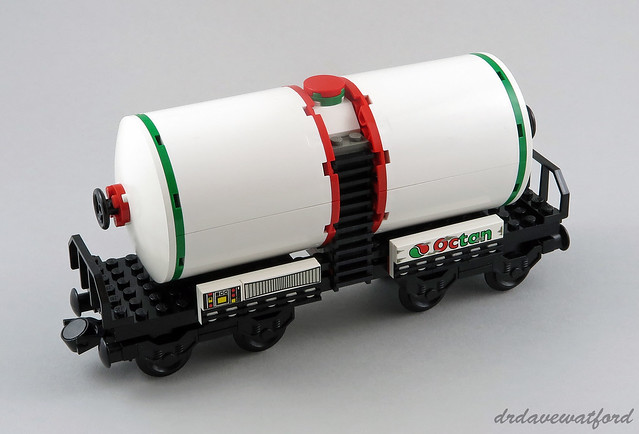

I ended up with a total of six tanker trucks including the one I'd previously assembled. With my BNSF locomotive motorised and packing a working headlight, and some rolling stock now built, it was finally time to power up the upper loop of my work-in-progress city layout and do a test run (video clip embedded below, or here if the embedded clip won't play on your device). I did wonder whether the 9V motor might struggle when faced with the weight of the locomotive plus six tanker trucks, but as you can see from the video I needn't have worried - the motor shifts the trucks with surprisingly little difficulty, and indeed I suspect it could have managed to pull a few more as well.
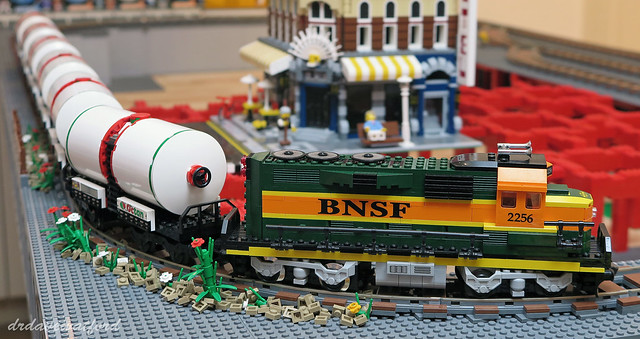
Testing 10133 Burlington Northern Santa Fe

The train is travelling at half speed in the video, and at this speed the illumination of the headlight is barely perceptible unless the ambient lighting is low. Unlike modern LEGO lighting which is powered by a Power Functions battery box and remote, the brightness of the light can't to my knowledge be controlled independent of the speed of the motor. There's nothing stopping you from combining both 9V and Power Functions systems in one model, however, which is exactly what I've done in the train that runs on the subterranean loop of my layout and which includes a 9V motor and also a Power Functions battery box, lights and a remote receiver (more information here).


I've really enjoyed playing with trains over the past few weeks, but it's turned out to be a really bad move financially. While I already owned the BNSF locomotive and tanker trucks featured in the last couple of Gimme LEGO posts, I got so engrossed in it all that I made the mistake of checking out the train-related LEGO offerings on eBay. This was of course very dangerous as I predictably ended up splashing out on a whole bunch of additional 9V trains and rolling stock. Beware - LEGO trains are addictive, and expensive....

Monday, 18 April 2016

The Other Santa Fe

One of the cool things about my ongoing MOC City Layout project is that it features two loops of old-style LEGO 9V track, thus providing me with the perfect excuse to dig out and revisit some of my favourite LEGO 9V trains. After all, I've been accumulating LEGO trains for years - one of the first sets that I ever owned was Set 171 Train Set without Motor - and my love of LEGO trains was one of the main reasons that I embarked upon on my LEGO City project in the first place.

Anyway, having recently finished installing the upper track loop of my city, I decided that I'd mark the milestone by building a classic LEGO 9V train and use it to test the newly-laid 9V track. But which train to choose? Well, if we're talking classic 9V trains then many fans probably wouldn't look beyond the coveted and much-loved Set 10020 Santa Fe Super Chief, which I previously posted about here and here and also wrote about in the first ever issue of Bricks Magazine. Being a master contrarian, however, I thought that the Super Chief would be too obvious, so I've therefore decided instead to tackle the Super Chief's less glamorous sibling, Set 10133 Burlington Northern Santa Fe Locomotive, or BNSF for short.


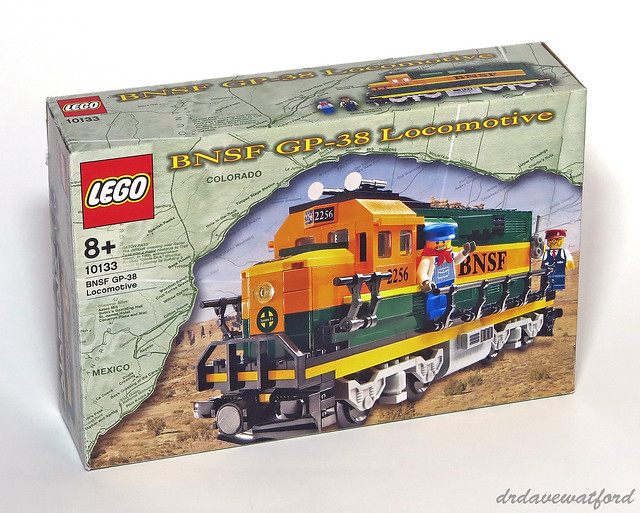
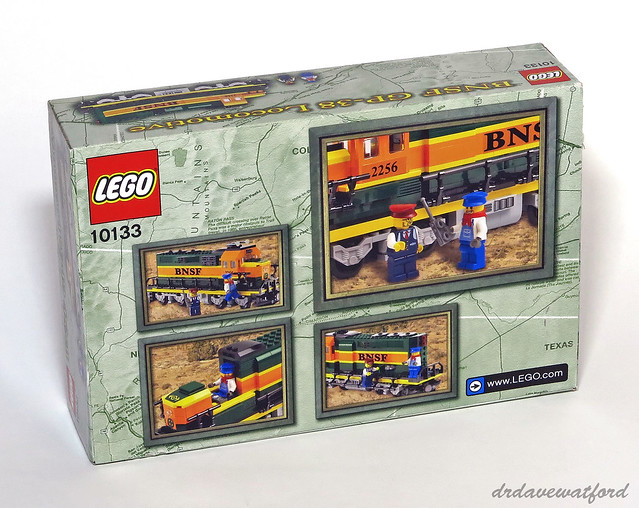
Set 10133 was released back in 2005, three years on from the Super Chief, but the two set boxes nevertheless carry the same branding and background artwork featuring a map of part of the Santa Fe railroad which runs from New Mexico to Colorado and into Kansas. The front of the box (above) also features a cutaway showing a photograph of barren desert terrain superimposed with an image of the completed BNSF model plus minifigures, while the back of the box (below) is dominated by a number of boxouts which provide some alternate views of the set contents.


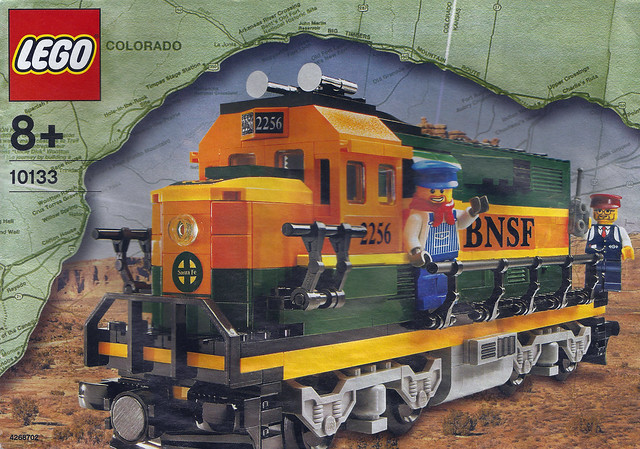
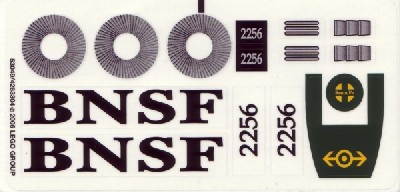
The box is designed to be opened via a couple of thumb tabs. My copy of the set was pre-owned so I don't know how many bags of elements it contained when new; I can't provide you with a scan of the set's single sticker sheet either as the stickers had already been applied to the bricks in my copy of the set, but thanks to the wonders of Bricklink you can see an image of the unused sticker sheet here. The set contains a single instruction booklet, the front cover of which (below) carries the same imagery as the front of the box. The booklet is 56 pages long, and unusually there's not a single advertisement or other distraction - the building guide occupies every single page apart from the front cover.


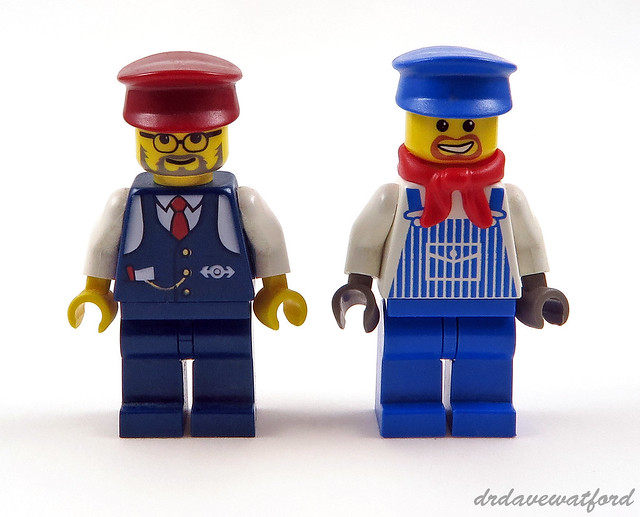
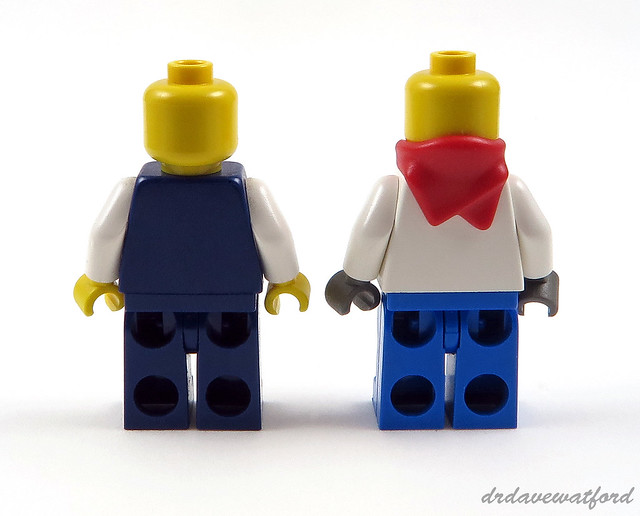
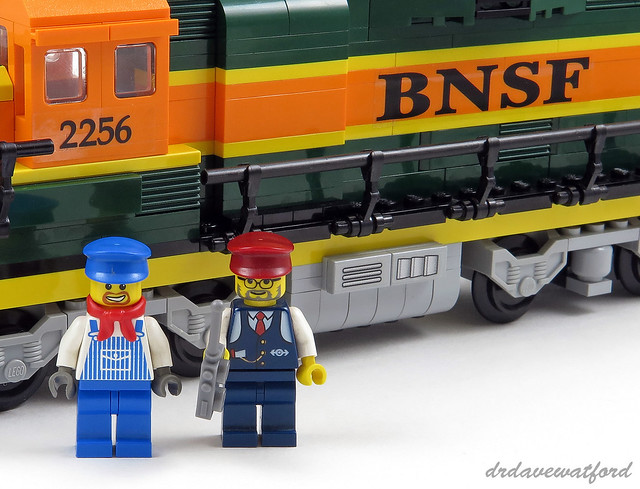
The set contains two minifigures - Conductor Charlie and Engineer Max. Conductor Charlie (below, left) can be found in a total of six sets including this one. His torso print, featuring a dark blue waistcoat complete with a fob watch, is exclusive to this minifigure but his unprinted dark blue legs, head print and dark red hat can be found as a constituent part of many other minifigures. Engineer Max (below, right) appears in just four sets. The combination of his white arms, old dark grey hands and a torso print featuring blue striped overalls is exclusive to the minifigure, although his blue hat, red bandana and head print can all be readily found elsewhere.


You can see a rear view of the two minifigures minus their hats below. Neither Charlie nor Max has a backprinted head or a backprinted torso so there's not much of interest to see here


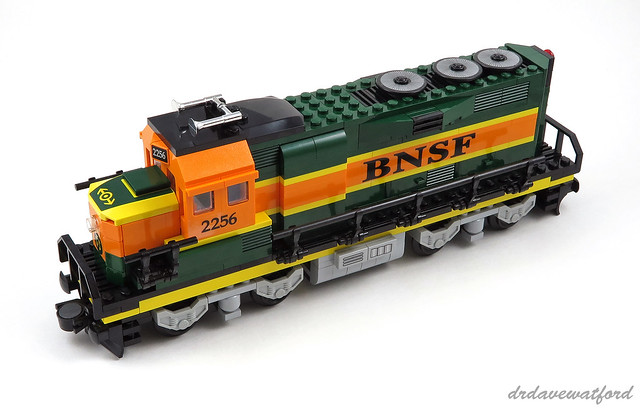
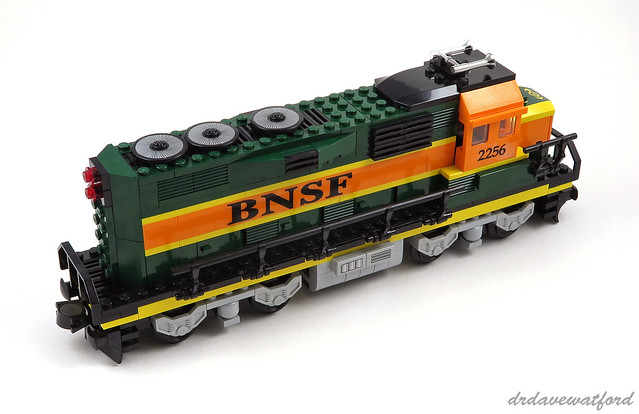
The BNSF locomotive is constructed on a yellow 6 x 28 train base which is exclusive to the set. The build starts with the placement of a black 1 x 6 train wagon end at both ends of the train base, while railings consisting of 19L rigid hoses are attached on either side. The body of the locomotive is then constructed, initially from a variety of dark green elements including 1 x 3 and 1 x 6 bricks, 1 x 8 plates, modified 1 x 2 bricks with grille, and left and right 1 x 3 x 1 doors, all of which are unique to the set in this colour. Yellow plates and orange bricks and plates are layered on top, after which we're back on to dark green for the roof of the locomotive which features yet more rare dark green elements including modified 2 x 2 bricks with a curved top and 2 top studs, left and right 3 x 2 wedges, and a 4 x 6 plate, none of which had been seen before in dark green prior to the release of this set.


The tapered front and rear of the locomotive are fashioned in dark green, yellow and orange using SNOT techniques; once again we see the appearance of elements such as dark green 45 degree 2 x 4 slopes which were unique to the set at the time of its release. An orange Technic 1 x 2 brick with a hole, which had previously only appeared in two sets, is placed at the front of the locomotive, and a trans-clear 1 x 1 round plate is inserted into the hole as a headlight. A dark bluish grey printed 1 x 4 tile is used to represent the control panel in the driver's cab. Large stickers provide the 'BNSF' lettering which runs along both sides of the body. These stickers are STAMPs, i.e. they traverse multiple elements; this practice leads to difficulties in terms of dissassembling models when you're done with them and also compromises the longevity of the stickers themselves, so we should definitely be thankful that LEGO have largely stopped using stickers in this way over recent years.


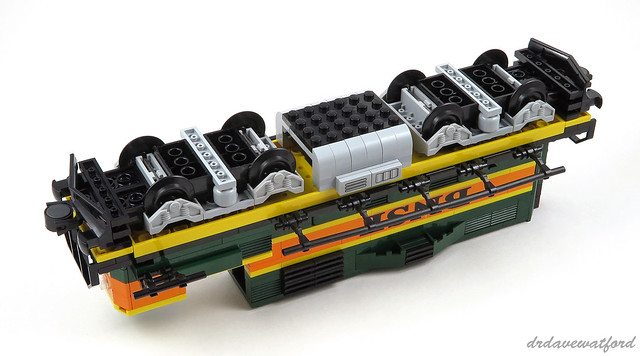
With the superstructure now largely complete it's time to get to work on the structures underneath the train base (below) including the wheel assemblies, or bogies if you prefer. These feature the use of unprinted light bluish grey minifigure heads which had only previously appeared in a total of 4 sets. Each completed wheel assembly clicks into a hole on the underside of the train base by way of a 5mm pin on the top of a train bogie plate; this attachment allows limited horizontal rotation sufficient to enable the locomotive to successfully negotiate curved track sections. I believe that the structure sandwiched between the wheel assemblies is supposed to represent a fuel tank; the tiles on either side of it are stickered rather than printed. Both wheel assemblies feature a standard magnetic coupling for attachment to rolling stock, another locomotive or a B unit.


With the bogies and fuel tank assembled and attached, all that's left to do is complete the driver's cab and add a couple of final details. STAMPs once again feature, specifically the unit number on either side of the cab. The orange 30 degree 1 x 1 x 2/3 slopes, a.k.a. cheese slopes, which protrude from the front of the cab are also stickered with the unit number. The cab incorporates a number of rare orange elements; the six 1 x 2 x 2 plane windows remain unique to the set to this day, while other elements including 1 x 3 plates, modified 1 x 1 bricks with headlight, modified 1 x 2 plates with door rail and 45 degree 2 x 4 slopes have to date appeared in just 8 sets or less in this colour.


A couple of uncommon chrome silver car air horns are mounted on the roof of the cab, while further back three stickered black Technic 3 x 3 discs are mounted on top of the body towards the rear; I believe that these are supposed to represent cooling fans. In addition to their appearance in this set, these stickered Technic discs have also been utilised in Set 10020 Santa Fe Super Chief plus the more recent Set 10219 Maersk Train, both of which are, like the BNSF locomotive, also diesels.


You can see the finished build complete with minifigures in the picture below. While not as sleek or elegant as the Super Chief, I can't help but love the eye-catching colour scheme of the BNSF locomotive. It's also worth noting that the model is a pretty respectable representation of the real train - you can see a picture of the actual BNSF unit 2256 here.


In addition to its aesthetic merits, this set is also notable from the perspective of the elements that it includes. Not only was it one of the first sets to include dark green elements in any real quantity, but it was also one of the very first sets to include the now-ubiquitous cheese slope. Furthermore, as previously described, the BNSF locomotive incorporates loads of rare elements, some of which continue to be unique to the set more than ten years after its release.


The BNSF locomotive might not be as celebrated as the Super Chief, but it's still pretty collectable. Retailing for just £24.99 / US$40.00 at the time of its release, you'll now need to stump up well over £200 / US$300 for a sealed copy on Bricklink; I was lucky enough to pick up my used, boxed example back in early 2010 for a little over £50 plus shipping, but it would set me back around three times as much to buy it in the same condition now.

Monday, 9 November 2015

The Countdown Begins....

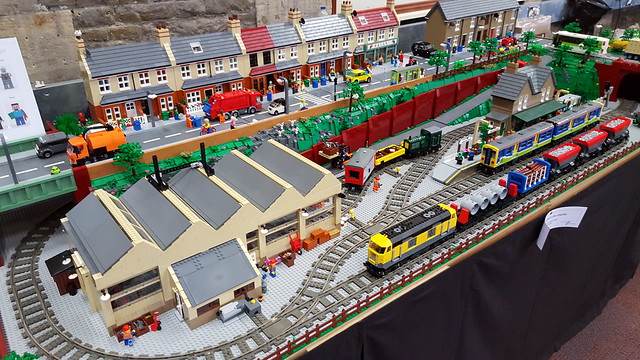
Regular readers may recall that I posted a piece on Gimme LEGO a couple of weeks back about my preparations for this year's Great Western Brick Show, a.k.a. STEAM, and my experience of exhibiting at the show - you can read it here if you missed it. As luck would have it, I was allocated display space next to Brickset's Huw Millington who was exhibiting his excellent Brickton train layout (picture below) at the show. Because our displays were adjacent to each other, I ended up babysitting Brickton on a few occasions when Huw took a break, and I therefore got to have a play with the trains (which mysteriously derailed a couple of times on my watch, but we'll not dwell on those unfortunate incidents....).

Brickton by Huw Millington, Photograph by Jamie Douglas
I have to say that it was great fun to spend some time presiding over Brickton during the STEAM weekend, so much so that it's inspired me to crack on with my own work-in-progress City Layout. Not only that, but I've somewhat rashly decided that I'm going to try to get my layout sufficiently display-worthy to exhibit at next year's Great Western Brick Show. Yes, really.... I accept that those of you who've been patiently following my painfully slow progress are probably shaking your heads in bemusement at this news - I have after all been working on my layout since November 2010 and I don't exactly have much to show for it - but I'm going to give it a go. As an added incentive, Huw has confirmed that he's going to continue to develop Brickton and plans to show a new and improved version of it at STEAM next year; if I can get my layout ready in time, and if STEAM organiser Martin Long will let me display it there, then Huw's agreed that we can link our displays together at the show so that trains can run from one layout to the other. So I'd better crack on, then....


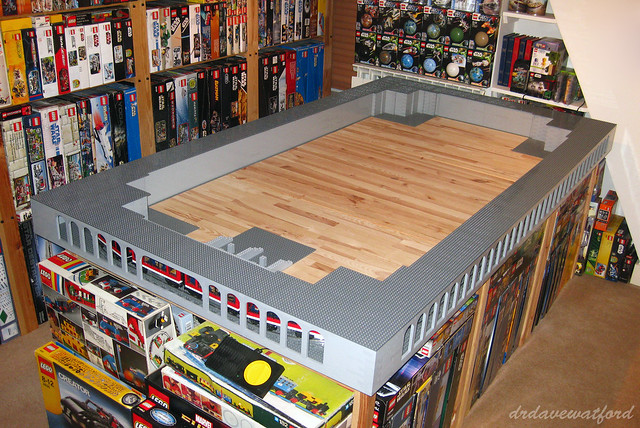
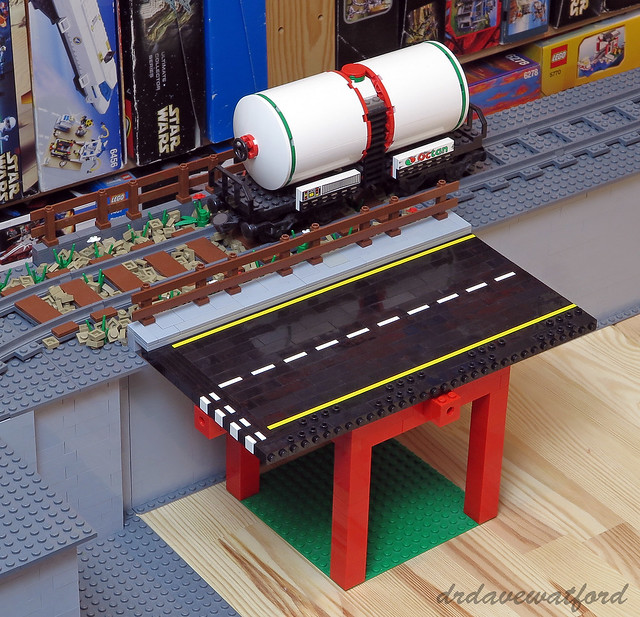
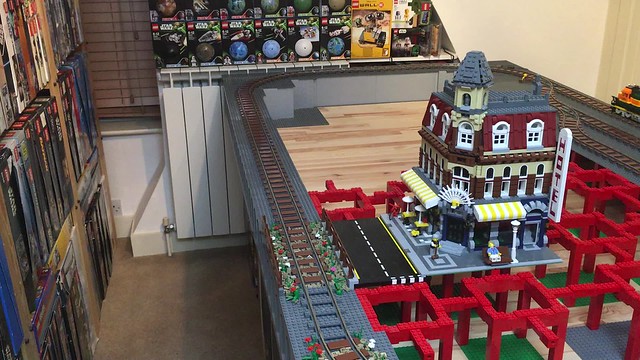
Last time I posted an update on my City Layout I'd just completed putting a roof over the subterranean track loop as you can see in the picture above. Since then I've started to think about how the next level of my city will fit together. The first thing I did was lay down a few track sections at what will be ground level. Dark bley track on a dark bley base looked predictably monotonous, so to address that I used some reddish brown tiles as sleepers and filled the space between and around the sleepers with ballast consisting of dark tan 1 x 1 plates as you can see in the picture below (click to enlarge). The sleepers are obviously too wide to be true to life, but I still think that the effect is quite pleasing. The ballast also looks okay I reckon, and the addition of a few plant stalks and the odd flower here and there helps to give the track a slightly more realistic feel, not to mention perfectly complementing the colour scheme of the tanker truck (Set 10016) that I've posed on the track.... Running some dark reddish brown fencing down the outside of the track helps to stop the ballast from falling off the sides of the layout, as well making things look nice and tidy.


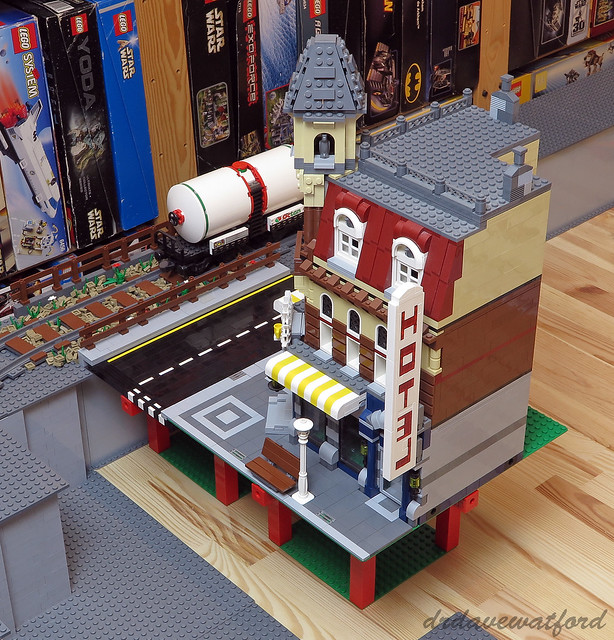
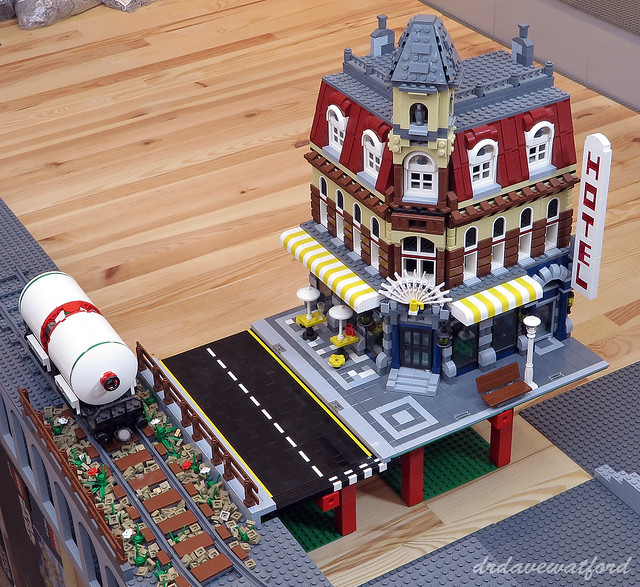
Having made a start on the ground level track loop, the next thing I wanted to do was to attach a section of road alongside the track. It's interesting that having recently experimented with a variety of techniques for constructing and integrating brick-built roads I've ended up going back to something not too dissimilar to what I worked out back in August 2011 when I first played around with with brick-built roads here. One of the things I needed to figure out was how best to neatly transition from track to road; I ended up building a three stud-wide pavement to separate them (picture below - click to enlarge) with more reddish brown fencing employed trackside to protect pedestrians. The road is supported underneath by a modular brick-built scaffold, and I envision that the whole ground level of the city inside the outer track loop will eventually be supported by similar scaffolds. The road itself is predominantly built from one stud-wide black bricks which are laid on their sides; by building the roads in this way I figure that I'll be able to create a studless road surface relatively inexpensively, and it also enables me to fashion suitably thin road markings out of yellow and white plates and tiles sandwiched between the black bricks. I spent a while debating what colour the roads should be before eventually deciding to build them in black rather than dark bley; while black is probably less realistic I do think that it'll provide a better contrast with the surrounding structures - my city already features more than enough bley and dark bley I reckon. The outer edges of the road section incorporate a number of modified 1 x 4 bricks with four studs on one side; the studs on the side of these bricks attach to the underside of the pavement, thus holding the road firmly in position.


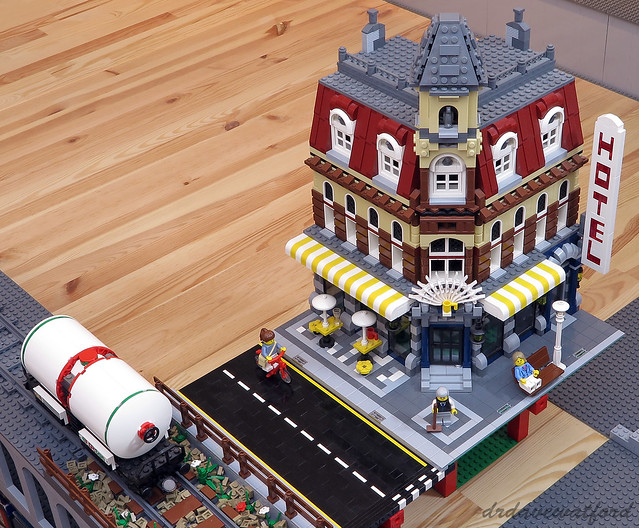
With a section of brick-built road in place the next task was to neatly transition from the road to a building, and for this I called upon my trusty Cafe Corner (below - click to enlarge). Modified 1 x 4 bricks with four studs on one side attached to the edge of the road section are again used to anchor the road to the underside of the pavement next to the building and hold everything nicely in position.


I'm planning on populating my city with a mixture of modular buildings, for example Cafe Corner and Green Grocer, and a selection of MOCs. Over time my intention is to gradually phase out the official sets and replace them with more of my own creations, but until that time comes LEGO's beautiful and iconic modulars will more than suffice I think.


And that's as far as I've got for now. Having started to figure out how the various components making up my city will fit together, the next step will be to get to work in earnest on the modular scaffold which will underpin all the ground level structures, although given that I've used up most of my supply of loose red bricks on the frame of my Manic Miner mosaic, it looks like I'm going to need to raid Bricklink once again to stock up. So raid Bricklink I shall - there's no time to waste as the countdown to STEAM 2016 has well and truly begun.....


Monday, 2 May 2011

Favourite Sets #5 : Emerald Night

When I was a boy, LEGO trains were a simple affair, barely resembling 'real' trains at all other than for the fact that they (usually) came with flanged wheels and ran on rails. Not that I cared - my first LEGO train was Set 171 Train Set without Motor and I adored it, particularly when my parents subsequently bought me the accessories that I needed to motorise it. It's probably worth mentioning that my childhood was during a simpler age when the ability to propel a LEGO train around a circle of blue railway track using a battery-driven motor still carried with it a genuine 'wow' factor.....

My first LEGO train......
I emerged from my almost-obligatory LEGO Dark Ages a few years ago, and it quickly became clear that things had moved forward on the train front in terms of realism. Set 7989 Cargo Train Deluxe and Set 7897 Passenger Train were available at retail at that time. Both these sets made a better fist of looking like 'real' trains, and the Cargo Train in particular came with some interesting rolling stock, trackside vehicles and extra track including a set of points. Also, both came with motors and could be remote-controlled to move forwards or backwards at various speeds, in stark contast to the system of my youth when you had to flick a switch on the battery box to get the train moving and then run after the thing and flick the switch again to make it stop..... All that having been said, neither the Cargo Train nor Passenger Train had enough to entice me back into the train fold at that time. For me they lacked that all-important 'wow' factor, so my re-introduction to LEGO trains was further delayed even as I immersed myself in the delights of the LEGO Modular Buildings, Star Wars sets and other goodies.

All that changed in early 2009 when I stumbled across some early publicity shots and a video of Set 10194 Emerald Night. I initially couldn't quite believe that this beautiful steam train was even made from LEGO, such was its aesthetic beauty. I wanted it so badly that I made a special trip to my nearest LEGO brand store (which by UK standards really isn't that near.....) on the day of launch to get one.

Beautiful !
Usually I build sets, enjoy them for a few weeks or months, and then disassemble them and return them to their boxes. I've had Emerald Night built and on display in my house since the day I bought it, however. The only other sets I've kept and cherished in that way are my Modular Buildings. In my eyes Emerald Night is absolutely beautiful - perfect. Admittedly I'm no train-spotter, but to me it looks like a 'real' train, and it manages to do so without a bucketload of brand-new custom-designed parts made specifically for the set. There are a couple, certainly - the large train wheels were made specifically for this set, for instance - but by and large this set consists of 'real' LEGO pieces magically combined into a work of genius. I just love it - I love the overall design, the colour scheme, the splendid coach that comes with the set, even the grumpy-looking train driver with his red necktie. And not only that, but it can be motorised with minimal effect on the aesthetics, it runs well, and it even has a couple of lights at the front which are cleverly integrated into the design. Gorgeous !

Mr. Grumpy the Train Driver


Even the Passengers and Conductor love Emerald Night.....


My love-affair with Emerald Night is largely a harmonious one, but there are a couple of bittersweet elements to it. Firstly, I remain frustrated that the LEGO company don't sell standalone coaches for Emerald Night. Watching this magnificent locomotive pulling just one coach looks a bit pathetic to be honest. The only ways round this are either to buy multiple copies of the set and try to sell the spare locomotives to make it financially viable, or to source the parts needed to build additional coaches from the likes of Bricklink or LEGO's own Pick A Brick service. The problem is that some of the parts such as the tan window frames and light blue-gray curved coach roof pieces are quite rare and hence extremely expensive in the numbers required. I've personally already spent a fortune trying to aquire the parts for an additional 5 coaches, and some of those parts are still on order.....

The other main problem is the effect that my discovery of Emerald Night has had on me, and more specifically my bank balance. My newly rekindled love-affair with LEGO trains encouraged me to explore LEGO's back catalogue of retired trains, and in this way I've discovered a number of other superb trains and accessories from the past which have cost me a small fortune to source. These include Set 10020 Santa Fe Super Chief plus its unique coaches, which I eulogised about in a previous blog posting, and Set 10133 Burlington Northern Santa Fe (BNSF) to name just a couple. Then there's the fact that I've been inspired to plan and construct a sizeable layout for my LEGO trains which will require substantial space and cash for the 10,000+ pieces that it will take to build. After all, my Emerald Night plus 6 coaches (once completed) will need somewhere fitting to run.....

Mine, all mine !
So buy Emerald Night at your peril. It's beautiful, but it can take you down a slippery slope from which you may never return.....