Showing posts with label 9V. Show all posts

Monday, 9 May 2016

Strange Cargo

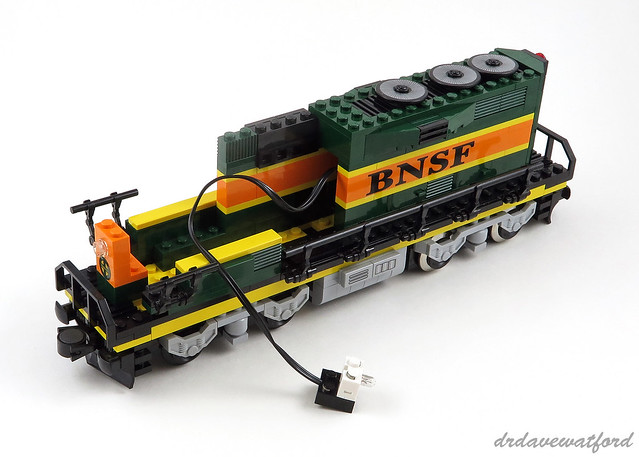
Having built and reviewed the Burlington Northern Santa Fe locomotive (below) in my previous post I was keen to see it in action on my work-in-progress city layout, but there were a couple of things I had to attend to first.


Firstly, the set isn't motorised out of the box, so I needed to incorporate a motor in order to get it running. Thankfully, LEGO has helpfully devoted a few pages of the BNSF instruction booklet to the incorporation of a 9V motor into the locomotive, and since I'd recently laid 9V track on my layout this was exactly what I was looking to do. As an added bonus, I discovered that the instruction booklet also includes instructions (sample page below) for incorporating a working light at the front of the locomotive; LEGO even previously produced a service pack, 3748 Light Unit for Train, which includes all the required elements to do this. Unfortunately, at the time of writing there were only 5 Bricklink sellers anywhere in the world with copies of this service pack for sale; given that the lowest asking price was around £13 + shipping for a service pack containing just 4 elements I figured I could probably pick up the elements I needed individually on Bricklink for a lot less, and that was indeed the case.
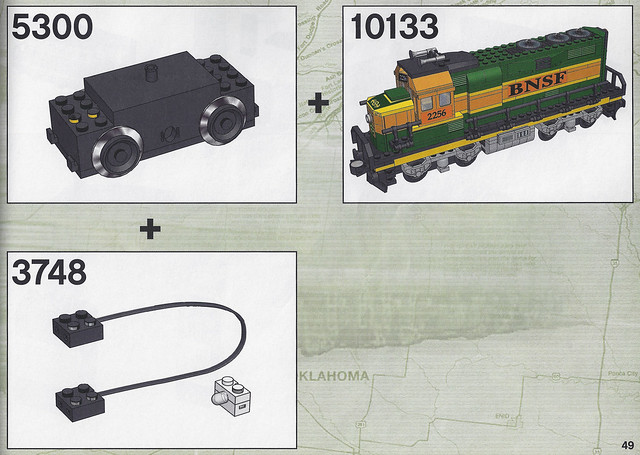

Fitting a 9V motor to the BNSF locomotive turned out to be very straightforward, basically just a case of detaching the rear wheel assembly and clicking the 5mm pin at the top of the motor into the now-vacant hole in the underside of the train base. Anticipating the desire of purchasers to motorise the locomotive, LEGO included a pair of decorative sides in the BNSF set which attach to the sides of motor and give it the appearance of a standard brick-built wheel assembly. Installing a light at the front of the locomotive required a little more effort, however, necessitating the removal of the driver's cab and part of the bodywork. One end of a 36 stud-long wire is attached to the 9V motor, while the other end is threaded through the train base into the body of the locomotive (below) and attached to a 1 x 2 light brick which is installed immediately behind the orange 1 x 2 Technic brick at the front of the loco. The cab is then replaced and the body reconstructed.

With the locomotive now motorised and a light brick installed, the other question I had to address was what rolling stock it should haul. My assumption has always been that the BNSF locomotive is supposed to be paired with Set 10170 TTX Intermodal Double-Stack Car (below) on the basis of the similar set branding plus the fact that both sets were released at around the same time; further evidence is provided by the BNSF Railway Company itself which claims on its website to transport more intermodal units each year than any other railroad in the U.S.. The problem is that I only have a single copy of Set 10170, and a train consisting of the BNSF locomotive plus just a single intermodal double-stack car would look a bit rubbish I reckon. Of course there's always eBay or Bricklink, but with complete examples of Set 10170 regularly changing hands for anything up to £100 or more plus shipping I wasn't overjoyed at the prospect of paying out £300+ to lay my hands on a few more of them....


An alternative was therefore needed, and I immediate thought of Set 10016 Tanker Truck which was released in 2001. I've long had a soft spot for this set, perhaps as a result of its nostalgia-inducing Octan branding, and in fact you may already have seen one of these trucks in some of the more recent pictures of my layout such as this one. Anyway, as well as having a couple of 'official' copies of the set I also bought up the necessary elements from Bricklink and elsewhere a few years back to build a few more of them, so I certainly have enough to provide my BNSF locomotive with a worthwhile cargo to haul.
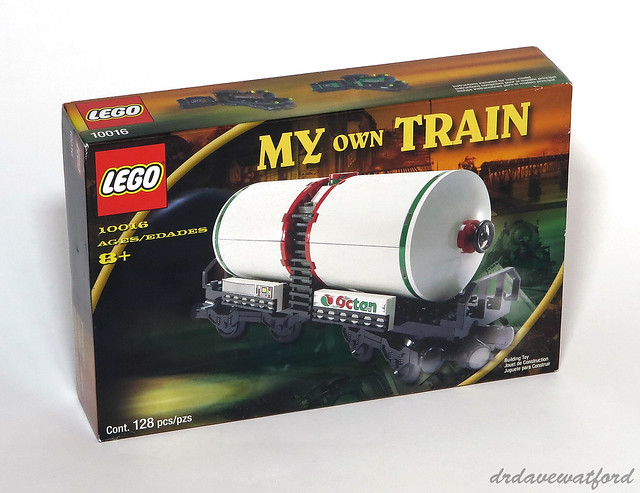

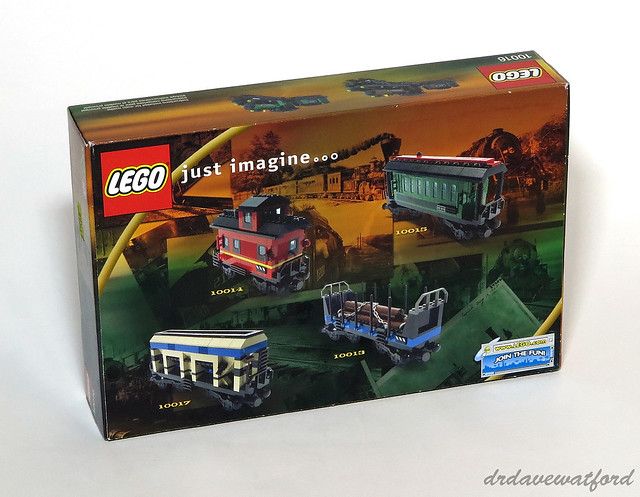
The front of the 10016 box (above) features an image of the assembled tanker truck and carries the My Own Train branding which graced more than forty 9V train-related sets between 2001 and 2004. A number of other 2001 My Own Train releases such as 10013 Open Freight Wagon and 10017 Hopper Wagon are showcased on the back of the box (below).

The set's 128 elements are supplied in three sealed bags, and the set box also contains a 16-page instruction booklet, the cover of which you can see below. Similar to the instruction booklet for the BNSF locomotive (reviewed by me here), there's no advertising or other filler included in the booklet at all - every page apart from the front cover is occupied by building instructions.
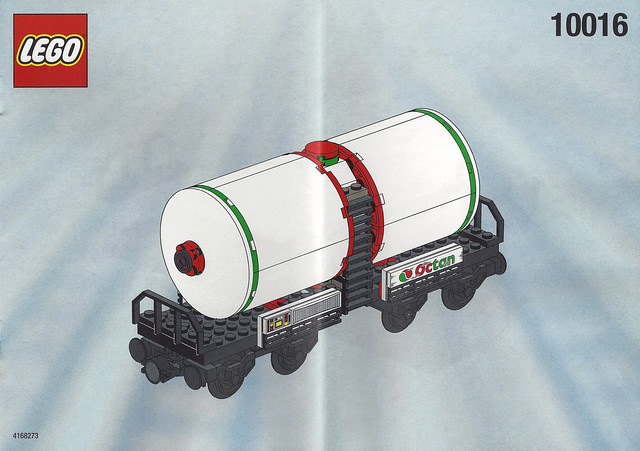

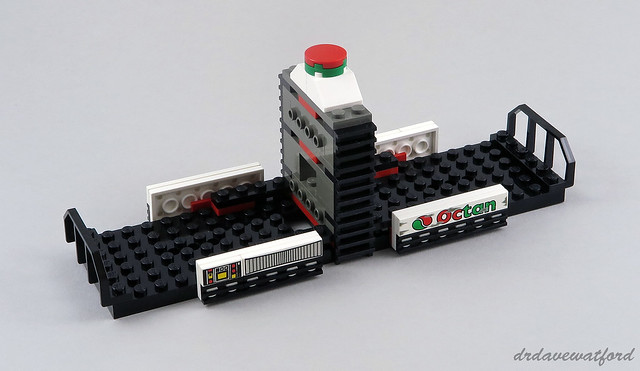
The set doesn't include any minifigures, and the build is quick and straightforward. The foundation of the tanker truck is a black 6 x 24 train base. Modified 1 x 6 plates with train wagon end are installed at either end of the train base, and brackets are placed along the sides to which a variety of printed tiles are attached (picture below). The 1 x 6 tile printed with 'distressed' Octan branding is rare, having only ever appeared in two sets including this one, while the white 1 x 4 tile with black stripes has featured in just 8 sets in total. The central structure which supports the tank is then constructed and a number of black 1 x 2 modified plates with ladder are attached on either side of it.

The tank is constructed in two identical halves which predominantly consist of white 4 x 4 x 6 quarter cylinders. These elements are quite rare in white, having only ever appeared in a total of 8 sets. The quarter cylinders are held together by red and green 4 x 4 round corner plates together with a central core of stacked 2 x 2 bricks. White 8 x 8 inverted dishes are attached at either end; similar to the cylinders these are surprisingly uncommon in this colour, having only ever appeared in five sets including this one. The two halves of the tank are then attached to the rest of the truck by way of a number of 1 x 4 modified bricks with 4 studs on one side which are incorporated into the central supporting structure. With the tank installed it's then just a case of constructing a couple of identical wheel assembies topped off with train bogie plates and clicking the wheel assemblies into the underside of the train base, at which point we're done.
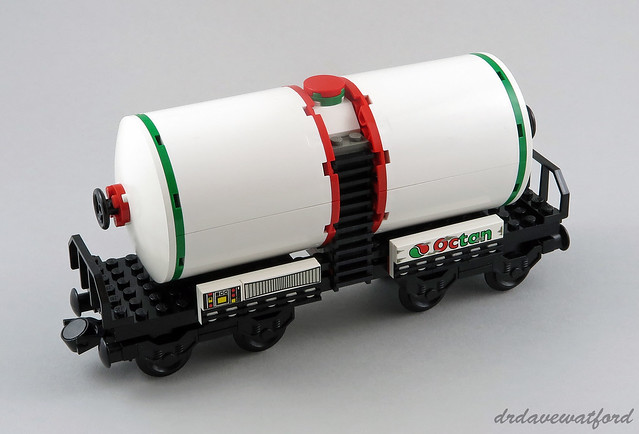

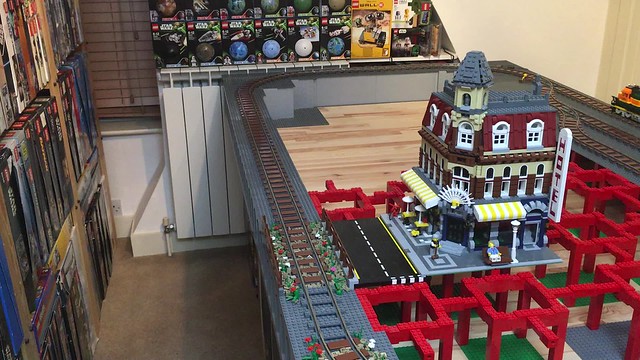
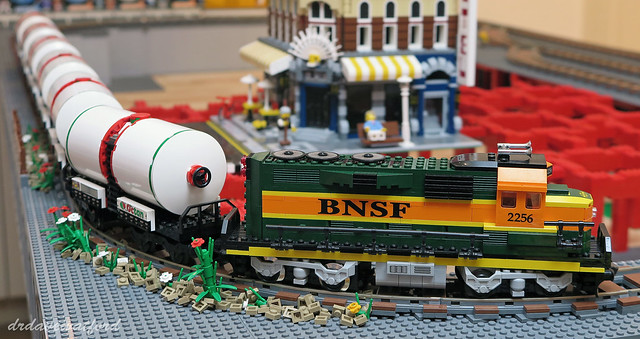
I ended up with a total of six tanker trucks including the one I'd previously assembled. With my BNSF locomotive motorised and packing a working headlight, and some rolling stock now built, it was finally time to power up the upper loop of my work-in-progress city layout and do a test run (video clip embedded below, or here if the embedded clip won't play on your device). I did wonder whether the 9V motor might struggle when faced with the weight of the locomotive plus six tanker trucks, but as you can see from the video I needn't have worried - the motor shifts the trucks with surprisingly little difficulty, and indeed I suspect it could have managed to pull a few more as well.
Testing 10133 Burlington Northern Santa Fe

The train is travelling at half speed in the video, and at this speed the illumination of the headlight is barely perceptible unless the ambient lighting is low. Unlike modern LEGO lighting which is powered by a Power Functions battery box and remote, the brightness of the light can't to my knowledge be controlled independent of the speed of the motor. There's nothing stopping you from combining both 9V and Power Functions systems in one model, however, which is exactly what I've done in the train that runs on the subterranean loop of my layout and which includes a 9V motor and also a Power Functions battery box, lights and a remote receiver (more information here).


I've really enjoyed playing with trains over the past few weeks, but it's turned out to be a really bad move financially. While I already owned the BNSF locomotive and tanker trucks featured in the last couple of Gimme LEGO posts, I got so engrossed in it all that I made the mistake of checking out the train-related LEGO offerings on eBay. This was of course very dangerous as I predictably ended up splashing out on a whole bunch of additional 9V trains and rolling stock. Beware - LEGO trains are addictive, and expensive....

Monday, 18 April 2016

The Other Santa Fe

One of the cool things about my ongoing MOC City Layout project is that it features two loops of old-style LEGO 9V track, thus providing me with the perfect excuse to dig out and revisit some of my favourite LEGO 9V trains. After all, I've been accumulating LEGO trains for years - one of the first sets that I ever owned was Set 171 Train Set without Motor - and my love of LEGO trains was one of the main reasons that I embarked upon on my LEGO City project in the first place.

Anyway, having recently finished installing the upper track loop of my city, I decided that I'd mark the milestone by building a classic LEGO 9V train and use it to test the newly-laid 9V track. But which train to choose? Well, if we're talking classic 9V trains then many fans probably wouldn't look beyond the coveted and much-loved Set 10020 Santa Fe Super Chief, which I previously posted about here and here and also wrote about in the first ever issue of Bricks Magazine. Being a master contrarian, however, I thought that the Super Chief would be too obvious, so I've therefore decided instead to tackle the Super Chief's less glamorous sibling, Set 10133 Burlington Northern Santa Fe Locomotive, or BNSF for short.


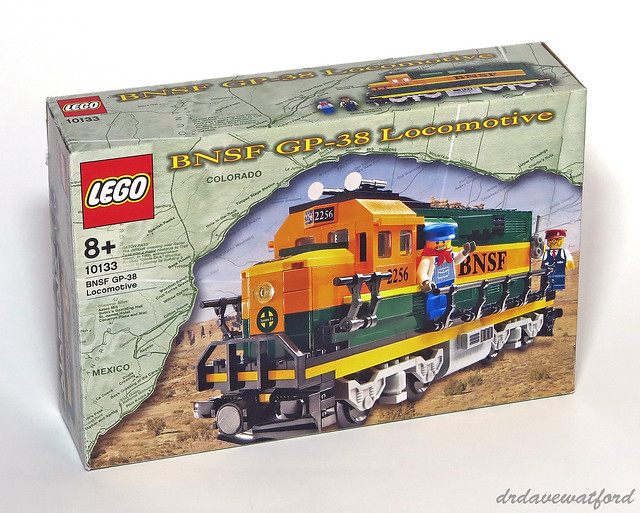
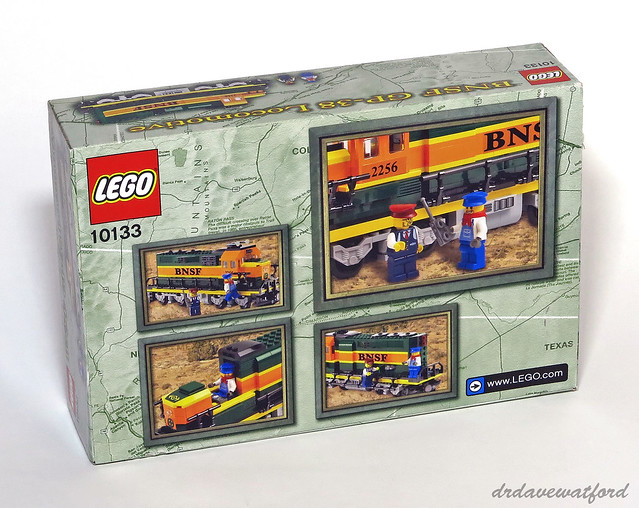
Set 10133 was released back in 2005, three years on from the Super Chief, but the two set boxes nevertheless carry the same branding and background artwork featuring a map of part of the Santa Fe railroad which runs from New Mexico to Colorado and into Kansas. The front of the box (above) also features a cutaway showing a photograph of barren desert terrain superimposed with an image of the completed BNSF model plus minifigures, while the back of the box (below) is dominated by a number of boxouts which provide some alternate views of the set contents.


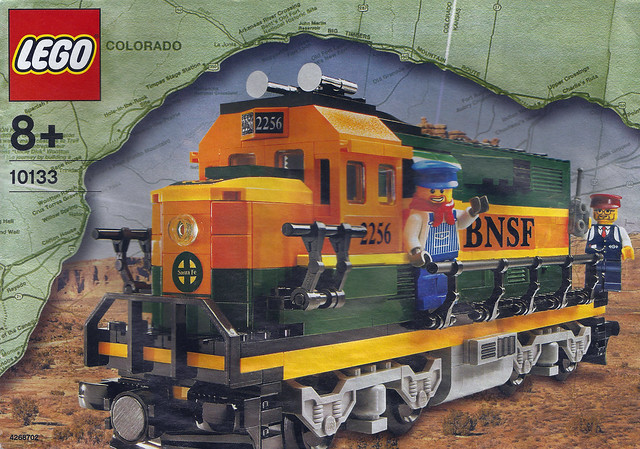
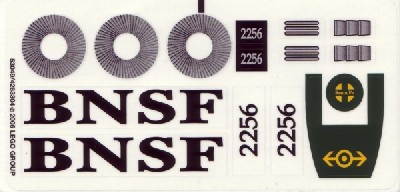
The box is designed to be opened via a couple of thumb tabs. My copy of the set was pre-owned so I don't know how many bags of elements it contained when new; I can't provide you with a scan of the set's single sticker sheet either as the stickers had already been applied to the bricks in my copy of the set, but thanks to the wonders of Bricklink you can see an image of the unused sticker sheet here. The set contains a single instruction booklet, the front cover of which (below) carries the same imagery as the front of the box. The booklet is 56 pages long, and unusually there's not a single advertisement or other distraction - the building guide occupies every single page apart from the front cover.


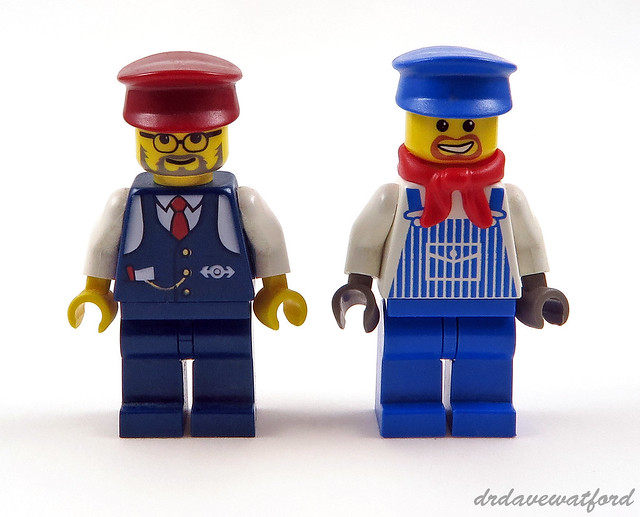
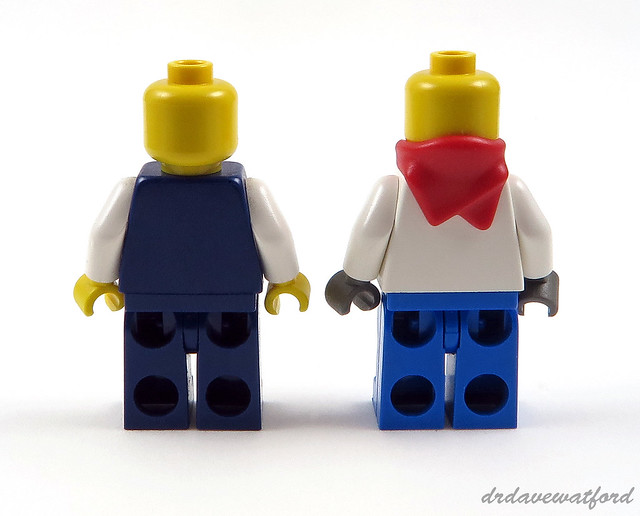
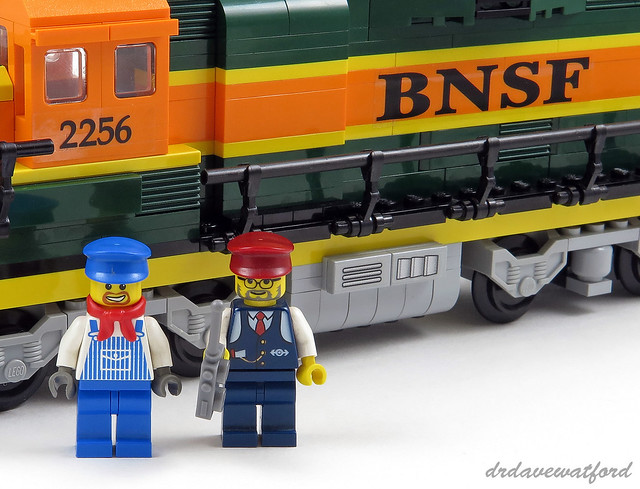
The set contains two minifigures - Conductor Charlie and Engineer Max. Conductor Charlie (below, left) can be found in a total of six sets including this one. His torso print, featuring a dark blue waistcoat complete with a fob watch, is exclusive to this minifigure but his unprinted dark blue legs, head print and dark red hat can be found as a constituent part of many other minifigures. Engineer Max (below, right) appears in just four sets. The combination of his white arms, old dark grey hands and a torso print featuring blue striped overalls is exclusive to the minifigure, although his blue hat, red bandana and head print can all be readily found elsewhere.


You can see a rear view of the two minifigures minus their hats below. Neither Charlie nor Max has a backprinted head or a backprinted torso so there's not much of interest to see here


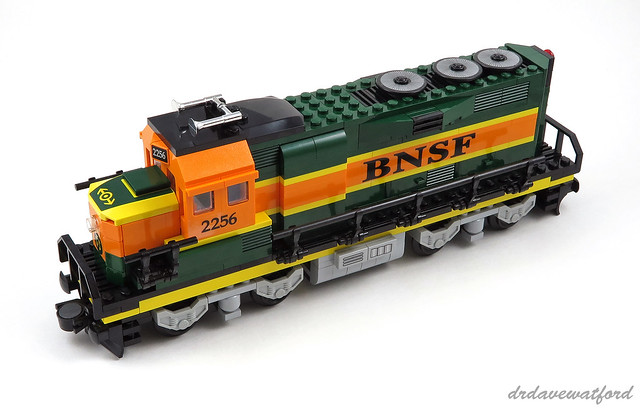
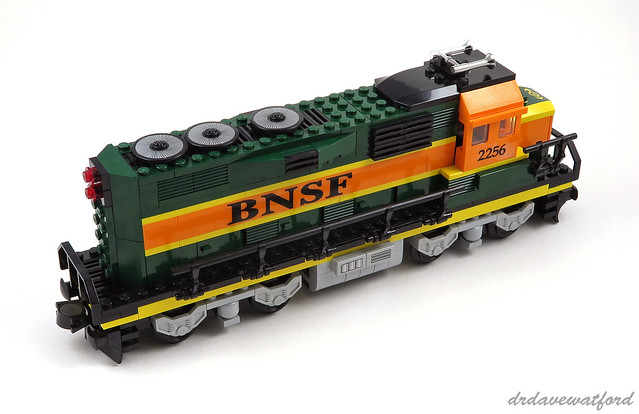
The BNSF locomotive is constructed on a yellow 6 x 28 train base which is exclusive to the set. The build starts with the placement of a black 1 x 6 train wagon end at both ends of the train base, while railings consisting of 19L rigid hoses are attached on either side. The body of the locomotive is then constructed, initially from a variety of dark green elements including 1 x 3 and 1 x 6 bricks, 1 x 8 plates, modified 1 x 2 bricks with grille, and left and right 1 x 3 x 1 doors, all of which are unique to the set in this colour. Yellow plates and orange bricks and plates are layered on top, after which we're back on to dark green for the roof of the locomotive which features yet more rare dark green elements including modified 2 x 2 bricks with a curved top and 2 top studs, left and right 3 x 2 wedges, and a 4 x 6 plate, none of which had been seen before in dark green prior to the release of this set.


The tapered front and rear of the locomotive are fashioned in dark green, yellow and orange using SNOT techniques; once again we see the appearance of elements such as dark green 45 degree 2 x 4 slopes which were unique to the set at the time of its release. An orange Technic 1 x 2 brick with a hole, which had previously only appeared in two sets, is placed at the front of the locomotive, and a trans-clear 1 x 1 round plate is inserted into the hole as a headlight. A dark bluish grey printed 1 x 4 tile is used to represent the control panel in the driver's cab. Large stickers provide the 'BNSF' lettering which runs along both sides of the body. These stickers are STAMPs, i.e. they traverse multiple elements; this practice leads to difficulties in terms of dissassembling models when you're done with them and also compromises the longevity of the stickers themselves, so we should definitely be thankful that LEGO have largely stopped using stickers in this way over recent years.


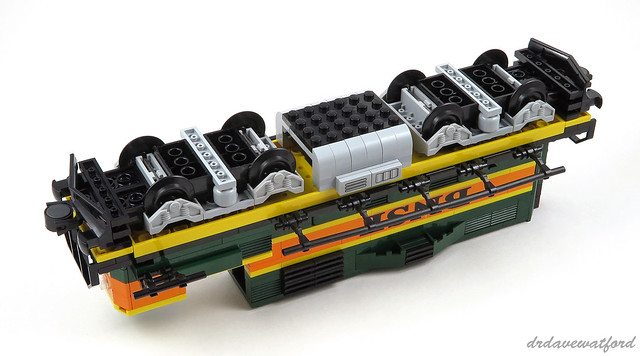
With the superstructure now largely complete it's time to get to work on the structures underneath the train base (below) including the wheel assemblies, or bogies if you prefer. These feature the use of unprinted light bluish grey minifigure heads which had only previously appeared in a total of 4 sets. Each completed wheel assembly clicks into a hole on the underside of the train base by way of a 5mm pin on the top of a train bogie plate; this attachment allows limited horizontal rotation sufficient to enable the locomotive to successfully negotiate curved track sections. I believe that the structure sandwiched between the wheel assemblies is supposed to represent a fuel tank; the tiles on either side of it are stickered rather than printed. Both wheel assemblies feature a standard magnetic coupling for attachment to rolling stock, another locomotive or a B unit.


With the bogies and fuel tank assembled and attached, all that's left to do is complete the driver's cab and add a couple of final details. STAMPs once again feature, specifically the unit number on either side of the cab. The orange 30 degree 1 x 1 x 2/3 slopes, a.k.a. cheese slopes, which protrude from the front of the cab are also stickered with the unit number. The cab incorporates a number of rare orange elements; the six 1 x 2 x 2 plane windows remain unique to the set to this day, while other elements including 1 x 3 plates, modified 1 x 1 bricks with headlight, modified 1 x 2 plates with door rail and 45 degree 2 x 4 slopes have to date appeared in just 8 sets or less in this colour.


A couple of uncommon chrome silver car air horns are mounted on the roof of the cab, while further back three stickered black Technic 3 x 3 discs are mounted on top of the body towards the rear; I believe that these are supposed to represent cooling fans. In addition to their appearance in this set, these stickered Technic discs have also been utilised in Set 10020 Santa Fe Super Chief plus the more recent Set 10219 Maersk Train, both of which are, like the BNSF locomotive, also diesels.


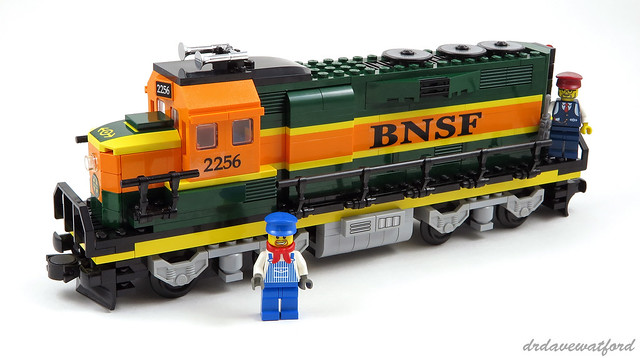
You can see the finished build complete with minifigures in the picture below. While not as sleek or elegant as the Super Chief, I can't help but love the eye-catching colour scheme of the BNSF locomotive. It's also worth noting that the model is a pretty respectable representation of the real train - you can see a picture of the actual BNSF unit 2256 here.


In addition to its aesthetic merits, this set is also notable from the perspective of the elements that it includes. Not only was it one of the first sets to include dark green elements in any real quantity, but it was also one of the very first sets to include the now-ubiquitous cheese slope. Furthermore, as previously described, the BNSF locomotive incorporates loads of rare elements, some of which continue to be unique to the set more than ten years after its release.


The BNSF locomotive might not be as celebrated as the Super Chief, but it's still pretty collectable. Retailing for just £24.99 / US$40.00 at the time of its release, you'll now need to stump up well over £200 / US$300 for a sealed copy on Bricklink; I was lucky enough to pick up my used, boxed example back in early 2010 for a little over £50 plus shipping, but it would set me back around three times as much to buy it in the same condition now.

Wednesday, 4 April 2012

Whoops...

Honestly, what was I thinking ? Infrared remote control requires line of sight in order to operate the device - it won't work through walls. So if you place the device that you wish to control, for instance a LEGO train, in a place without line of sight to the controller, say in a long, enclosed section of railway tunnel, then it won't work. Duh.


Above (as with all the pictures, click to enlarge) you can see where I'd got to with my LEGO city layout the last time I blogged about it; eventually the whole loop of track will be fully enclosed, and the plan is to ultimately run an extended 5-car version of Set 7938 Passenger Train on this loop. Problem is that the standard, unmodified train is operated by infrared remote control, so for the majority of its progress around the enclosed loop of track I won't be able to control it. Whoops.... So what to do ? Well it's thankfully not an insurmountable problem, but it has once again necessitated an unplanned excursion into my wallet for what I think is the optimal solution.

For those of you of a more tender age, it's probably time for a quick history lesson. Since the appearance of LEGO trains in the mid-nineteen sixties, the company has utilised a variety of methods for making trains move by themselves. Initially it was 4.5V motors powered by huge on-board battery boxes. Then in the late sixties LEGO introduced a system of 12V motors running on electrified track; this system gave rise to some of the most iconic and revered trains that LEGO have ever produced, not least Set 7740 Inter-City Passenger Train (below).


This 12V system endured for two decades, eventually being phased out in the early nineties when LEGO transitioned to a system of 9V motors running on a different, moulded type of electrified track. This 'era' ran until 2006, and the introduction of the Remote Controlled, or RC, system which reverted to non-electrified track and motors once again powered by on-board battery boxes. Importantly, however, as the name suggests trains could for the first time be controlled remotely without the need for a physical connection between train and operator. The RC system was short-lived, however, giving way to the Power Functions-based system a few years later. This PF system, which is what LEGO currently sells, also employs non-electrified track, motors powered by on-board battery boxes and infra-red remote control which requires line of sight in order to control the train. Bringing things back to the present, it's this PF system which is used by the train I plan to use in my underground track loop, and hence my little problem....

So the solution ? 9V. Despite having been officially phased out by the LEGO company a while ago now, 9V is still probably the standard for AFOL builders of public LEGO train displays. The track is no longer produced by LEGO and is relatively expensive on the secondary market, as are the motors, but critically for me, train control is via a speed regulator attached to a section of track by wires so there's no need for line of sight, nor is there the potential for batteries to run out with the train stuck deep in a section of tunnel.... Talking of public train displays, and the observation that most seem to employ 9V, there's also another possible advantage - when I finally complete my layout and my attention shifts to the question of public display, if I use 9V track then it raises the possibility of linking my layout with that of someone else to produce a much larger collaborative build.

Anyway, once I'd sourced (and paid for....) the required quantity of dark bley 9V track, it took no time at all to replace the existing track in my layout with the 9V alternative and wire it up to a speed regulator. You can see where I've currently got to with my layout in the pictures below (click to enlarge); use of a wired system is certainly messier and less elegant, but it"s a compromise I'm willing to make in this case.


The other thing I needed to do, of course, was to convert my train from PF to 9V. Having previously had few dealings with 9V beyond buying a couple of old 9V sets for my collection, I approached this task with some trepidation. I needn't have worried, however - it was incredibly simple. From the outside, the standard 9V motor seems to be pretty much identical to the PF motor included with Set 7938 Passenger Train, so it was literally a matter of disconnecting the PF motor from the battery, removing it from the train chassis, and attaching the 9V motor in its place. I could have stripped out the PF remote receiver and battery box at this point given they were no longer needed to make the train move, but decided instead to retain the PF components to power and control the front and rear lights of the train instead.


You can see the train running on the newly laid 9V track loop in the (decidedly ropey) video clip below, complete with PF-powered front and rear lights. These are turned off and then back on again about halfway through the clip using the remote control.


So another small step forwards, then - ever onwards !

<-- LEGO City Layout : previous blog entry                  LEGO City Layout : next blog entry -->