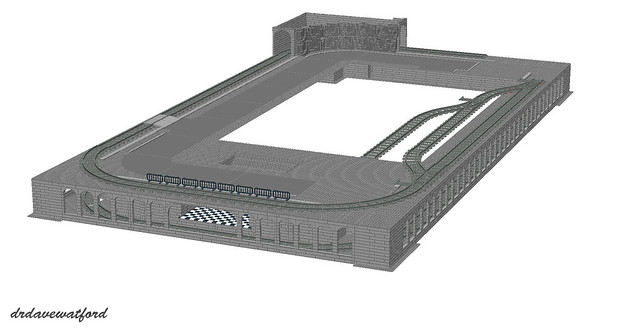
Over the subsequent weeks and months the basics of the design gradually came together in LDD as you can see from the June 2011 LDD screengrab above (click to enlarge); many of the original concepts, such as a train layout on two levels and a tunnel on the upper level running through a rock formation, were included in the LDD design. I also started to think about how I might integrate my modular buildings into the layout as you can see below (click to enlarge).
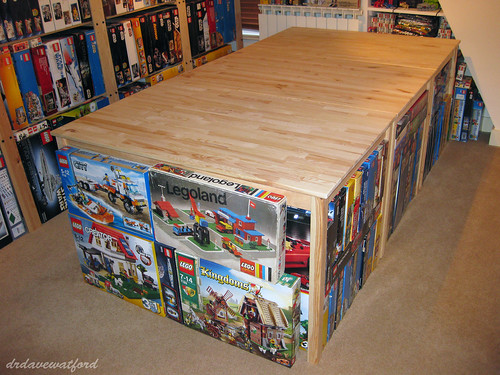
As the design continued to take shape it was time to turn my attention to the question of where in my house I could build my layout. I wanted it to be a permanent fixture that I could work on over time and enjoy, and ideally it needed to be in a location where it would remain undisturbed and unmolested when I wasn't working on it. I eventually identified an area of around 1.25 metres x 2.5 metres in my study; suitable tables were then identified, purchased, constructed and installed in the designated space (picture below), at which point the process of sourcing the necessary LEGO elements to build the layout really began in earnest.
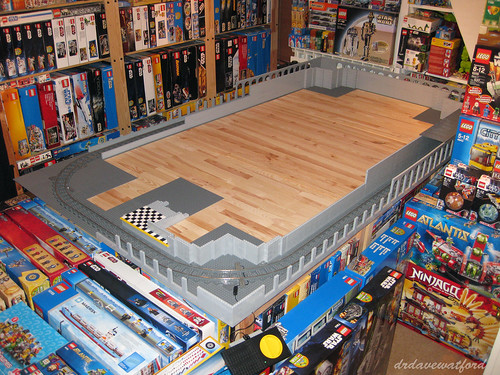
LEGO elements for the layout soon started to arrive from Bricklink sellers and elsewhere, at which point building could begin. There were predictably a few changes of plan along the way; I toyed, for instance, with the idea of linking the upper and lower loops of track (more details and video here) but quickly discounted that notion when it became clear how much space that would require; I also decided to ditch road plates for brick-built roads to save on space and because I thought brick-build roads looked a lot better (details here); finally, I decided to electrify the subterranean track loop using LEGO's 9V train system when it became evident that I wouldn't be able to control trains remotely on the enclosed lower loop using a Power Functions remote control due to an absence of 'line of sight' (details and video here). Slowly and painstakingly, my layout started to materialise as you can see in the picture below.
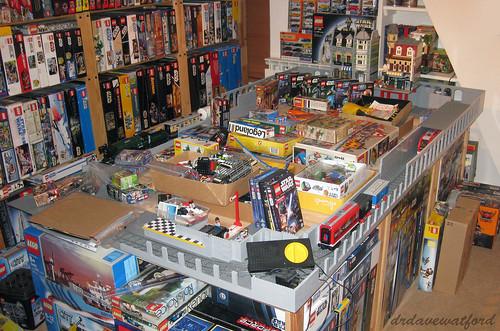
There was a problem, though. If you compare the earlier photograph of the empty tables taken in June 2011 with the picture immediately above which was taken in April 2012 you can see that the area around the layout was gradually filling up with LEGO sets as all my available LEGO storage space had become exhausted. And as you can probably imagine, as my collection expanded further, the problem worsened, with more and more floor space taken up by LEGO sets. It consequently became harder and harder to physically get to the layout to work on it, and eventually all available space around the layout, and indeed on the tables themselves, became filled with sets piled one on top of another. It was obviously impossible to continue, and thus all building ground to a halt until a storage solution could be found. This really wasn't as straightforward as it might sound, and I soon realised that for the adult LEGO collector who's in it for the long haul, storage might just be the biggest, and potentially most expensive, challenge that they'll face in respect of their hobby. Suffice to say that the complete lack of progress on the project since the last update I posted in April of 2012 is entirely down to me grappling with the storage issue.
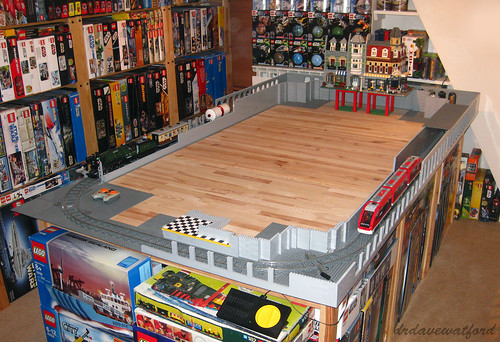
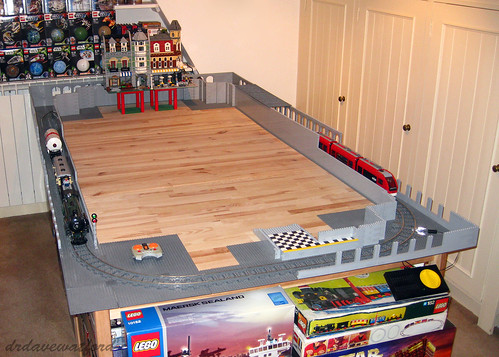
Challenging though the problem was, I had no choice but to get to grips with it, partly because I wanted to continue building my layout, but more importantly because my wife wasn't willing to tolerate my LEGO collection taking over the whole house, which it eventually would have done. So I had to bite the bullet - I identified an external storage solution, came to terms with the associated costs, and commenced the task of sorting through all my sets. Those sets which I considered to be the core of my collection - Star Wars and a few other licensed themes such as Indiana Jones and Harry Potter, modular buildings and other Exclusives, space-related sets (vintage and more recent), plus a variety of other favourites - remained at home while everything else was carefully catalogued, packed into numbered, double-walled boxes and placed into secure storage over a 6 month period. What I'll do with all the stored items is another important question, of course - if our much-discussed house extension ever materialises then it'll all come back home, but otherwise..... Even so, one step at a time - the task of identifying non-core items and duplicate sets, cataloguing, packing and storing is now nearly done, and it feels good. For the sake of posterity I'm a little frustrated that I didn't take pictures when things were at their worst and the layout was completely inaccessible, but I at least remembered to take the "work in progress" picture above - better late than never; admittedly much of the work had already been done by that point and I was on the home straight, but at least it gives you a flavour of how things were. A few weeks on from then and I'm finally organised and ready to crack on, as you can see from the picture below.
So, the wheel has gone full circle and I'm basically back where I was a couple of years ago, albeit better equipped to accommodate any further expansion of my LEGO collection but also definitely more restrained on the aquisitions front.... And to all those patient and intrepid souls who've continued to e-mail me since my last update in April 2012 and ask when I was going to post a progress report, I salute you - those reminders definitely helped to push me along, and I hope that this post provides an explanation of sorts.
So now we're all caught up and it's high time to get building again. Next time I post there'll hopefully be some real progress to report on this project, so stay tuned!
< -- LEGO City Layout : previous blog entry LEGO City Layout : next blog entry -- >


I love your blog so much! LEGO is my life
ReplyDeleteThanks, Suzie - I aim to please!
DeleteThe support system (or lack thereof) for your Cafe Corner and Green Grocer frightens me!
ReplyDeleteFear not - Cafe Corner and Green Grocer have actually been sitting quite comfortably on top of those two inter-connected supports for more than 2 years now.
DeleteThe supports are actually fairly robust, which is a good job as I anticipate that I'll be using a large number of them to support the entire ground level of the layout....
What a collection you have! I'm eager to see the more and more so please share with us :)
ReplyDeleteSuperb layout, look forward to future blogs on your progress.
ReplyDeleteAre there any other sets you'd like add to your collection, but haven't been able to track them down yet.
I wouldn't say no to a boxed, complete Set 3450 Statue of Liberty.... ;-)
DeleteAh yes, what an excellent set, sadly I only have the one example, otherwise we could have traded.
ReplyDeleteGreat blog, can't wait to see your finished product :) I stunbled onto this blog quite by accident, I am planning on building my own Gotham style city and was looking for inspiration...you certainly have given me food for thought, never would have considered brick built roads before but they look so good I may just give them a go.
ReplyDeleteAs a side note, I have been selling lego online for over 13 years but never use the instructions so I have a fair few vintage instructions going spare if there is something specific you need to finish of a set or want a decent replacement, I'm not as organised as yourself but give me a few days and I should know either way if I have a particular set of instructions, so if you need any I'd be happy to send to you for just the cost of the postage as you'd be doing me a favour in getting them out of my way :)