

Given all this, you might consider that a recent request from Fairy Bricks head honcho Kevin Gasgoigne for me to live-build a large model over the course of a weekend on behalf of the Fairy Bricks charity might be somewhat foolhardy.... For those who aren't aware, Fairy Bricks raises money to buy LEGO sets which it donates to childrens' wards at hospitals and hospices, and Gimme LEGO is proud to consider itself a Friend of Fairy Bricks. The charity was due to have a presence at the recent Bright Bricks and Bricks UK Exhibition of LEGO at Sandown Park racecourse, and the plan was for me to live-build Set 10234 Sydney Opera House during the show as a way of encouraging people to buy tickets for the raffle where the first prize was a new and sealed copy of the set. I have to admit that I had my doubts - at 2989 pieces the set is by my reckoning the 11th largest that LEGO have ever produced, and I was only going to be able to attend the show for a day and a half as I had a couple of other commitments to fit in. All that having been said, it was obviously a request that I couldn't refuse. I therefore agreed, albeit with some degree of trepidation, and so it was that a couple of months later I found myself heading down to Sandown Park racecourse in Epsom, South London on a crisp Saturday morning.

So how does a laid-back builder go about constructing a 2989-piece collossus in a day and a half? Well, apart from a generous supply of caffeine and chocolate, I figured that I'd just have to get my head down and focus - no mean feat given that I'd be building the model in a crowded and noisy exhibition hall. Shortly after arrival at the venue I was given custody of the set (above) and I wasted no time in slicing through the three tape seals at one end of the huge, bulging box and emptying out the contents - four instruction booklets sealed in a cardboard-backed bag, a bunch of blue baseplates, and a prodigious number of bags containing LEGO elements. Most of the bags are printed with a number corresponding to the instruction booklet that they're associated with, and in this way the build is split into four distinct stages. I'd brought along a few of the clear plastic crates that I use to sort pieces at home when I'm building large sets, so for each stage in turn I emptied out all the correspondingly numbered bags into a crate and roughly sorted them into small elements at one end and larger elements at the other to make finding pieces a bit easier. Parts-wise I've never seen so much dark tan in one place, so if you're looking for a dark tan parts pack then look no further....

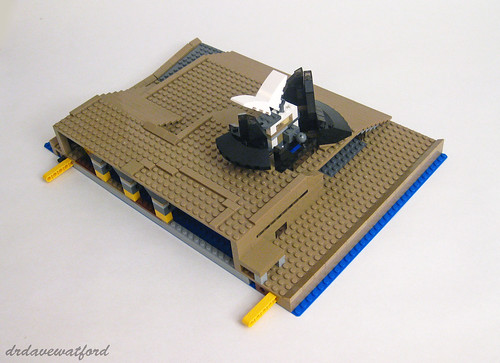
The first instruction booklet, which consists of just 48 pages from cover to cover, guides you through construction of the area to the front of the Opera House (pictures above and below - click to enlarge). This part of the build is relatively quick and straightforward. Consisting mainly of a representation of the 100-metre wide ceremonial staircase known as the Monumental Steps which leads up to the two main performance venues, this first stage of the build sits on a couple of blue baseplates with a combined area of 32 x 48 studs. The separate structure which sits to the front of the Opera House is actually a restaurant, and its roof isn't completed until the very end of the build. The restaurant windows are comprised of black 6 x 6 and 10 x 10 round corner bricks which are cleverly positioned and held in place 'back to back', i.e. underside to underside, as you can (just about) see in the photographs.
The second instruction booklet, which runs for a total of 72 pages, covers the construction of the rest of the Opera House and its surrounds, with the exception of the two main auditoria with their vaulted, sail-like roof structures and towering windows at the front and back. This section is mounted on a blue 48 x 48 baseplate which is unique to the set. By lunchtime on Saturday when I needed to sneak off elsewhere I'd been building for a total of approximately three and a half hours during which time I'd polished off the first instruction booklet and about a third of the second booklet.
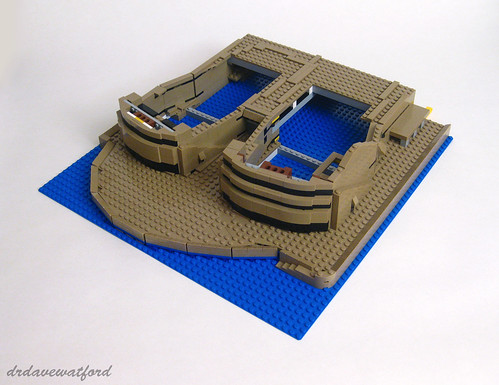
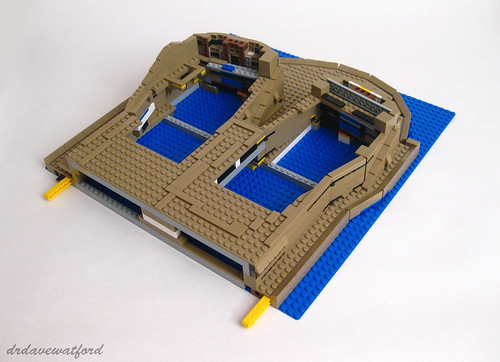
I arrived at the venue early on Sunday morning to crack on with the build, conscious that the pressure was well and truly on if I was going to finish up by 6 pm that day. I polished off the remainder of the second instruction booklet within a couple of hours, at which point Stage 2 of the build (pictures above and below - click to enlarge) was complete. The next job was to join the two completed sections together; this is achieved using just a couple of humble Technic pins, with the yellow Technic liftarms protruding from the base of each section acting as guides to ensure that the sections are correctly aligned relative to each other. While the second section took a fair bit longer to complete than the first, the build was nevertheless once again quite straightforward. I thought the curved terrace section that you can see in the picture above was particularly nicely realised - the curve is approximated via the use of a number of 1 x 4 hinge plates and the area inside the curve is neatly filled in with a variety of wedge plates; if you look closely you can see a couple of awkwardly-shaped areas filled with two 2 x 4 wedge plates.
With the first two booklets completed it was time to move on to booklet three which contains instructions for construction of the larger of the Opera House's two main auditoria, the Concert Hall. In the model, the space beneath the sail-like roof is almost entirely filled with the structures which support the different roof elements and hold them at the correct angles. In comparison to the previously completed sections of the build, construction of the roof was trickier and needed a little care and concentration. The roof sections are held in place by a number of Technic A-frames which are angled via the use of ball-and-socket joints; it's pretty ingenious and the result is instantly recognisable, although if I have a criticism it's that the gap running along the apex of the roof isn't aesthetically very pleasing. In truth, however, it's hard to see how this could have been avoided.
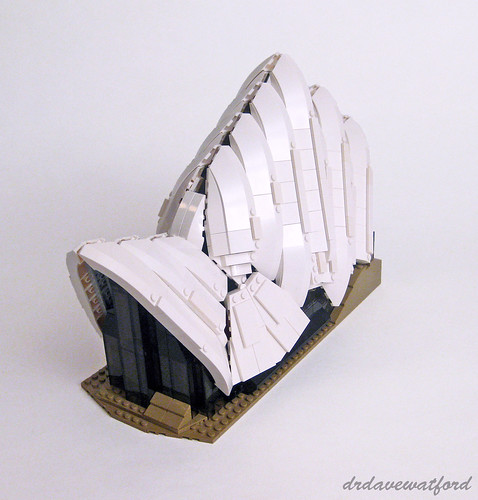
You can see pictures of the completed Concert Hall above (front view) and below (rear view), with the sail-like roof sections bookended by large expanses of glass. The picture below nicely demonstrates how the different roof sections are held at different angles via the use of ball and socket joints as previously described.
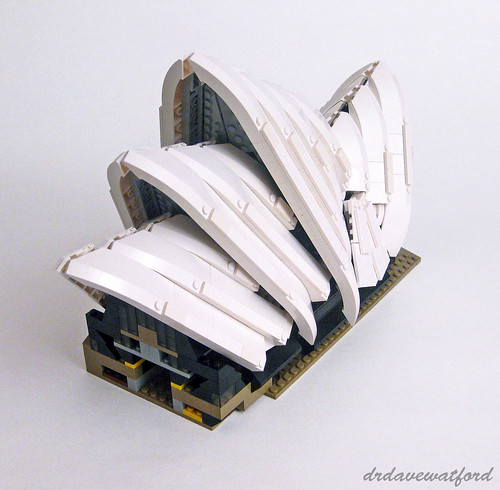
Once instruction booklet three was done and dusted I felt like I was on the home straight. Without further ado I dived into instruction booklet four and the final part of the build. This commenced with construction of the smaller of the two main auditoria - the Joan Sutherland Theatre. I was on a roll by this time, and with the end in sight I steamed through this section in double-quick time.
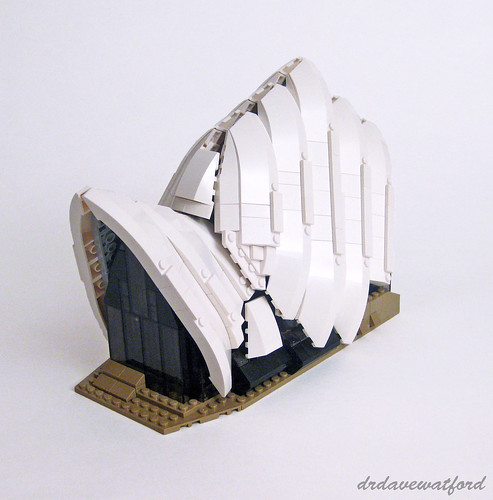
While not identical to the Concert Hall, construction of the Joan Sutherland Theatre predictably followed along very similar lines which inevitably provoked a sense of deja vu. That having been said, a degree of repetition is almost inevitable in a build of this size. You can see pictures of the completed Joan Sutherland Theatre above (front view) and below (rear view).
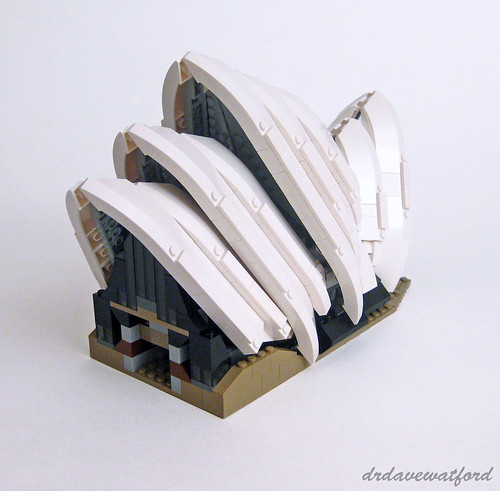
The completed Concert Hall and Joan Sutherland Theatre sections could then be dropped into their respective slots in the structure below, at which point Sydney Opera House was almost finished. Both auditoria are only attached underneath by a few studs but that's nevertheless more than enough to hold them securely in place. All that was left to do was to construct the curved glass structures at the rear of each auditorium, build and attach the restaurant roof, place 28 lamp posts onto the boardwalk around the sides of the building, and I was done ! You can see various views of the completed model below (click to enlarge).

Total build time turned out to be a little over 9 hours which was less than I'd expected. I'm pretty sure that I could have shaved some time off that if I'd been more focused and less easily distracted by visitors on the day, but chatting to attendees was a lot more interesting and worthwhile than trying to finish up more quickly, and it made for a far more memorable experience as far as I was concerned.
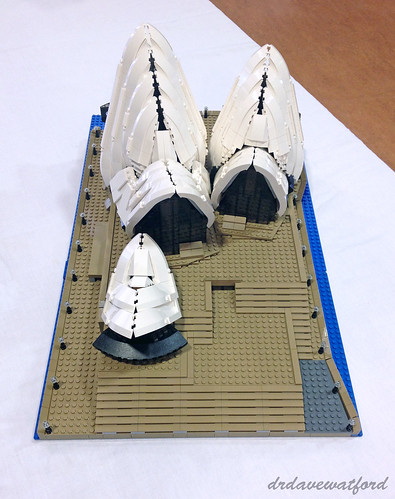
Prior to getting started, I did have some concerns that the build might be a bit dull thanks to the degree of repetition and necessarily bland colour palette employed. In the event, however, while there certainly was some repetition, it actually turned out to be a surprisingly interesting build, not least because of the number and variety of clever building techniques employed; construction of the 'sails' was particularly ingenious. With regard to the finished model, while I'm aware that some people who know Sydney Opera House much better than I do have expressed reservations about the accuracy and proportions of the model, to my untrained eye it seems to be a pretty good approximation.
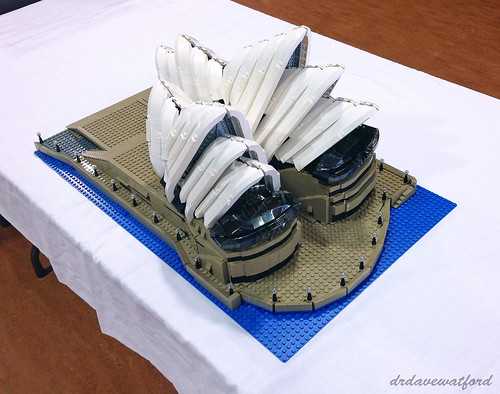
Much more important than whether or not I enjoyed the build was of course whether it had the desired effect on raffle ticket sales. Kevin stood close by and sold tickets while I cracked on with the build, and our double act did seem to bear fruit - visitors would watch me build for a while, whereupon Kevin would appear and casually inform them that they could win their very own new and sealed copy of the set for just the cost of a £1 raffle ticket. All told, around £2,000 was raised from raffle ticket sales by the time the raffle draw took place late on Monday afternoon, so a big hand to Kevin and many thanks to all those attendees who bought a ticket.
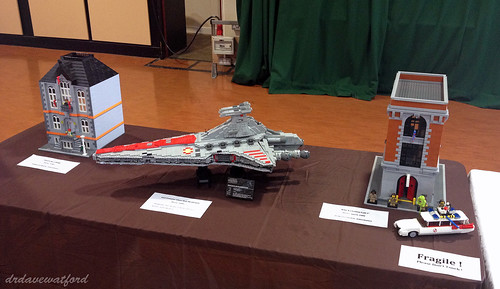
The Sandown Park show itself, which was being held for the first time, was a great success, attracting almost 4,700 visitors over the 3 days which was apparently way beyond the expectations of the organisers. I'd brought a few MOCs (above - click to enlarge) to exhibit, all of which have previously featured on Gimme LEGO at one time or another. Thankfully Kevin had arranged for them to be on display adjacent to where I was building Sydney Opera House so I was able to chat to attendees about the models and answer any questions that came up. Which reminds me - thanks to the Gimme LEGO readers and Bricksetters who came over to say "hi" - it was good to meet you!
.jpg)
I had limited time to check out the models that other exhibitors had brought along, but I saw enough to be impressed by the high quality of exhibits. In addition to a healthy line up of new builds and previously-displayed models from a host of noted builders, professional LEGO builders Bright Bricks were in attendance and brought a number of excellent models along with them, including the amazing tropical seabed scene above (click to enlarge).
Given the success of the event, and the ability of the venue to accommodate larger numbers of exhibits and visitors if needed, I reckon there's a good chance that we'll be back there next year. I just hope my sore fingers have recovered by then....


