Showing posts with label Minifigures. Show all posts

Thursday, 25 May 2017

A Fair Cop

As regular readers may have noticed, I've recently had to take an enforced break from building and blogging - my apologies. I'm pleased to report that things are slowly returning to normal, however, so regular service can hopefully now be resumed. Anyway, it's around this time of year that the summer wave of sets starts to appear in stores, and I did initially consider picking up a random summer release and running the rule over it. Given the wall-to-wall coverage of new releases on other sites, however, I decided instead to take a trip back in time and take a close look at an older set. I ended up choosing Set 588 Police Headquarters from 1979, not least because I picked up a copy of it in reasonable condition a while back and still hadn't gotten around to building it yet.

When it comes to LEGO, I have to admit that there are few things that give me more pleasure than a boxed copy of an older set in decent condition. The front of the box features a shot of the finished build that leaves little to the imagination - boxes these days generally embellish the subject matter with CGI wizardry which undoubtedly ramps up the excitement but also makes it harder to get a sense of the actual build inside the box; no such problems here. The set number, 6+ age recommendation and parts count also make an appearance on the front of the box, while the back of the box shows a youngster enjoying the finished build and also showcases a number of alternative builds, something that I wish could be resurrected on modern set boxes.

I think most LEGO fans would probably agree that there's been steady progress over time when it comes to set design, but one area where I think older sets continue to reign supreme is in their packaging and 588 is no exception. The front and back of the box are in fact part of a sleeve which slides smoothly off to reveal an inner tray. In the picture below I've removed the set's 360 elements from the cardboard tray but I've left the instruction booklet and a couple of promotional leaflets in place.

The instruction booklet is actually a fold-out double-sided instruction sheet measuring 40 cm x 54 cm. The instructions break the build down into a surprisingly small number of steps by modern standards, highlighting the absurd degree of hand-holding that builders of more recent sets have to contend with. In addition to the building instructions and a photograph of the completed build (below) there's also a panel highlighting the same alternative builds that are shown on the back of the box.

My copy of the set came complete with a pair of promotional leaflets. These were both unfortunately folded in half at some point, either by LEGO themselves during the original packing process or more likely by the previous owner of the set. The first leaflet contains 16 pages and has a cover consisting of a large LEGO logo. The content (example page below) is a fantastic trip down memory lane for LEGO fans of a certain age, and also serves as a reminder for younger builders of how the design of sets has changed over the years. Interestingly, the leaflet contains advertising for Set 585, a previous Police Headquarters set released in 1976, so it's possible that this leaflet may have found its way into my copy of Set 588 by accident.

The second promo leaflet has a cover featuring various LEGO elements and minifigures superimposed with a LEGO logo. It's the same size and length as the first booklet, and while there's some overlap of content it also features a selection of newer sets including Set 588. There's a 'LEGOLAND Town' section in the booklet which includes the nice little diorama below, and there's also a delicious 2-page Classic Space spread.

The set includes four 'modern-style' minifigures with articulating arms and legs. Modern minifigures started to appear in sets in 1978 so would still have been something of a novelty in 1979 when Set 588 was released. Two of the minifigures are identical policemen with helmets (below) who ride the motorbike and fly the helicopter.  The torso print features a white police badge, a diagonal zip pattern running from shoulder to the opposite hip, and a zip pocket. I had initially assumed that the white helmet was of the same type that appears in the much-loved Classic Space minifigs, but according to Bricklink the police helmets in this set are different by virtue of their thick chinstraps. The yellow minifig heads have solid studs and carry the standard grin pattern, while the black legs are unprinted.

From the rear (below) the minifigs are predictably unremarkable, with their heads, torsos and legs all plain and unprinted.

Next we have the policeman who drives the car. His torso, featuring a suit with police badge and breast pocket over a white collared shirt, graced a total of seven minifigs and 29 sets between 1979 and 2003. His head features the classic LEGO standard grin pattern and his black legs are unprinted. According to Bricklink his white police cap has appeared in a total of 172 sets, most recently in 2016.

Once again the rear view (below) is unremarkable given the absence of head or torso back-printing.

The fourth and final minifigure (below) has only ever appeared in four sets including this one, although none of the individual components are rare. The torso print features a collared shirt with six buttons and has appeared as a part of 21 minifigures and 53 sets over the years. Again the head is printed with a standard grin pattern and the legs are unprinted. The old brown hair, which first started appearing in sets back in 1979, has since appeared in almost 250 sets according to Bricklink, most recently in 2004.

Consistent with the other minifigures in the set there's no back-printing on the torso or the head.

The build commences with a trio of vehicles. First up is a classic 4-wide Police car which, like so many such vehicles of its day, is constructed on a vehicle base.  LEGO fans of a certain vintage will also immediately recognise the wheel archessteering wheel and windscreen which were ubiquitous in small vehicles back in the day. Less common are the white 1 x 3 x 1 printed doors which only appeared in a total of ten sets in this this colour between 1979 and 1991. There's room inside for a driver plus a passenger seated behind. I was surprised that LEGO didn't incorporate a printed radiator grille into the design since these were a common inclusion in 4-wide cars of old.

Next up is a helicopter. The fuselage, which can only accommodate a single minifig, sits on a pair of old grey skids represented by 1 x 8 plates. The white printed 1 x 3 x 1 doors seen in the police car make a repeat appearance. Immediately beneath the windscreen is a trans-clear 2 x 4 plate. I had quite a few of these in my childhood LEGO collection, but they haven't been available outside a LEGOLAND model shop since 1986. The main rotor is made up of an old light grey four blade propeller to which four 1 x 8 plates are attached; this attaches to a black modified 2 x 3 plate with helicopter rotor holder on the roof of the fuselage. There's also a smaller tail rotor made up of an old light grey two blade propeller attached to a modified 2 x 2 plate with helicopter tail rotor holder.

The final vehicle is a simple motorcycle. It incorporates a couple of printed 1 x 2 bricks as panniers; these printed bricks have only ever appeared in seven sets, most recently in a Service Pack back in 1991.

With the three vehicles completed it's time to get cracking on the Police Station itself. Older iterations such as 370 Police Headquarters typically included a custom baseplate, but 588 is built on a standard road plate. For the purposes of the build it could be argued that a custom baseplate might have been better, but I could never get enough road plates when I was a kid and suspect that I would have been absolutely delighted to add another section of straight road to my childhood collection.... The Police Headquarters straddles the road, with through access being controlled by two pairs of trans-clear 1 x 4 x 6 doors. The walls of the building include a number of white 1 x 3 bricks; 1 x 3 bricks didn't appear in sets until 1978 so this set would have been one of the first to include these now-common elements. The walls on the ground floor and first floor incorporate yellow window frames, each of which accommodates a pair of black windows. Although lacking glass, these windows can at least be opened, and have only ever appeared in three sets so are pretty uncommon. In addition to the attachment points for the windows, the window frames also have additional tabs to which pairs of green shutters are attached. Access to the front of the building is via a door on the left side of the building. The door is flanked by a pair of trans-dark blue 1 x 1 round bricks with open stud. A printed 'POLICE' sign sits on the ground floor roof; this printed white 1 x 6  brick appeared in a total of eight sets between 1979 and 1991. The first floor roof is decorated with various structures including an old light grey antenna with 8 side spokes. This element only ever appeared in ten sets in this colour, and it can be tricky to find one with all the spokes intact which no doubt accounts for its high price on Bricklink where intact examples cost in excess of £8/$10 each plus shipping. I assume that the right side of the building contains the police cells given that the windows consist of yellow 1 x 4 x 2 fence elements which presumably represent barred windows. Resourceful prisoners can however try to escape via a back door....

Both the ground floor and first floor offices feature rudimentary interiors containing a simple desk and telephone made up of a red 2 x 1 45 degree slope with white rotary phone print topped with a red 1 x 2 tile. This printed slope element appeared for the first time in this set and only subsequently graced five more sets in this colour. There's a helipad on the roof of the cell block. This is marked out with yellow plates and more trans-dark blue 1 x 1 round bricks. A section of flat roof spans the road and connects the cell block and helipad with the office block. A path utilising yellow 1 x 4 x 1 fence elements is marked out across the top of the flat roof.

The area in front of the Police Headquarters is furnished with exterior decoration in the form of a classic large 4 x 4 x 6 2/3 pine tree, a lamp post and what appears to be an emergency telephone; the latter features a white 1 x 2 brick printed with a telephone pattern that has only ever appeared in a total of four sets, most recently in 1979. You can see the finished Police Headquarters complete with all vehicles and minifigures in the picture below.

It turns out that there are actually two versions of this set which appear to be identical apart from minor differences in the box art. Set 588, which is the version I own, is in fact the US variant, while the version sold in Europe, Australia and Canada was Set 381 Police Headquarters. For some reason a used, boxed copy of set 588 ended up for sale on eBay's UK site back in 2010 and I picked it up for around £25 including shipping. There are currently a number of copies of 588 and 381 for sale on Bricklink; a boxed example in similar condition to mine will set you back about double what I paid including shipping which seems pretty reasonable for a set that's nearly 40 years old now.

Overall, this is a nice example of a classic LEGO police station, although for me it doesn't quite hit the heights of my all-time favourite police station, Set 370 Police Headquarters from 1976.


Tuesday, 21 July 2015

Desert Delight?

Unless you've been living under a stone for the past few years you can't fail to be aware of the phenomenon that is Minecraft. I have to confess that I came to the party quite late, stubbornly refusing to get caught up in it all until I was eventually dragged into the fray by my Minecraft-mad youngster (nickname Super B, or just B for short). Although I've since dabbled a little with single player, most of my Minecraft game time has been spent playing co-op with B on an XBOX 360, building somewhere for us to live, exploring different biomes and digging down to the bedrock layer looking for diamonds while trying to avoid being blown up by creepers or falling into lava.

As well as enjoying Minecraft the game, B has built some of the Minecraft LEGO sets including a couple of the original Microscale offerings as well as a selection of the more recent minifigure sets such as The Mine and The First Night. I therefore thought it'd be interesting to involve him in a review of one of the new summer wave of Minecraft sets. His job would be to build the set and simultaneously provide me with a stream-of-consciousness commentary, while I would be relegated to the role of parts monkey as well as adding my own thoughts about the set into the mix and trying to pull everything together into a coherent Gimme LEGO posting. Read on to discover if I succeeded....


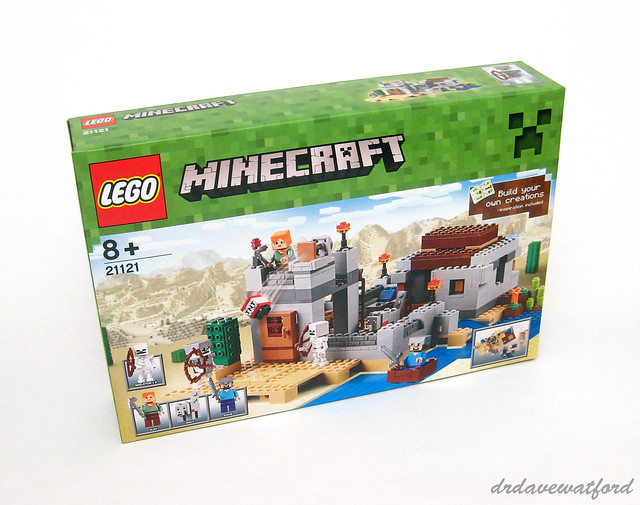
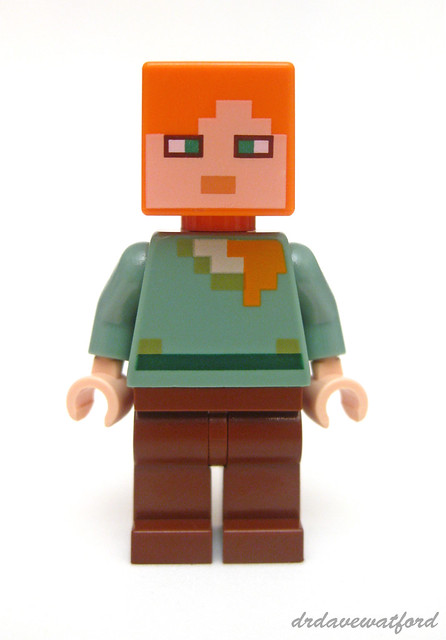
We reviewed Set 21121 The Desert Outpost, kindly provided to us ahead of its general release by LEGO's Community Events and Engagement (CEE) Team. First off I sat junior down, put the box in front of him and asked him for his thoughts. It was interesting that he immediately zeroed in on the minifigures, particularly Alex, who I have to admit I'd never heard of, and the wolf. He didn't think that either of these characters had previously appeared in any of the Minecraft sets, and he couldn't wait to get his hands on them. He was also excited to discover that the set contained two skeletons, both of which had bows, and one of which was wearing armour. It was only after he'd closely examined the minifigures that his attention eventually switched to the Desert Outpost building itself, which he said looked like it was made out of cobblestone and dirt and reminded him of First Night with an extension.


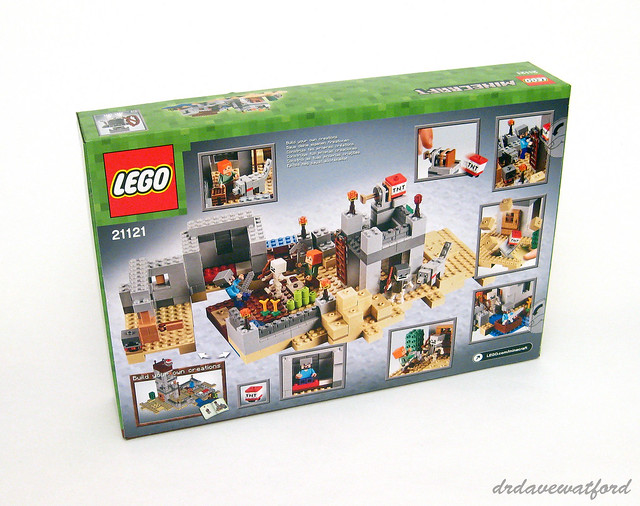
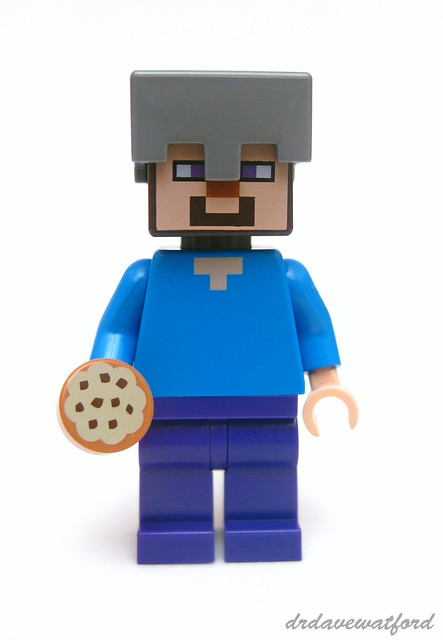
Both the front and back of the box carry the "Build your own creations" mantra which is I assume a reference to the fact that you can substantially reconfigure the Desert Outpost building by design as we'll see later. Consistent with this, the back of the box shows a reconfigured version of the Desert Outpost as well as showcasing a number of notable play features. It was the latter that caught B's eye, particularly "the launcher that fires TNT" and "the exploding area where the TNT lands". Oh, and for some reason the fact that Minecraft hero Steve is holding a cookie in one of the pictures was also a cause of much amusement.


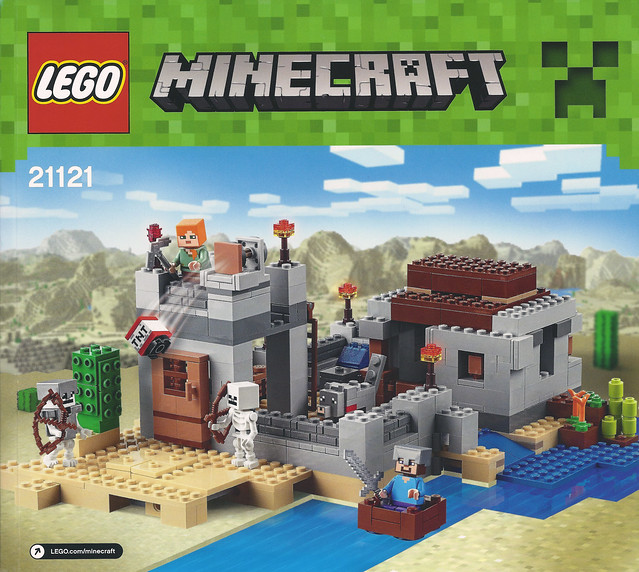
The box contains three numbered bags of elements, an un-numbered bag containing large tan plates and a single instruction booklet (front cover above). There's no sticker sheet. B's trawl through the 108-page instruction booklet stopped abruptly when he got to an advertisement for LEGO's Minecraft microsite as it featured a Snow Golem, and he was also drawn to a two-page spread showing all the Minecraft minifigure sets.


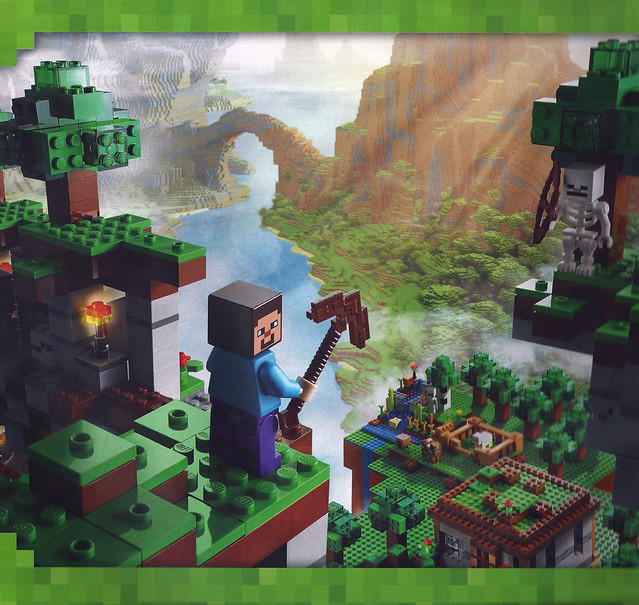
In addition to the obligatory building guide for the Desert Outpost model the instruction booklet contains some interesting additional content. Notably, there are 16 pages of supplementary instructions, of which more later. The booklet also contains a number of other adverts and a two-page inventory of parts. My eye was caught by a somewhat bizarre two-page Mojang advert, one half of which (below) features what looks like a 1970s photograph of a bearded man watching on while a little girl plays with a Commodore PET or similarly ancient personal computer; a Minecraft scene is superimposed on the computer screen to make it seem like the kid is playing Minecraft. It's all a bit surreal....


As previously mentioned, B couldn't wait to get hold of the minifigures, with Alex (below) taking star billing. He was right that Alex hasn't previously featured in a LEGO Minecraft set. An alternative version of Alex featuring what looks like the same orange head and sand green torso but sporting a diamond helmet and a diamond sword appears in another of the 2015 summer Minecraft releases, Set 21122 The Nether Fortress. Neither the head nor the torso are back-printed. Alex comes complete with an iron pickaxe.


Next up is Minecraft stalwart Steve. With his minimally printed dark azure torso and dark purple legs, this seems to be the same version of the Steve minifigure that appears in the first wave of Minecraft minifigure sets, although I don't recall him being provided with a cookie before; B didn't think that the cookie had any special significance, concluding that Steve must just be hungry.... In this set Steve gets an iron sword and an iron helmet in addition to his cookie but he isn't provided with armour to protect his torso. Like Alex, neither his head nor torso are back-printed.


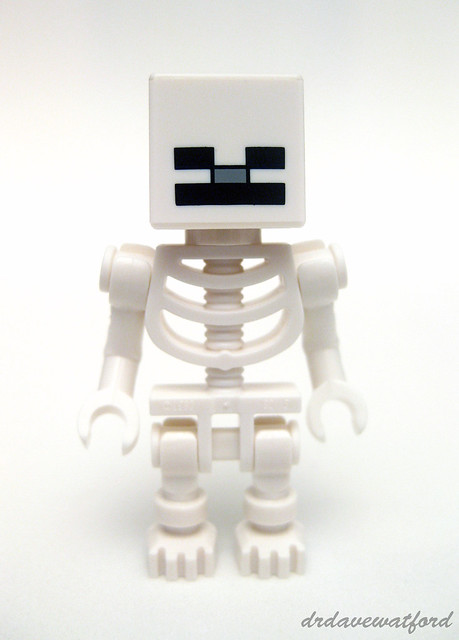
The skeletons appear to be the same as those which appeared in the first wave of Minecraft minifigure sets. Each of them is provided with a wooden bow.


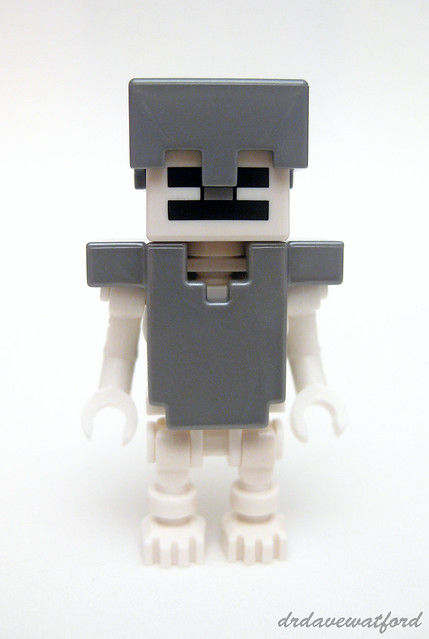
One of the skeletons sports an iron helmet and iron body armour. B wanted me to point out that in Minecraft skeletons are destroyed by sunlight, but wearing a helmet protects them and hence its significance. So now you know....


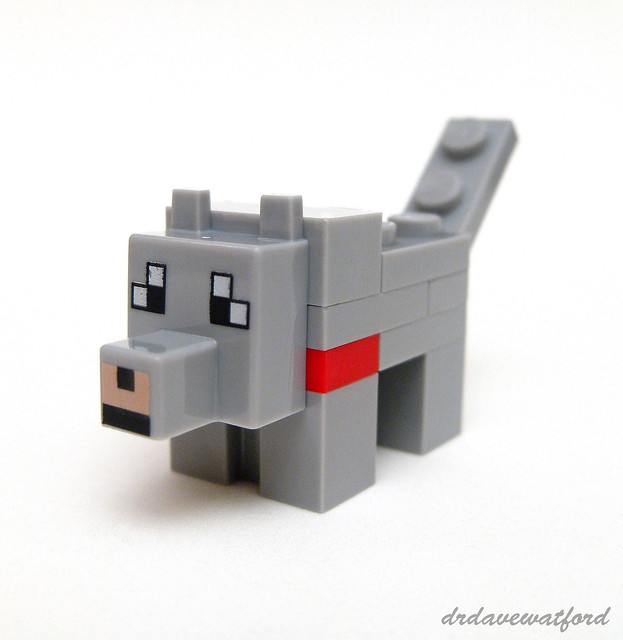
Last but definitely not least we come to the wolf, which is my own favourite minifigure in this set, if you can even call it a minifigure. The printed head appears to be a new element, while the legs are represented by a couple of light bley modified 1 x 2 bricks with groove which have previously only appeared in 5 sets. B reminded me that the red 1 x 2 plate immediately above the front legs is supposed to represent a collar and shows that the wolf has been tamed.


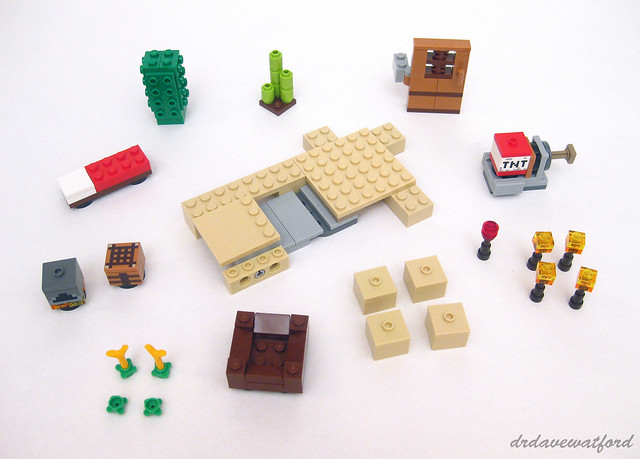
The first bag of elements contains all the parts needed to construct the minifigures plus a real mixed bag of accessories which you can see laid out in the picture below. First up are the crafting table and furnace, both structures that any self-respecting Minecraft fan will immediately recognise; if that's not you however then they're the cube-like structures on the left of the picture. These structures utilise a number of printed elements which were expressly produced for this purpose, specifically a medium dark flesh 1 x 2 brick with reddish brown and dark brown lines and 2 x 2 tile with dark brown Minecraft grid pattern, and a dark bley 2 x 2 brick with light bley and black Minecraft geometric pattern printed on the side. Each of these elements has previously appeared in a couple of the 2014 Minecraft sets. With the crafting table and furnace constructed, some torches of both the standard and Redstone variety, a small square wooden boat for Steve, some sugar cane fashioned from lime green 1 x 1 round bricks, some crops consisting of bright green round 1 x 1 plates with flower edges and bright light orange Carrot Tops, and a bed were next to be built. These were quickly followed by a cactus which makes effective use of green 1 x 2 - 2 x 2 brackets, a TNT launcher, a medium dark flesh and reddish brown door, and finally a small outside section featuring a simple mechanism for flipping sand blocks into the air. I could see B's attention beginning to wander as he reached the end of this laundry list of accessories and it was no surprise when he said he wanted to take a break. When I asked him what the problem was he said that it was a bit boring to build all the accessories at once and that he'd have rather built the Desert Outpost first and made the accessories as he went along.


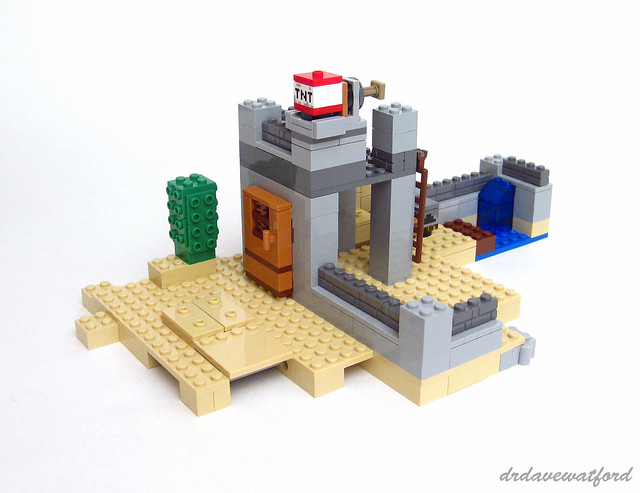
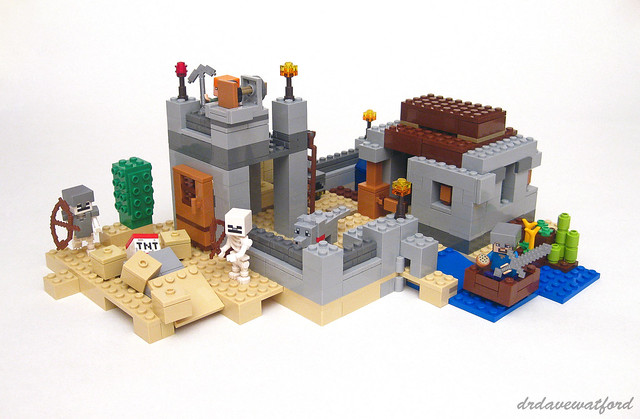
After a break Mini Me was ready to get stuck into the front section of the Desert Outpost; this requires the contents of Bag 2 plus a 16 x 16 tan plate from the unmarked bag. Bag 2 contains predominantly basic bricks and plates, which is not a surprise given the nature of the Minecraft sets but still relatively unusual in a licensed set. The 16 x 16 plate is the starting point, and a few basic bricks are attached to the underside to raise it up off the ground.  Soon the walls of the outpost start to take shape. These utilise lots of light bley jumper plates which are used to offset sections of dark bley masonry bricks as you can see in the picture below. With the beginnings of the walls in place the previously-assembled crafting table and furnace are put in place and the door is attached. A rudimentary upper floor is then constructed, after which the section featuring the mechanism for flipping sand blocks into the air is attached adjacent to the door. Finally the cactus is put in place and and TNT launcher is placed on top of the upper level. When the launcher is activated the TNT block falls to the ground, at which point you can simulate an explosion by pressing down on the flipping mechanism and shooting the sand blocks into the air. It was no surprise that B was highly amused by this play feature, recruiting the set's minifigures to participate in a minigame which consisted of them taking turns launching the TNT block from the upper level of the Desert Outpost and sending sand blocks cascading into the air.


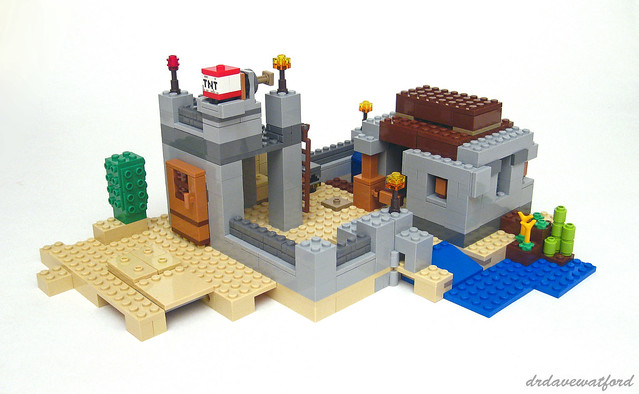
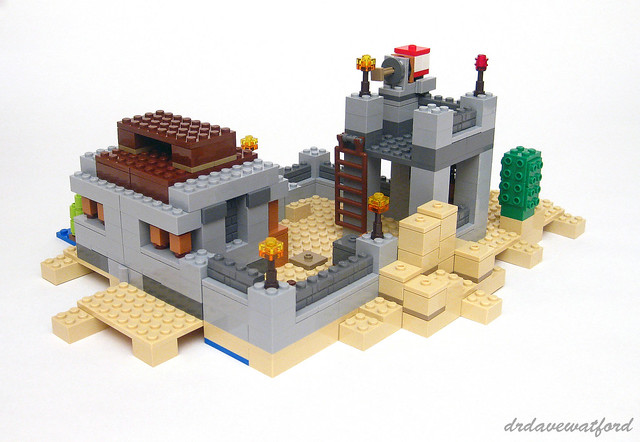
Once B had finally tired of his sand block flipping minigame he got back to the job in hand and started on the rear section of the Desert Outpost. Once again the floor, which is constructed from the remainder of the tan plates in the un-numbered bag, is raised up off the ground via the attachment of a few strategically-placed basic bricks underneath; the floor of the rear section actually consists of two distinct sections joined by hinges for reasons that will soon become clear. The walls of the rear section are made up of a number of detachable brick-built wall panels. These panels sit on light bley modified 2 x 2 tiles with one stud at the centre which hold the wall panels in position while still making it easy for them to be detached and swapped around if desired. At various points some of the accessories constructed during the first stage of the build, namely the bed, sugar cane and other crops, are put into place. Once the rear section of the Desert Outpost is completed, it's attached to the front section using hinges. Three reddish brown roof sections are then attached, torches are placed in strategic locations, and the build is complete.


Access to the upper level is provided by a ladder which you can see in the rear view below.


The completed build populated by its complement of minifigures can be seen below. Note Steve in his wooden boat on the right of the picture, and the mechanism for flipping sand blocks on the left. While B was pleased with the finished build, I have to say that my immediate reaction was that the outpost seems insubstantial, with the walls reaching no higher than two blocks in some areas. Even so, it does undoubtedly capture the Minecraft vibe in terms of the construction style, some instantly recognisable accessories, and of the course the minifigures.


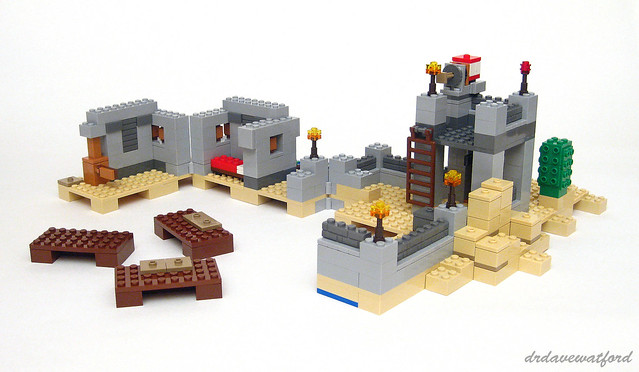
Some of the floor sections are connected to each other via the use of hinges, meaning that the build can be unfolded (picture below) in order to provide access to the interior. In order for the model to be fully opened out the reddish brown roof sections need to be detached from the rear section of the outpost.


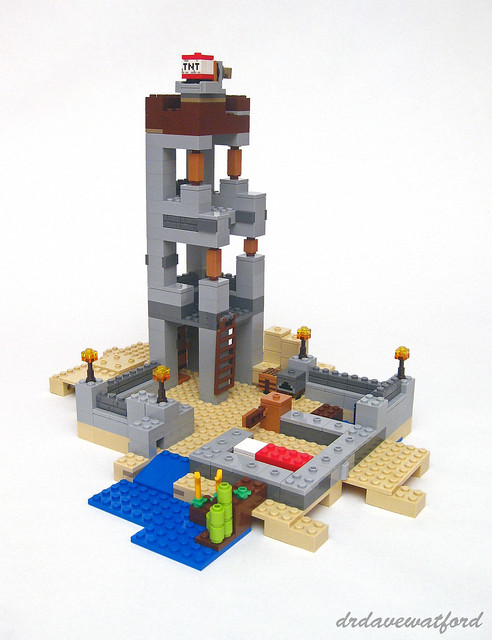
As previously mentioned, there are 16 pages of supplementary building instructions at the back of the instruction booklet. Entitled "Rebuild Inspiration" and bearing the words "Build your own creations" these pages walk the builder through a partial disassembly of the primary model and a reworking into an alternative build (picture below). This basically involves removing the detachable wall panels from the rear section of the outpost, completely dissassembling them and then using almost all of the newly-liberated pieces to build a tower. In truth the alternative build looks unfinished and pretty uninspiring, although I guess that the intent is merely to get the creative juices flowing and hopefully encourage the builder to finish the job with additional pieces from elsewhere.


Although the set carries an age recommendation of 8+ it's not a particularly challenging build - B is younger than the recommended age, but having had some previous experience building LEGO sets he managed to complete it without too much difficulty. The highlight of the set from his perspective was the minifigures, with Alex and the wolf being his two favourites. The play features, particularly the TNT launcher and the mechanism for flipping sand blocks, also got a big thumbs up. He concluded proceedings by providing me with an overall set rating of 9.3 out of 10 "because the set has lots of cool features" after which he made it clear that he was done talking and wanted to be left in peace to play with Alex and the other minifigs. So clearly a satisfied customer, then.... From an AFOL perspective, however, I have to say that even though I've grown to appreciate the joys of Minecraft to some extent the set didn't particularly grab me. I agree with B that the minifigures are neat, particularly the wolf, but the build itself feels insubstantial, and it's hard to believe that the set contains 519 elements. That having been said, I had the same lukewarm reaction to most of the other Minecraft minifigure sets as well so if you liked them then you'll probably like this one too. You might not like the price, though - while I've not seen an official RRP yet, the set is already listed for pre-order on a couple of UK sites at a price of £59.99 which seems a bit pricey.

Thanks again to Kim from LEGO's CEE team for providing Gimme LEGO with a copy of the set to review ahead of its general release.

Monday, 13 October 2014

Double Agent

LEGO's recent reboot of the Agents theme in the form of Ultra Agents, and my subsequent review of one of the new offerings - Set 70162 Infearno Interception - reminded me that I've been meaning to revisit my collection of original Agents sets for a while now and review one of the sets on here. Consisting of 13 sets released in 2008 and 2009, the original Agents line-up contains some excellent offerings, so much so that I found it hard to decide which one to go for. I eventually plumped for Set 8971 Aerial Defence Unit and enthusiastically dived in.


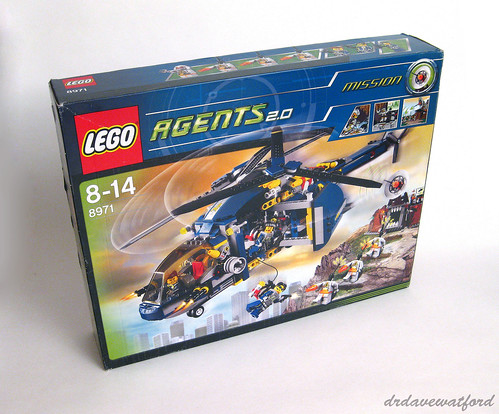
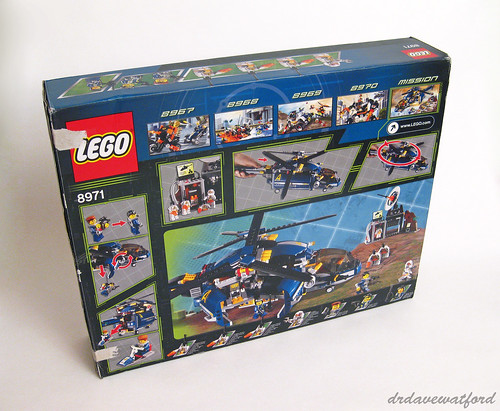
One of the things I like about the Agents theme is the consistency of presentation. This is most evident in the use of an agreeable overarching colour scheme applied across all of the sets and which, in the case of the Agents 2.0 second wave of sets released in 2009, also extends to the branding of the packaging and instructions. All the vehicles at the disposal of the eponymous agents are predominantly, or at least partially, dark blue in colour with variable amounts of metallic silver on show, and the agents themselves sport dark blue torsos and legs embellished with lime green and silver printing. Dark blue and lime green also dominate the branding of the Agents 2.0 boxes as you can see above and below. It's not just the agents either; the villains, together with their vehicles and bases, also conform to a consistent colour scheme, in this case orange, silver and black in varying proportions. The back of the box (below - click to enlarge) showcases a number of the set's play features, and a series of small panels highlight other second wave Agents releases. I wish the previous owner of my pre-owned copy of the set had been a bit more careful opening the box, but other than the damage caused by removal of the original seals the box is thankfully in reasonable shape.


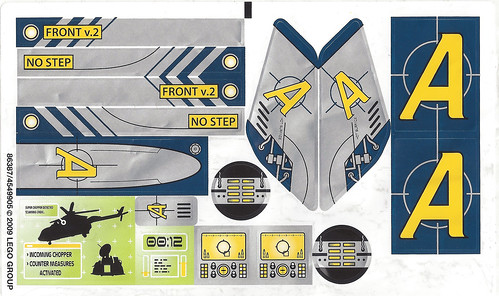
I believe that the set's 733 elements were originally packed into 4 bags when the set was new. In addition to the elements, the set contains a sticker sheet and two instruction booklets. You can see the sticker sheet below, which unusually for a pre-owned set is largely intact and unused. It won't be unused for long, however.... The sheet contains 16 stickers, and dark blue, silver and lime green are once again the order of the day.


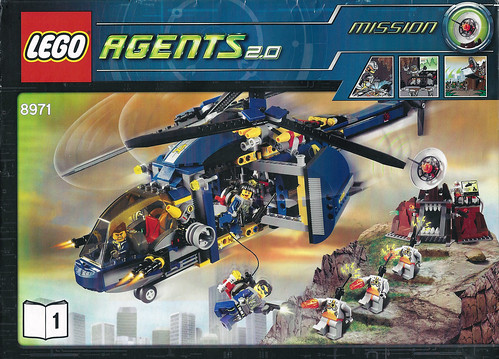
The instruction booklets are both close to A4 in size and have covers which are the same except for the booklet number in the bottom left corner. The cover of booklet 1 can be seen below; the cover art is almost identical to the imagery on the front of the box, with only the age recommendation lacking. Both booklets are 76 pages long; booklet 1 consists almost entirely of building instructions, covering the minifigures, base and the first half of the helicopter build, while booklet 2 contains a 2-page inventory of parts and seven pages of advertising for Agents sets, the LEGO Club and a product survey as well as wrapping up the helicopter build.


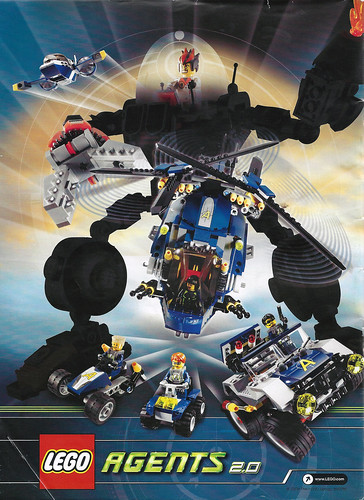
The back cover of the first instruction booklet (below) contains advertising for the second wave of Agents sets released in 2009; a silhouette of the mech from Set 8970 Robo Attack looms large in the background, while in the foreground you can see the 4 x 4 from Set 8969 4-Wheeling Pursuit bottom right and the Agents vehicle from Set 8967 Gold Tooth's Getaway bottom left.


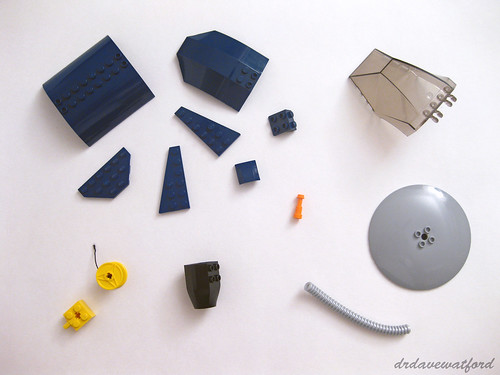
You can see a few of the less common parts contained in the set below (click to enlarge). As previously stated, the Agents theme is notable for its use of dark blue elements and that's reflected in the selection of elements on show here. The dark blue 1 x 2 - 2 x 2 bracket and curved 8 x 8 x 2 double slope are both unique to the set, while the trans-black 8 x 6 x 4 windscreen is exclusive to the Agents theme, having only appeared in this set and one other, Set 8634 Turbocar Chase. The dark blue 2 x 2 curved slope with recessed side ports has only ever featured in this set and two others, and that's also the case for the dark blue 8 x 6 x 2 curved windscreen. The black cylindrical element is a Basilisk body segment and has appeared in a total of 4 sets including this one, as has the bley 10 x 10 inverted dish, the orange telescope and the pearl light gray 7mm diameter 11L ribbed hose.  All other elements in the picture have also appeared in ten sets or less to date.


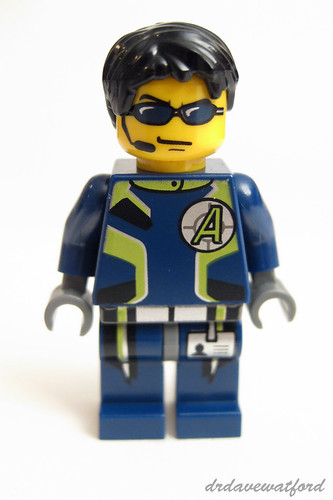
The set contains seven minifigures - three Agents, a villain and his three drones. The version of Agent Chase that appears in this set (below) also appears in two others - Set 8634 Turbocar Chase and Set 8635 Mobile Command Center. His torso is the same as that used for Agent Charge, the other male agent in this set, and indeed the same as that used for all male agents appearing across the various sets making up the Agents theme. His legs, which are common to all three agents in this set, are printed with an I.D. card and a continuation of the lime and silver pattern adorning his torso, while his head print features dark blue shades and a head-mike.


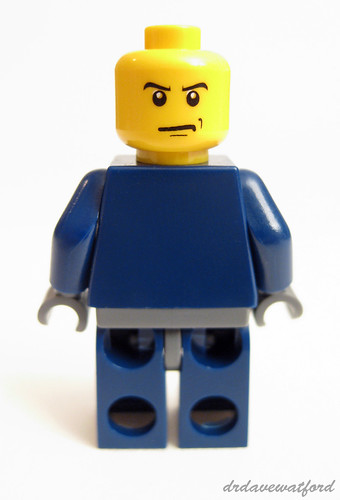
Agent Chase doesn't have a back-printed torso, but he does have a alternate expression as you can see in the picture below. Bricklink describes his alternate expression as "Angry Eyebrows and Scowl"; maybe he's on a downer because he's lost his shades.... This double-sided head is actually a "Chase exclusive" appearing only in the five different Agent Chase variants that you can see here.


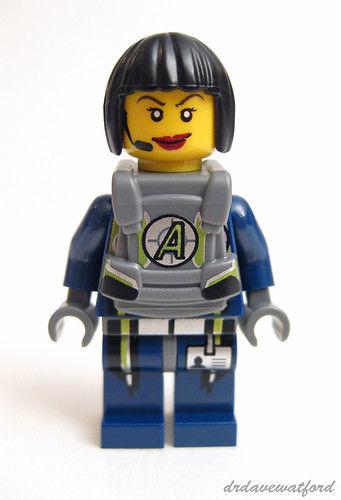
Agent Swift (below) is unique to this set. Her torso print, which is obscured by her body armour in the picture below, is similar but not identical to that of the male agents and can only otherwise be found adorning the torso of Agent Trace, her fellow female agent. The body amour is predictably exclusive to the Agents theme and has graced a total of five minifigures, while as previously stated her printed legs are the same as those of the other agents.


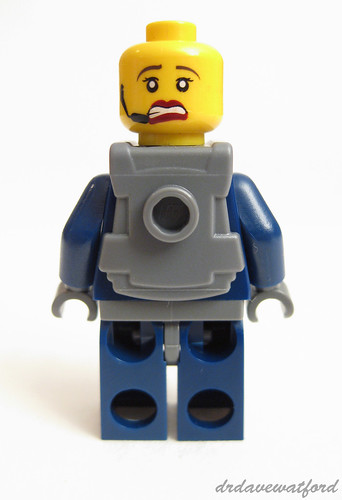
There's no back-printing on Agent Swift's torso, not that it really matters as it'd be hidden by her body armour anyway. She does however have a back-printed head featuring a scared alternate expression for all those occasions when you want to place her in peril.... As was the case with her torso, her head print is only shared with the Agent Trace minifigure.


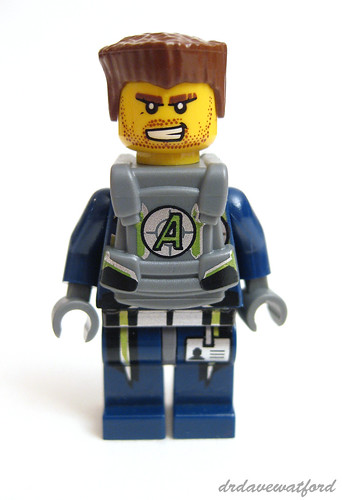
Rugged, mean-looking Agent Charge (below) is unique to this set. His torso and legs are identical to those of Agent Chase, but unlike Chase he comes complete with body armour. His snarling, stubbled face print and flat top hairstyle can be found in a variety of other minifigures outside of the Agents theme.


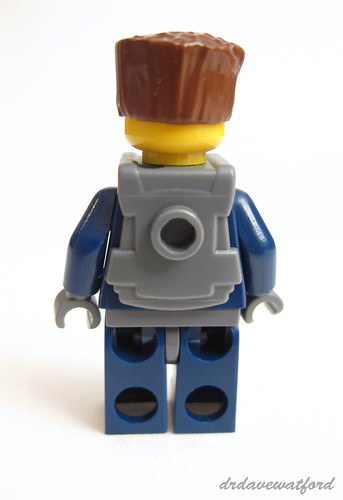
Similar to the other agents there's no back-printing on his torso, although like Swift the body armour would have obscured any printing anyway so no great loss. Unlike the other agents, however, he doesn't have an alternate expression, so basically you have the choice between 'mean' and 'mean....


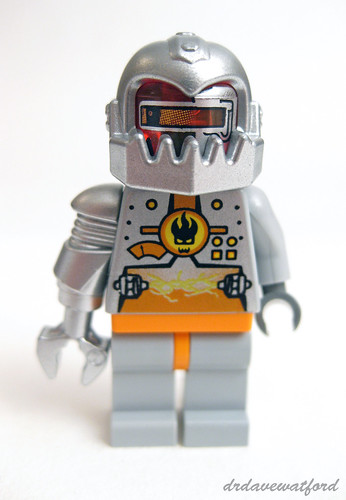
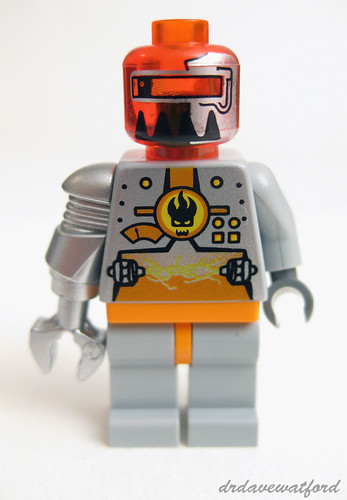
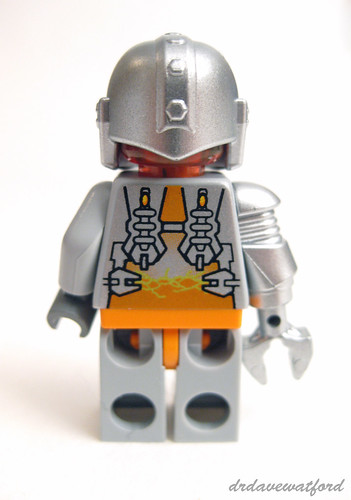
Each of the Agents sets features at least one distinctive villain, and on this occasion the bad guy is Magma Commander (below). He's unique to the set, as are his torso and printed trans-neon orange head, although his metallic silver helmet can also be found being worn by Break Jaw, another Agents villain. Magma Commander sports a metallic silver mechnical claw in place of his right hand.


I've removed Magma Commander's helmet in the picture below so that you can get a better look at his groovy printed trans-neon orange head. The head doesn't feature any back-printing. Although his legs aren't printed front or back, they're nonetheless rare by virtue of the orange hips and this is the only set that they appear in.


You can get a closer look at Magma Commander's torso backprint and the detailing on the rear of his helmet in the picture below.


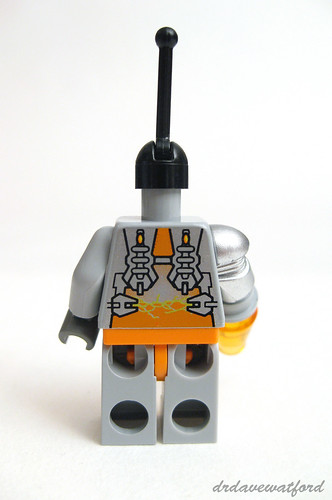
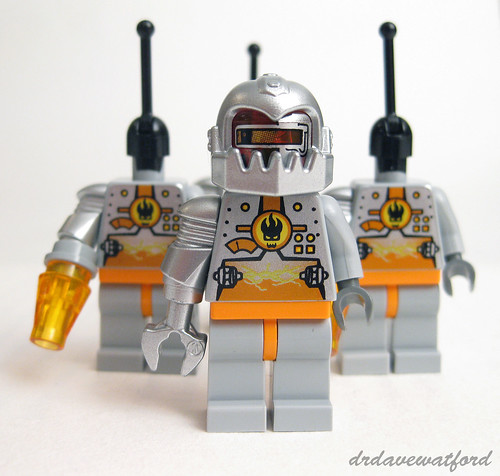
Rather than a posse of regulation goons or evil henchmen the Magma Commander is supported by three Magma Drones. These have identical legs and torsos to those of their master, although in place of his metallic silver claw on the right hand they have a trans-orange cone which is presumably meant to be some sort of weapon.


Each drone has an antenna consisting of a small black lever base with a black lever in place of a head; according to Brickipedia the drones are controlled via the large satellite dish mounted on top of Magma Commander's base which we'll come to shortly....


You can see the Magma Commander with his drones in the picture below (click to enlarge) - an imposing sight for our heroes. I have to say that I'm a big fan of the metallic silver, bley and orange colour scheme.


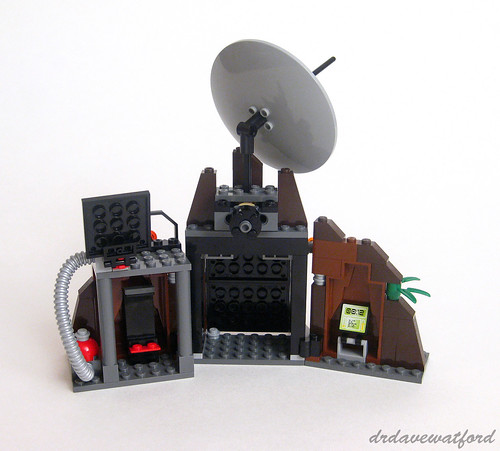
With the minifigures assembled it was time to get started on the various models. Differentiating between black, dark bley and light bley in the instruction booklets was frustratingly difficult initially and it took me a while to get oriented. First to be built was a small boat consisting of just 10 parts and a sticker; it's little more than a glorified jet ski and eventually fits into the back of the helicopter as you'll see later. Next up is Magma Commander's base (picture below - click to enlarge) which is formed from three distinct sections joined together by brick hinges. A couple of features dominate the central section of the base. At ground level there's a striking tiled black panel fringed with pearl light grey modified 1 x 1 plates with tooth. This is actually a doorway and by lifting the orange cone to the left of the panel you can raise the panel somewhat, although not enough to actually get the minifigures in or out.... Above the doorway is a huge dish which can be rotated by turning a knob at the back of the base. Bookending the doorway are a couple of smaller sections, each of which is predominantly made up of a reddish brown LURP; there's a narrow observation platform and stickered screen atop the right-hand section.


The rear aspect of the base is shown below (click to enlarge). To the right as you look there's a small control panel and to the left is a rudimentary reclining structure with a red base which can accommodate one drone at a time, perhaps for recharging. There's no doubt that the Magma Commander's HQ is small and insubstantial, but even so it does have the faintest whiff of 'Bond villain' about it and I was minded to go and build Set 8637 Volcano Base to sit alongside it and give the Agents a sterner test....


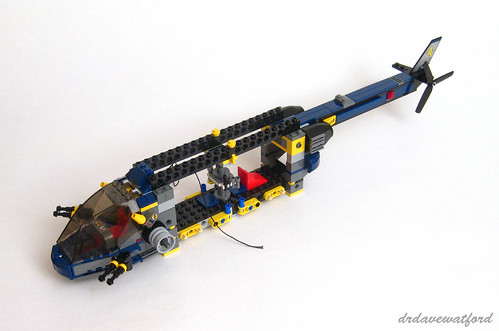
With the base completed it's time to get stuck in to the helicopter. My complaints about colour discrimination issues in the instruction booklets took an unexpected twist at this point with the realisation that black Technic pins do actually look black in the booklet and have white edges to highlight them; this means that if you insert a black Technic pin into a black element then they look like they're different colours in the booklet - really bizarre. First steps in the helicopter build involve the construction of a solid, sturdy Technic floor, after which you attach a pair of yellow winch reels and start to install structures in what will eventually be the fuselage. Next the two-seater cockpit is constructed and enclosed by the large trans-black canopy which is hinged at the back to enable easy cockpit access; you can see what the model looks like at this point in the picture below (click to enlarge).


You can just about see one of the two yellow winch reels peeking out from the back of the cockpit in the picture below (click to enlarge); the two winches operate independently from each other, their string being raised and lowered by turning the bley wheel on the corresponding side of the cockpit. The small structure consisting of a yellow 1 x 1 cone mounted on a Technic axle and pin connector acts as a stop to prevent the string from unravelling when you pull on it; in order to release the string you need to rotate the yellow cone upwards.


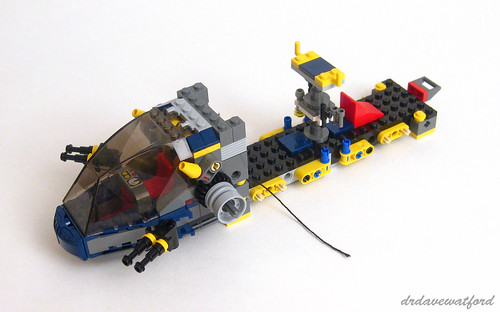
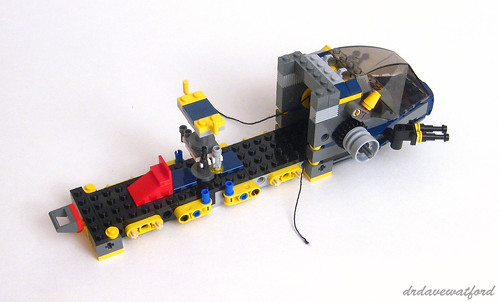
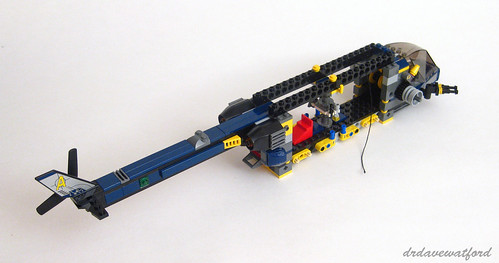
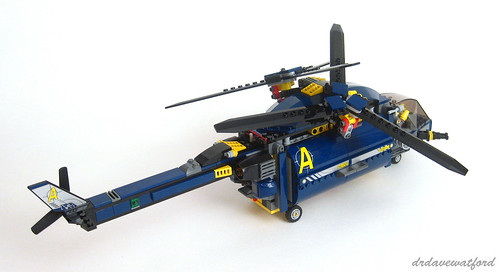
The next stage of the build (below - click to enlarge) involves construction of a lengthy tail boom and attachment of the rear rotor. The boom is largely studless, and at the point where it joins the fuselage of the helicopter it's flanked by a couple of jet engines which are fashioned from black Basilisk body segments described earlier. The cockpit and boom are then connected by black Technic bricks which form the beginnings of a roof over the fuselage.


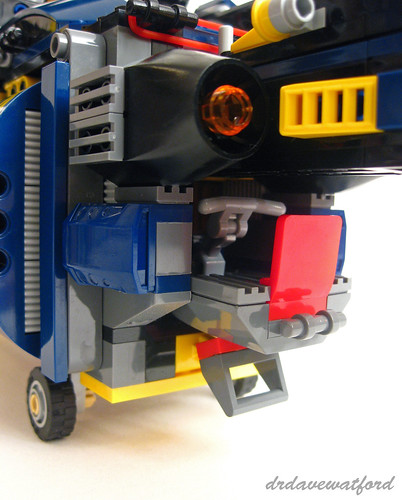
You can get a closer look at the tail boom, tail and jet engines in the picture below (click to enlarge). Attachment of the boom leaves a small space in the area beneath the point where it attaches to the fuselage; this space will be used to store the small boat described earlier.


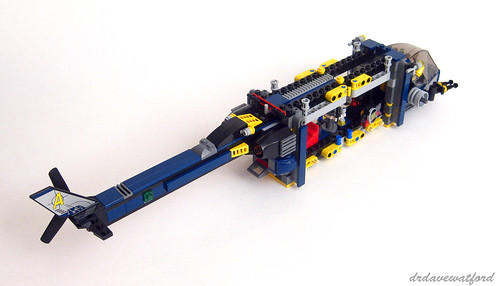
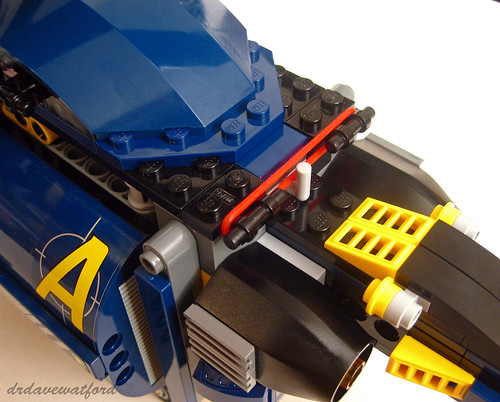
With instruction booklet one now finished it's time to move on to booklet two. The build continues with completion of the Technic frame to which the fuselage doors will be bolted, and construction of the mechanism for spinning the rotors; if you look closely at the roof of the fuselage in the picture below (click to enlarge) you can see a bley gear rack and red elastic band which form part of the mechanism. The string from the winches is no longer trailing out to the sides of the helicopter, having now been attached to a pair of what appear to be harnesses; the idea is that you attach Agent Chase and his colleagues to these harnesses after which you can lower them out of the fuselage or lift them up using the winches when the helicopter is in flight.


The mechanism for spinning the rotors can be seen a little more clearly in the picture below, and I'll describe it in more detail when I get on to talking about the set's play features. As well as the Technic-heavy work going on at this stage of the build there's also some tidying up to be done where the fuselage meets the cockpit and the boom.


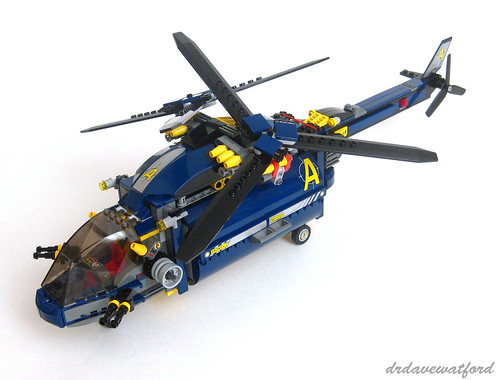
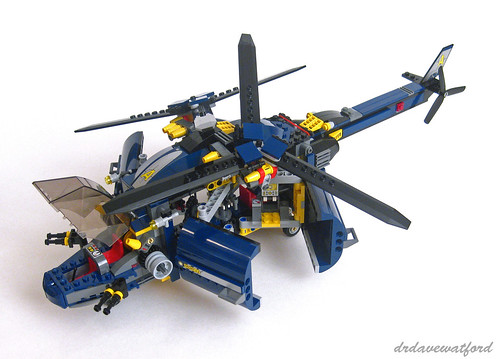
The final stage of the build begins with the construction and fitting of the four fuselage doors; if you want the finished helicopter to look as LEGO intended then there are a fair few stickers to attach at this point including a couple of larger ones which attach to the curved surface of two of the doors. I don't like stickers at the best of times, and I particularly hate trying to neatly apply big stickers to curved surfaces, so I spent the next few minutes cursing while I applied and reapplied the stickers until I finally had what I considered to be an acceptable result. With the doors fitted the helicopter then gets some rudimentary non-retractable landing gear, after which it's a case of fitting a couple of large curved roof sections, building and attaching the pair of large main rotors, doing a bit of tidying up, and then we're done as you can see in the picture below (click to enlarge).

I love the dark blue and yellow colour scheme, although I wish that there was more metallic silver which is a feature of many of the Agents sets but which only appears here thanks to the stickers. The design is surprisingly studless, with tiles and curved panels covering most surfaces and liberal use of SNOT techniques; I'm aware that some prefer a more studded design, but I personally think that the helicopter looks polished and impressive.


As well as looking good, the helicopter is packed with play features, some of which you can see demonstrated in the pictures below (click to enlarge). As well as the previously-described opening cockpit canopy, we get four independently opening doors on either side of the body of the helicopter; you'd generally expect the side doors to open via simple hinges, but in this case a more complex mechanism is employed which offers increased access by allowing each door to be pulled laterally away from the helicopter body as well as offering the ability to open outwards. Not visible in the picture below are the pair of winches behind the cockpit which can be used to lower or airlift the Agents through the open doors while the helicopter is in flight.


The twin rotors rotate thanks to the inclusion of a Technic mechanism; the yellow and black section on top of the boom can slide backwards and forwards which makes the rotors spin, and because the rotors are tilted and their motion is syncronised their blades never touch - clever! The recoil from the red elastic band that you can see in the picture below (click to enlarge) returns the mechanism to its starting position so you're ready to go again and keep the rotors spinning. The small rear rotor can also spin, although it isn't attached to the mechanism for the main rotors.


As mentioned previously, at the back of the fuselage beneath the tail boom there's a compartment which accommodates the small boat. The picture below (click to enlarge) shows the boat pushed halfway into its compartment. When the boat is pushed in as far as it'll go it can be secured for flight by lifting up the dark bley modified tile with handle that you can see in the picture below; having thoroughly enjoyed swooshing the finished model around the room I can confirm that the boat stays put!


In summary I think this is a superb set, and it offers a welcome reminder of what an excellent job LEGO did with the original Agents theme. The helicopter in particular looks great and it's packed with play features. For once I think that LEGO's 8-14 age recommendation is if anything slightly optimistic as the build was surprisingly challenging, featuring more Technic elements and mechanisms than I'd expected; it certainly look me longer to build than I thought it would, and I enjoyed almost every minute of it.


Reacquainting myself with the original Agents sets has been a joy, but the downside is that it's lessened my affection for the current Ultra Agents theme. Don't get me wrong - I was quite impressed with the Ultra Agents Infearno Interception set that I recently reviewed, and a couple of the other Ultra Agents sets such as the Mission HQ look pretty good - but I can't get away from the feeling that some of the original Agents sets such as this one, the Mobile Command Center and the Volcano base are at a different level and put the newer offerings in the shade. Let's just hope that LEGO builds upon the competent first wave of Ultra Agents sets and gives us a few spectacular second wave offerings in 2015 that'll mean I no longer have to reminisce about how good the original sets were....


Set 8971 Aerial Defence Unit was released in 2009 and is long retired. It contains 733 pieces and according to Brickset it originally retailed for £41.09/US$79.99. I purchased my pre-owned boxed copy of the set from eBay for £30 plus shipping last year, although I did need to replace a few missing parts; you'll probably end up paying a little more than that now for a boxed example, although there are currently a few new sealed examples available on Bricklink for between £60 and £70 plus shipping which seems surprisingly reasonable to me, so you hopefully won't need to break the bank if you're after a copy.