
I initially intended this review to be just one post, but it soon became clear that there would be too much to squeeze into a single post so I decided to split it - packaging, minifigures, brick-built characters and accessory models in this instalment, and the Sea Cow herself next time. My review may contain spoilers, so if you've not seen the LEGO Movie yet then you might want to consider watching it before reading this....

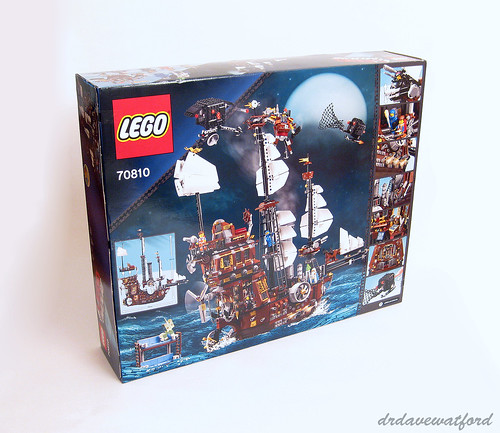
The box is big and heavy - the same width and height as the massive Sydney Opera House box but not as deep. The front of the box (above - click to enlarge) carries the standard LEGO Movie branding and features an exciting action shot of the Sea Cow model pitching on a stormy sea with all the other components of the set (characters and models) posed on and around it. There's also a triangular boxout in the bottom right corner which highlights the six minifigures and brick-built characters contained within the set, and text reminding us that "The ship does not float".... The back of the box (below) shows the Sea Cow from behind; there's also a small boxout revealing that the completed Sea Cow model is 58 cm long and 61 cm high, and a series of pictures highlighting a selection of the set's play features.
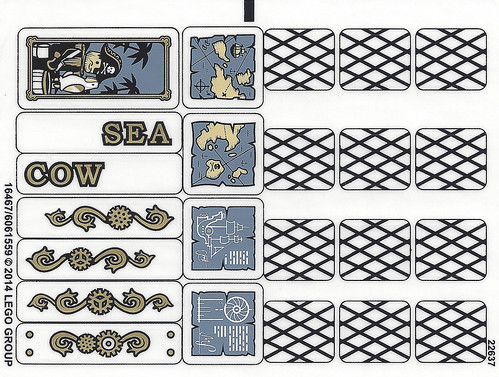
Having taken a close look at the box it was time to dive in and inspect the contents, so I cut the three tape seals which keep the end flap closed and peered inside. The box contains a whopping 17 bags of elements; all but one of the bags is printed with a number between 1 and 9, and most of the bags contain at least one smaller bag of elements. In addition to all the bags of parts there are five large dark brown hull pieces floating around loose inside the box. There's only one instruction booklet, but it's huge, sealed in a bag with a cardboard backing to keep it flat and neat. There's a single DSS (below); it's fairly small but still manages to accommodate 23 stickers.
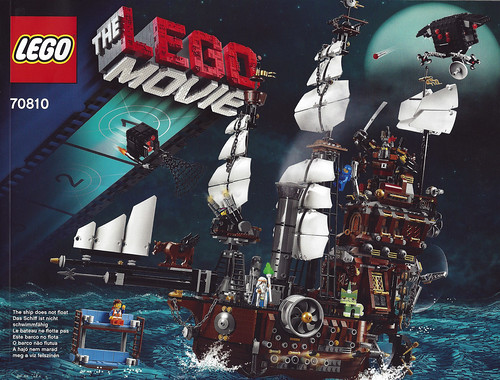
The instruction booklet (cover below) is a veritable brick; not since building Set 10179 Ultimate Collector's Millennium Falcon and Set 10188 Death Star do I recall an instruction booklet of such heft. It's close to A4 sized, and contains 292 pages from cover to cover. The booklet uses a similar style of binding to the Ghostbusters 30th Anniversary set that I recently reviewed over at Brickset, and I'm sorry to report that I experienced exactly the same problem with it as I did with the Ghostbusters booklet, namely pages falling out after minimal use. As a collector as well as a builder, instruction booklets falling to pieces after minimal use is unacceptable to me; I'll be informing LEGO Customer Service, and if anyone else is similarly affected then I'd urge you to do the same so that LEGO realise there's a potential issue with their new binding method.
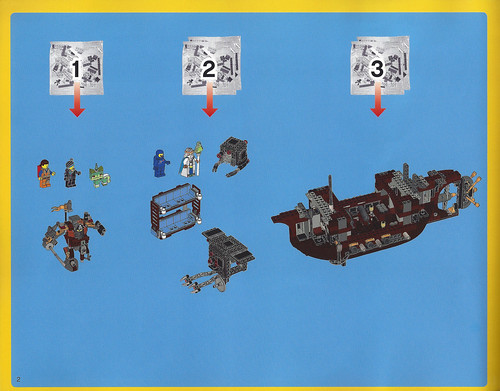
The build is broken into nine stages, and the numbering on the bags of parts shows which stage the contents are needed for. The first 3 pages of the instruction booklet (example page below - click to enlarge) show what you'll be building at each stage and also indicate how many bags of parts there are for each stage - the first time I've noticed this in an instruction booklet. A total of 282 pages are dedicated to the building instructions themselves, with the rest of the booklet taken up by a 4-page inventory of parts, a couple of pages of advertising for other LEGO Movie sets and the LEGO Movie video game, and the customary call on the back cover for feedback via an online LEGO survey.
As you might expect with a recently-released set of this size there's a generous selection of relatively uncommon parts included, although outside of the minifigures there are only a few actually unique to the set - a reddish brown 1 x 12 x 3 raised arch, a flat silver curved 2 x 1 slope with no studs, and a pearl gold unprinted minifigure head. I'll flag some of the other less common parts as we go along.
There's only a single bag numbered with a '1', and it contains the parts needed to build Emmet, Wyldstyle, Queasy Kitty and MetalBeard. The version of Emmet in this set has only previously appeared in polybag Set 30280 The Piece of Resistance, although that having been said, the torso, legs and hair are common to all versions of Emmet and this version only differs from most others by virtue of his front and back-printed facial expressions which you can see in the pictures below. Emmet comes complete with a light bley neck bracket, to which his Piece of Resistance attaches; I've photographed him without his neck bracket or Piece of Resistance in the second picture below so his torso backprint is visible.


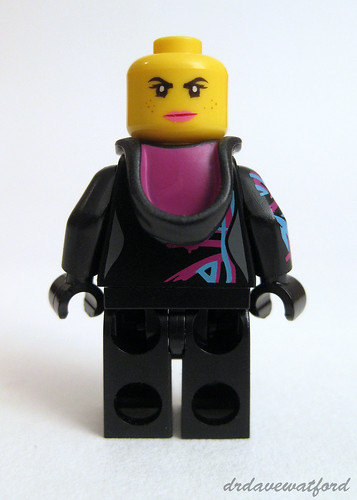
The set includes Wyldstyle with her hood down (below); this variant has appeared in a total of three sets to date including this one.

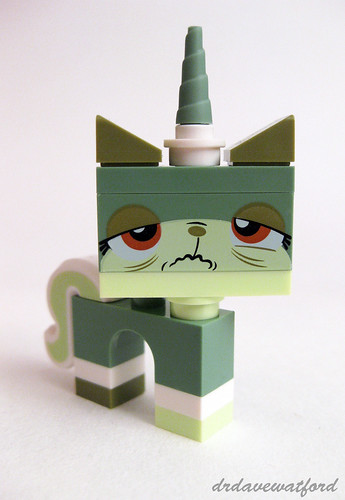
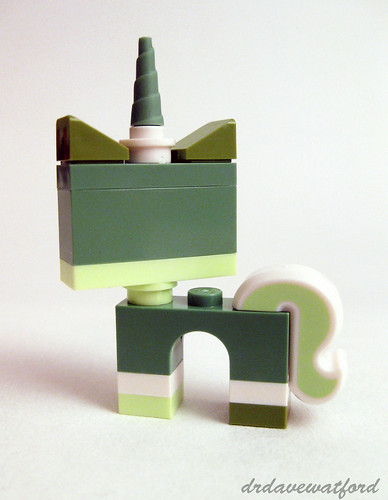
Queasy Kitty is unique to this set and contains a whole bunch of uncommon elements, some of which have never previously appeared elsewhere. The sand green 1 x 3 brick with the printed queasy cat face pattern is predictably unique to this set, as is the sand green 1 x 3 arch, the sand green unicorn horn, the white tail with yellowish green printing on the sides, and the yellowish green 1 x 1 and 1 x 3 plates. While not unique to the set, the yellowish green 1 x 1 round plate, the olive green 1 x 1 plate, and the sand green 1 x 3 plate have only previously featured in 2, 3 and 5 sets respectively. Good luck trying to build Queasy Kitty out of your existing elements, therefore, or even trying to source the parts from Bricklink....
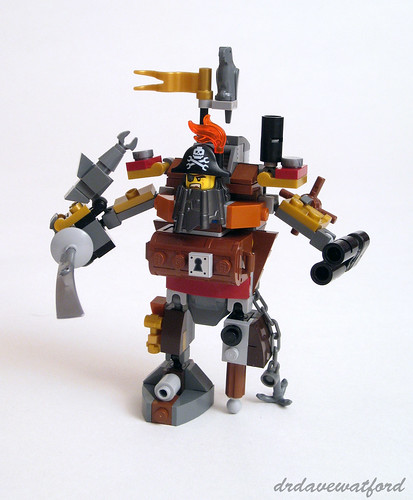
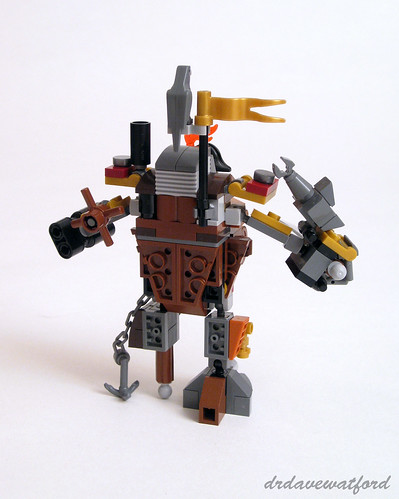
MetalBeard (below) is also a veritable treat for afficionados of uncommon elements, being made up of a host of new and/or hard to find parts. These include a few dark brown 1 x 2 plates, a light bley 1 x 1 tile with keyhole pattern, MetalBeard's pearl dark grey minifig head holder, and a couple of dark orange 18 degree 2 x 1 x 2/3 slopes with 4 Slots, all of which have only appeared in one other set to date. In addition to these, there are further elements which have only previously appeared in a handful of sets at most. These include a dark bley grappling hook, a couple of dark orange 45 degree 2 x 1 slopes, reddish brown 1 x 1 bricks with studs on two sides, reddish brown left and right 3 x 2 wedge plates, some of the new modified 1 x 2 plates with ball/receptable, and a flat silver 10L propeller blade used for MetalBeard's sword, to mention just a few. To describe MetalBeard as utterly bizarre would be a gross understatement, but it'll have to do in the absence of anything better; my personal highlight is the brick-built shark attached to his right wrist ! This version of MetalBeard is probably a little more than half the height of the more detailed version to be found in Set 70807 MetalBeard's Duel, although there are a number of common features such as his head, the dark bley parrot, and the treasure chest affixed to his torso complete with 1 x 1 tile printed with a keyhole pattern.
There are two bags numbered with a '2'. These contain the parts needed to build Benny and Vitruvius plus Emmet's double decker couch and a couple of Micro Managers. As a very long-time fan of LEGO's Classic Space sets of the late 1970's and early 1980's I was looking forward to getting my hands on Benny and you can see him below. Benny is currently unique to this set, although he'll be appearing in some form in Set 70816 Benny's Spaceship, Spaceship, SPACESHIP! which is starting to appear at retail even as I type this. The character of Benny is of course based upon the spaceman minifigures which accompanied LEGO's Classic Space sets of the late 70's and 80's; Broken chin straps on their helmets and faded torso prints were a common problem back in the day, and LEGO have cleverly simulated these defects in Benny's design, thus guaranteeing to win the hearts of anyone who owned any of those original Classic Space sets. Benny's helmet, torso and reversible headprint have yet to appear elsewhere, although his airtanks are the same as those which used to grace the Spacemen of old.


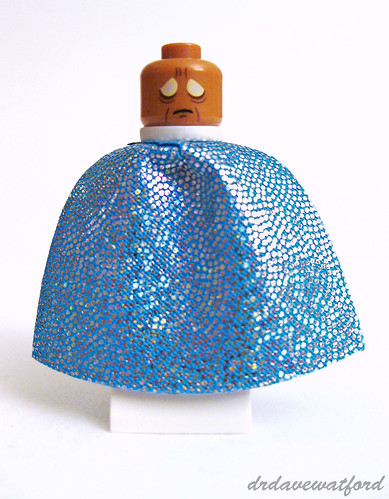
Vitruvius has only previously appeared in Set 70809 Lord Business' Evil Lair, another LEGO Movie offering that I reviewed over at Brickset; a different version of the minifigure will apparently accompany the upcoming Blu-Ray release of The LEGO Movie in some geographies. I commented in my Brickset review that Vitruvius looks like "an old hippy in a tie-dye T-shirt and jeans wearing a white bathrobe" and I still think that's pretty much spot on. Those ghostly eyes still give me the creeps, although I do love his sparkly cloak which is thus far unique to Vitruvius.

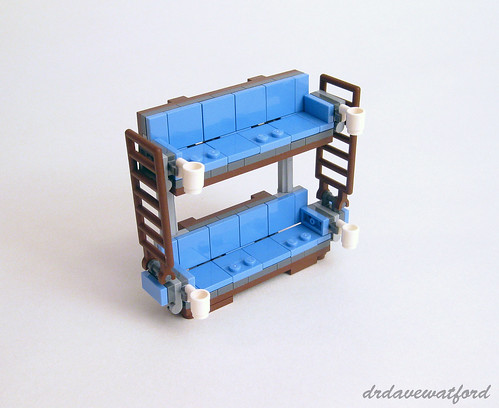
Once the minifigures and brick-built characters have been assembled it's time to get to work on Emmet's double decker couch. It's a pretty safe bet that if you haven't seen the movie you'll be scratching your head at this point wondering what the hell a double decker couch is doing in this set, but then if you haven't seen the movie then you'll probably be scratching your head at pretty much everything else as well I guess.... The couch (below - click to enlarge) is a fairly simple build; it utilises a couple of reddish brown 7 x 3 ladders in its construction, previously only available in three sets, but otherwise avoids the use of any particularly uncommon parts. I did wonder whether I'd built it wrong as once completed it's not possible to position the ladders fully vertically, but seemingly not.
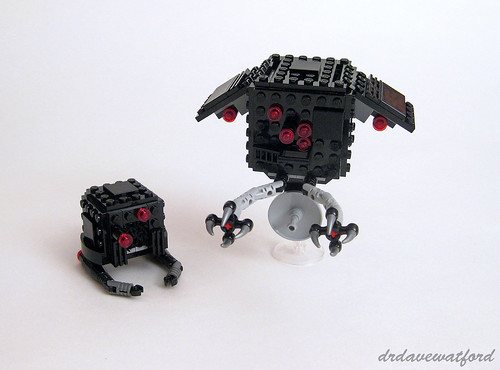
There are two Micro Managers included with the set, and you can see them below (click picture to enlarge). I've photographed the bigger one on a display stand (not included in the set) as it can't be posed upright otherwise. They look decidedly menacing despite being in essence just a couple of black boxes; this is in large part down to their articulated forward-facing arms, which in the case of the larger Micro Manager in particular look pretty lethal. The smaller Micro Manager just about accommodates a black 10 x 10 string net; this is fired forwards by a simple mechanism consisting of a Technic axle protruding from the rear which you push vigorously to launch the net. The larger Micro Manager features retractable side panels, attached to which are a pair of flick-fire missiles, and a radar dish which can be rotated upwards and backwards.
With all the minifigures, brick-built characters and accessory models completed, only the Sea Cow remains. I'll review the Sea Cow in my next posting, as well as providing my overall verdict on the set, so farewell until then.
Sea Cow review, Part 2 --->
Like you I bought this soon after release and it's currently in the waiting list of builds behind #10188 Death Star. In truth though I can't wait to build the Sea Cow. It has to be one of the most striking sets I've seen since I've got back into Lego and is going to have pride of place on display.
ReplyDeleteI'm looking forward to the rest of your review! Hopefully she won't disappoint!
"Striking" is one word for it.... I have to say I'm thoroughly enjoying the Sea Cow build and will report back with a detailed review when it's done. I still can't quite believe that it got the green light to go into production, but I'm delighted that it did.
DeleteWish i had the money to get it but aint gunna happen any time soon. Enjoyed reading about it though, even if it did make me a little depressed that it wont happen for me. I acctually went for a job at the sheffield lego store but they aint recruiting atm.
ReplyDeleteGlad you liked the review so far, Tony, and good luck with the job hunting. There'll obviously be some turnover of staff at your local brand store, so keep trying and you never know.... And brand store staff get a decent staff discount !
Delete