
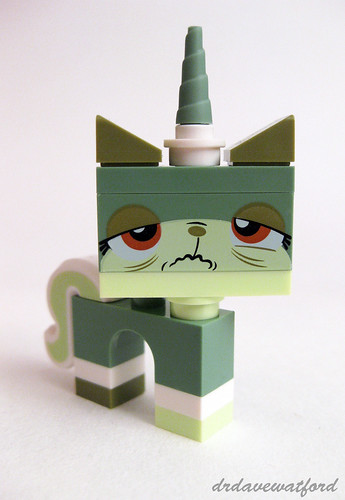
After all the time spent assembling and photographing minifigs and other accoutrements it was nice to get to work on the Sea Cow itself. I commented last time on the generous selection of unusual elements to be found in the Queasy Kitty (above) and MetalBeard brick-built characters, and if that was liable to quicken the pulse of afficionados of uncommon and/or interesting elements then the Sea Cow's parts palette will surely send them into paroxyms of ecstasy.... You can see a selection of the less common elements utilised in the construction of the Sea Cow in the picture below (click to enlarge); all of these elements have graced 10 sets or less to date, a good number of them have only previously appeared in one or two sets, and a couple of them are unique to the Sea Cow. There's loads of dark brown to go with the more common reddish brown, plus a liberal sprinkling of pearl gold, flat silver and dark red.

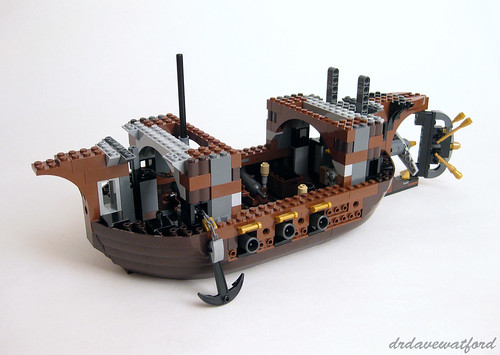
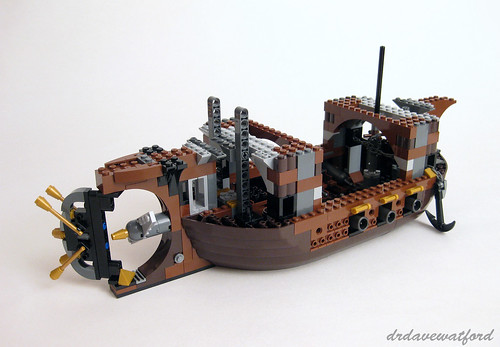
The single bag of elements numbered with a '4' is all that's required for the next stage of construction. This involves building up the sides of the hull and decorating the exterior with a bling-tastic selection of pearl gold and flat silver elements including 16 flat silver Technic pin connectors which I assume are supposed to represent mini-cannons of some sort. Both sides of the ship feature prominent semi-circular cut-aways, and we'll see how these are filled later on. Progress is rapid and straightforward, and you can see the results below (click pictures to enlarge).
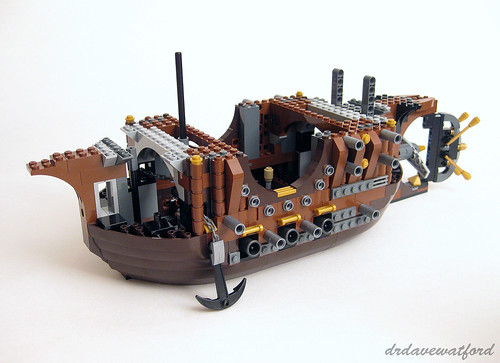
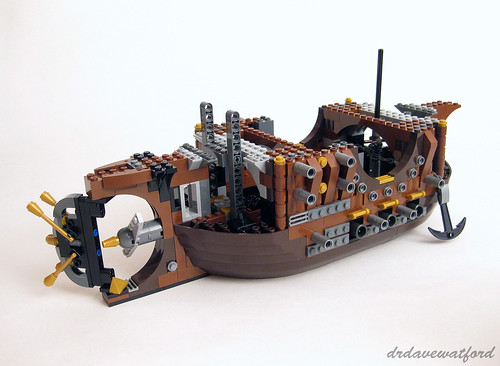
Construction of the ship's prow (the foremost part of the bow above the waterline) and stern plus the fore and aft decks comes next and requires the contents of the two bags marked with a '5'. The prow and stern are elegantly constructed, consisting of rows of reddish brown curved 4 x 1 slopes arranged side by side on 6 x 6 plates which are themselves held in position sideways so that the slopes face outwards and produce a pleasing curved contour as you can see in the pictures below. The decks are made up of a patchwork of reddish brown and black plates; once they've been dropped into place a 16L axle pierces the foredeck; this will form the core of the foremast. Finally, 8 trans dark blue boat studs are strategically attached to the underside of the hull; these serve to reinforce the joins between different parts of the hull and rudder and also presumably reduce friction in case anyone decides to slide the model around on the floor.

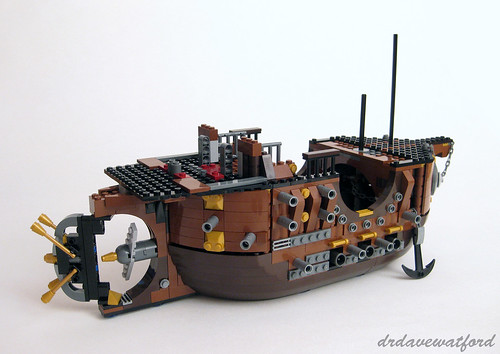
There are two bags marked with a '6', and the parts within are used to build the first level of the towering structure at the back of the vessel (pictures below - click to enlarge). This has walls which are angled via the use of hinge plates and which incorporate large windows; the lower part of the windows feature a cross-hatched leaded effect which is achieved with the use of stickers which attach to the window panes. Accurate placement of these stickers is important - if you make a mistake and have to remove and reapply one or more stickers then the affected window or windows take on a cloudy appearance, so handle with care.... Detailing above the arched entrance is provided by the unorthodox use of a pair of reddish brown whips, while at the back there are a host of interesting details including a couple of propellers, ornate multi-level lamps and even a pair of wings....
There's further detailing inside this section - as you can see from the official LEGO close-up below, the main interior feature appears to be some sort of steam regulation device, complete with a valve, pearl gold taps and some pearl gold spyglasses which pass for pipes. The 'steam room' also contains a chandelier hanging from the ceiling and a barrel containing swords and muskets
 |
| Picture (c) 2014 LEGO Group |
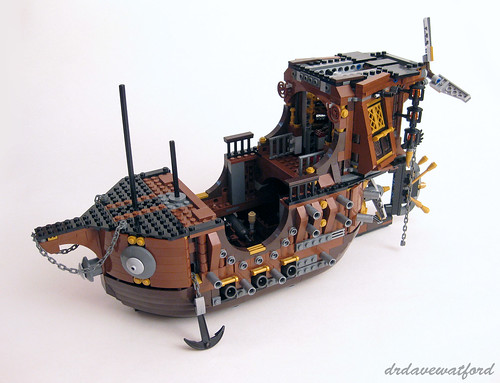
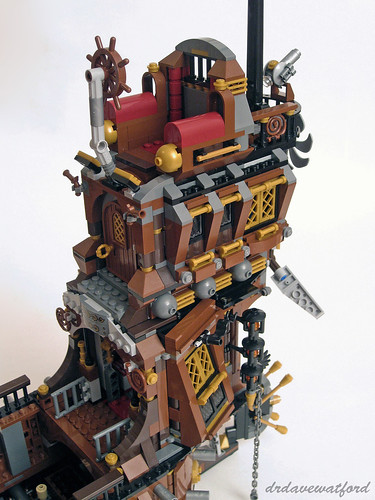
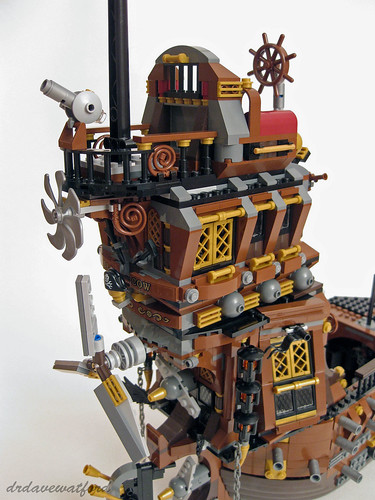
The contents of the three generously-stuffed bags marked with a '7', plus a huge 20 stud high one-piece boat mast from the unmarked bag, are needed for the next stage of the build. This involves construction of the captain's cabin on top of the 'steam room', and an upper deck on top of that. The exterior is very ornate, once again featuring an abundance of pearl gold detailing, lattice windows and numerous neat little touches.
We get another propeller at the rear, the designers presumably deciding that the three other rear propellers already in place weren't enough, and the name of the vessel is spelled out by a couple of stickers attached to curved 4 x 1 slopes beneath the propeller. I hate STAMPS so it's nice that "SEA" and COW" stickers are individually attached one to each 4 x 1 slope rather than a single sticker spanning both. The ship's wheel sits on the roof of the captain's cabin, behind which is what looks suspiciously like a large dark red armchair; this presumably enables MetalBeard to steer his ship in comfort.... Behind the armchair is a small, semi-circular rear observation deck (known as a poop deck, I believe) from which the rear mast rises. Sails are provided in the form of curved white Technic panels; when I first saw publicity shots of the model I was dubious of LEGO's decision to use these rather than the cloth sails of old, and I still think that cloth sails would have looked better BUT I have to admit that the Technic panels work better than I'd expected; they furthermore have the advantage over cloth sails of being less fiddly to install, more robust and hard-wearing, and a lot cheaper to replace in the unlikely event that you'd ever need to do so.
The interior of the captain's cabin is a joy to behold - it's literally packed with features and details such as a globe, sextant, paintings, charts, blueprints of the ship, a ship in a bottle and a treasure chest to name just a few. The charts, blueprints and paintings consist of stickers applied to tiles of various sizes and colours. The shame of it is that all this incredible detail is basically hidden from view once you've completed this section of the build; even so, you'll know it's there, and it'll hopefully give you a warm fuzzy feeling knowing how much care and attention the designers have lavished on the model. You can hopefully get a flavour of the level of detail from the promo shot below.
 |
| Picture (c) 2014 LEGO Group |
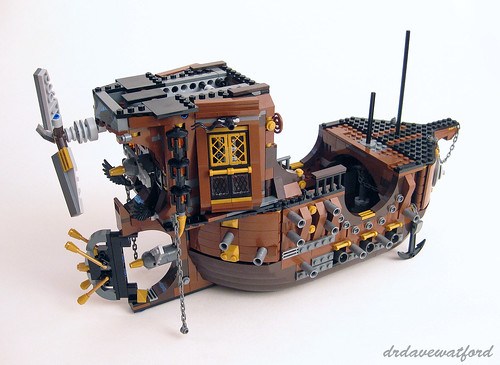
I'm starting to feel like I'm on the home straight as I pour out the contents of the two bags marked with an '8', grab a few more large elements from the unmarked bag, and start work on the forecastle, foremast and bowsprit (guess who had to take a crash course in galleon anatomy to write this review...?). One of the first tasks is to build what looks like a boiler on the foredeck; the boiler is basically a cylinder made up of a stack of light bley 2 x 2 round bricks with grille flanked by a couple of valves. The boiler slides down onto the shorter of the two axles sticking up from the foredeck which as previously described is attached to the ship's capstan; in this way the anchors can be raised and lowered by rotating the boiler. Construction of the foremast comes next, complete with a substantial gun emplacement halfway up and eight sails once again made up of white Technic panels of various sizes.
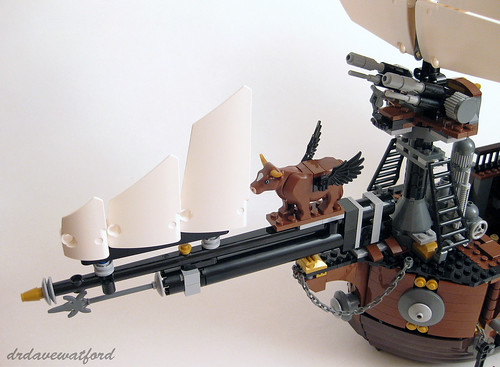
The bowsprit is the substantial spar projecting forward from the ship's prow. As well as accommodating three more sails, it's noteworthy for the presence of a winged cow complete with pearl gold horns (below - click to enlarge) - every galleon needs a figurehead, after all, even if it's not usually bovine....
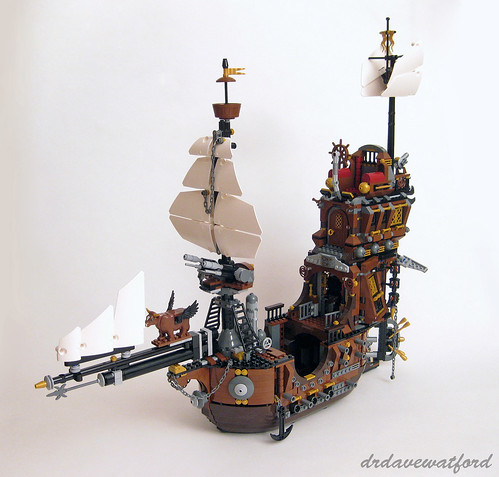
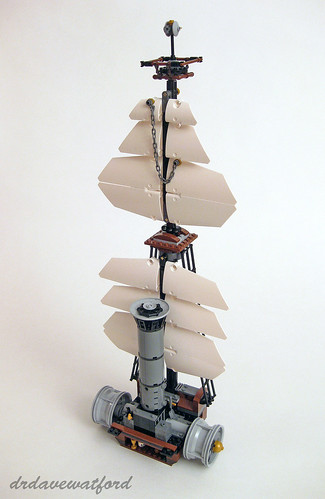
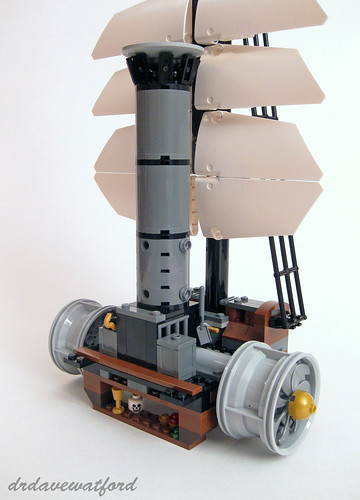
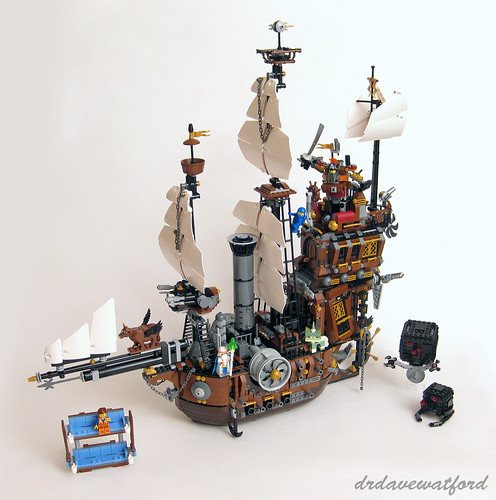
The last stage of the build involves construction of the main mast plus the ship's funnel and the prominent twin turbines that fit into the semi-circular cut-aways on both sides of the vessel. This requires the contents of the two bags marked with a '9' and the remaining elements in the unmarked bag. As you can see from the pictures below the main mast is absolutely enormous and the designers deserve considerable credit for ensuring that the whole thing doesn't come crashing down at the slightest provocation; the weight of the 16 sails alone made me wonder whether it would be horribly unstable, but it's deceptively robust and the mast complete with the section of deck and fittings can be carried around surpringly easily without breaking.
Once again there are a host of neat little details, some of which are hidden from sight in the finished model; these include a couple of secret compartments beneath the main mast containing a rat, a skull, a golden goblet and some gems. The funnel (below), while obviously dwarfed by the main mast, is also quite sizeable and sits atop a small furnace.
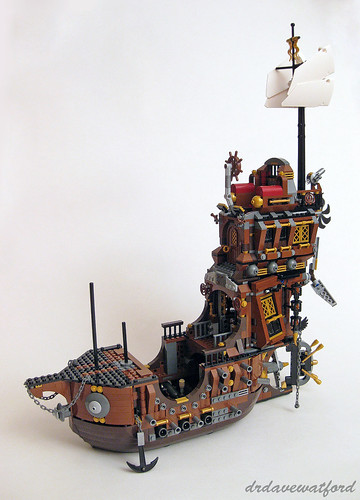
The section of deck complete with main mast, funnel and twin turbines slots into the mid-section of the vessel as you can see below, and the model is finished. I think the completed model looks majestic - enormous, wonderfully imaginative, packed with interesting details and features and impossible to ignore.
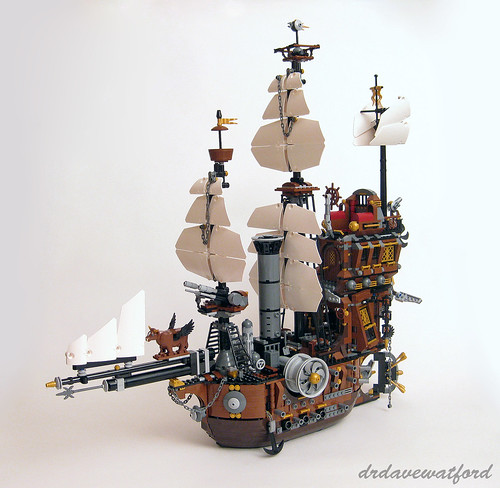
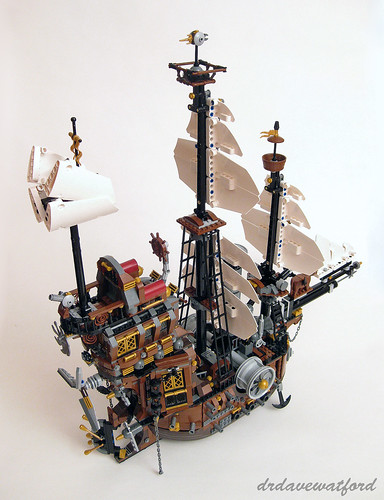
You can see the finished Sea Cow model plus all the minifigures, brick-built characters and other bits and pieces in the picture below (click to enlarge). It's hard to truly convey the sheer size of the finished ship, but hopefully the picture will at least go some way towards providing a sense of scale, showing as it does how the minifigures are completely dwarfed by the enormity of the ship.
The Sea Cow is a remarkable and spectacular model which has completely wowed me. I'm a fan of the Steampunk aesthetic which certainly helps, but I'd still defy anyone not to be impressed with the finished build. First and foremost it's huge - much bigger than I expected. Then there's the attention to detail both inside and out which frequently rivals that lavished on LEGO's revered modular buildings. One of the things I like most about the model is how quirky it looks; its higgeldy-piggledy appearance brings to mind a maritime version of The Burrow from the Harry Potter movies, and the designers appear have been given free reign to literally run riot, resulting in one of the most unusual, creative and over-the-top official models I've ever built. The icing on the cake is the relative lack of hype and expectation that preceded its release; similar to 2012's wonderful Haunted House this set almost seemed to come out of nowhere, and I therefore didn't approach it with unrealistically lofty expectations. Bottom line : the Sea Cow is stunning - my set of the year so far.
Set 70810 MetalBeard's Sea Cow contains 2741 pieces and retails for £169.99 / US$249.99 which is I think is pretty reasonable considering the part count. The set is a LEGO Exclusive which means it'll be a challenge to get hold of it at a decent discount, but despite that I still wholeheartedly recommend it - if you find another official set this year even half as much fun to build and as impressive to behold then I'll be surprised.... Hats off to LEGO, then - I think it was very brave of them to give the go-ahead to a niche set of this size and ambition, and I just hope it sells enough copies to ensure that they don't regret their decision....
Great review Dave. I know what you mean about the use of technic parts as sails, but in truth I can't imagine it with anything else now. I think they add to the Steampunk look of the ship and if possible just make the whole thing even more bonkers.
ReplyDeleteI can't wait to build it for myself now.
Yep - I was pleasantly surprised how well the Technic panels worked as sails, although the effect isn't quite so good from behind.
DeleteEnjoy the build - it's epic !
Dear Dr.Dave I am a big fan of your blog and all the action over at brickset you're involved with. Please send me this Sea Cow set and I will always think fondly of you when I look at it.
ReplyDeleteNice try, but no way Jose ! It's going on display in my house - only the second time that my other half has agreed to let me display a set in a communal area.
Delete