Showing posts with label passenger train. Show all posts

Tuesday, 2 June 2015

Raising the Roof

Having spent the last few weeks reviewing the largest of LEGO's new Jurassic World sets (here) and checking out TIE Fighters new and old (here and here respectively) in excruciating detail, not to mention taking some welcome holiday, I was starting to get withdrawal symptoms from my newly-resurrected LEGO City Layout. I was therefore delighted to find some time to work on it over the past week or so.


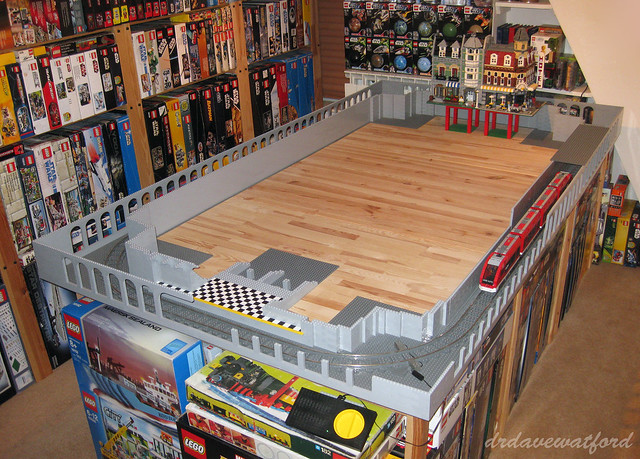
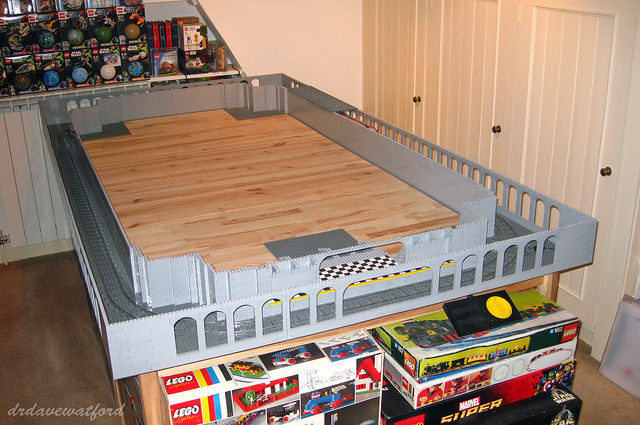
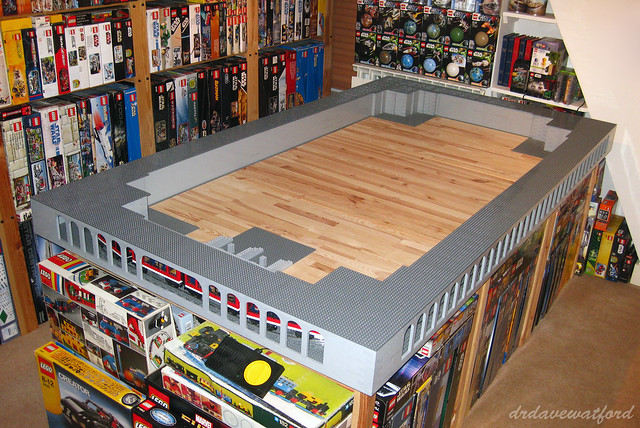
At the time of my most recent update (here) I'd pretty much completed the walls of the lower level of the layout (picture above) with only the front right section of wall needing to be finished off. This was therefore the obvious place to jump back in, and as you can see from the pictures below I completed the straightforward job of building the walls of the front right section up to the required height fairly quickly.
 https://www.flickr.com/gp/drdavewatford/FxoF01

Having reached this point in the build I figured that it would be as good a time as any to briefly pause and take stock of my parts usage to date. According to the original rough sketch I put together on LDD which I've followed reasonably closely, I've used around 500 light bley 1 x 1 bricks, 670 light bley 1 x 2 bricks, 240 light bley 1 x 4 bricks, 800 light bley 1 x 6 bricks and 810 light bley 1 x 8 bricks so far; the total part count currently stands at approximately 5,600 bricks, which seems a lot given how little there is to look at yet....
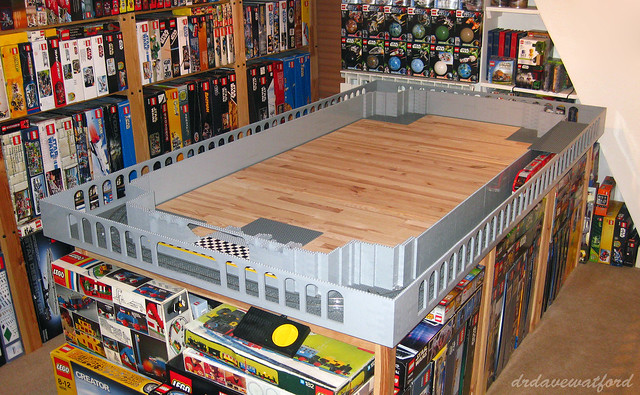

Having completed the walls of the lower level it was time to finish the job of enclosing the lower track loop by building a roof over the top of it; for those of you unfamiliar with the intended design, the roof over the lower track loop will form the floor of the planned upper track loop, thus providing a double-decker arrangement.
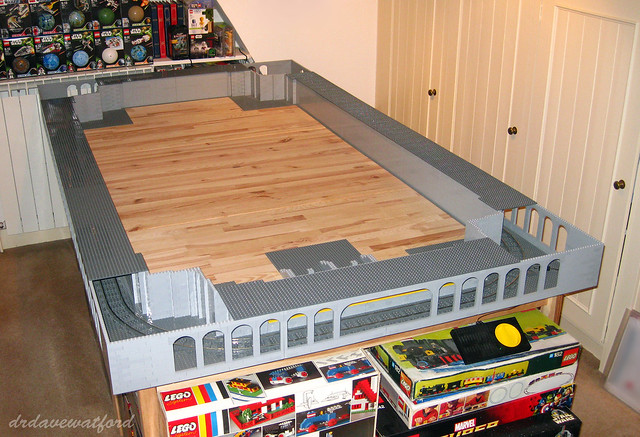

Covering the straight sections of track with a sturdy roof (pictures above and below) was a quick and simple task - the roof over these sections only has to span 15 studs so I was able to efficiently complete the job using a combination of dark bley 6 x 16 and 2 x 16 plates. The only real discomfort was financial - the 96 dark bley 6 x 16 plates needed to cover just the straight track sections alone don't exactly come cheap....
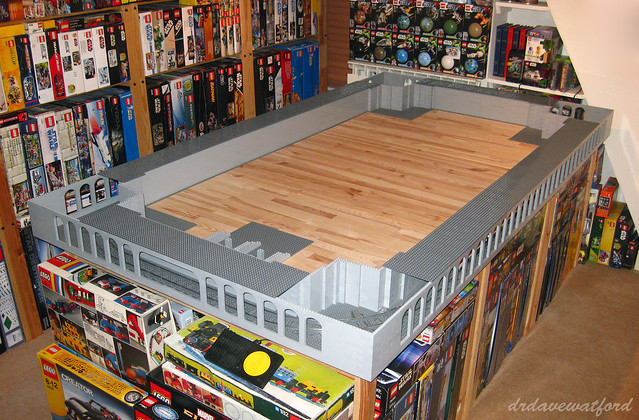

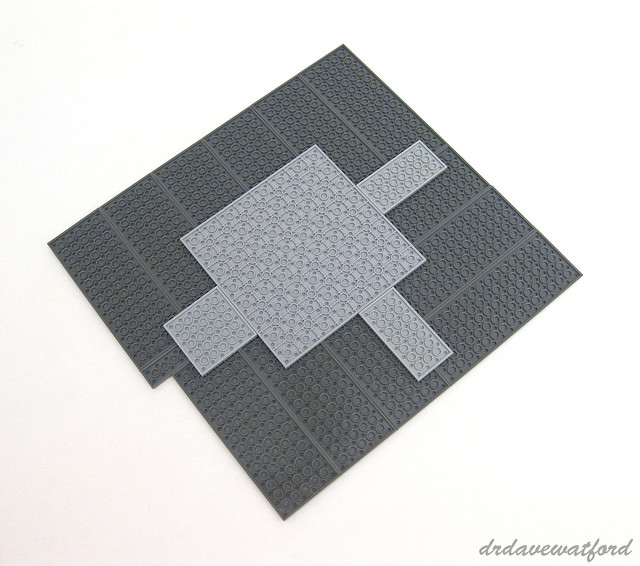
Although putting a roof over the straight track sections was simple enough, the corners required a little more thought as covering the curved track sections would necessitate spanning an area 34 studs square. My first thought was to use a 32 x 32 baseplate for each corner and support it at the edges, but because I wanted the corner roof sections to be at the same height as the straight roof sections this wasn't really viable. I therefore needed to use standard plates, but there obviously aren't any plates remotely large enough to span a 34 x 34 area on their own. I consequently needed to come up with a 'mosaic' of plates which would cover the area while providing at least a modicum of structural rigidity so that the roof wouldn't cave in under the slightest pressure. In the end I went with the arrangement below; the dark bley roof sections, again predominantly a combination of 6 x 16 and 2 x 16 plates, are supported underneath by a light bley 16 x 16 plate and a few smaller plates. The use of the large 16 x 16 plate turned out to be key, conferring an unexpectedly high degree of strength and rigidity.

It didn't take long to construct three more assemblies similar to the one above, and you can see the layout with all four corner roof sections in place in the pictures below. Time will tell whether this corner roof arrangement will prove to be sufficiently robust; a section of curved track will run over each corner, so the roof will need to support the weight of trains running over it, not to mention me accidentally leaning on it now and again.... Having tested the corner roof sections under modest weight-bearing, however, the early signs are that they'll do the job OK.
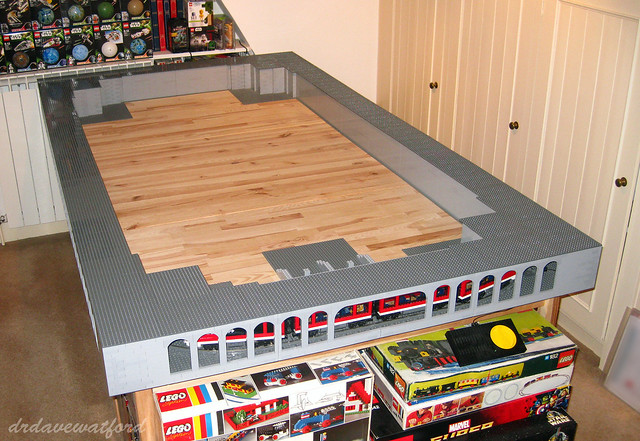

So that's the visible part of the lower level now pretty much done apart from the subway station, then. I still of course need to build the structures which will support the upper level, though, and I also need to figure out a way of rescuing stricken trains from the lower loop in the event of a breakdown; at present I can access the subway train through the arches, and the large opening in front of the subway platform is just about big enough to squeeze the train through when I need to remove it, but it's fiddly and not ideal.

Because I designed the lower level such a long time ago, I've predictably come up with a whole bunch of new ideas during the intervening period to tweak and potentially improve it. I'm going to do my best to keep a lid on those tweaks for now, though - having already taken the best part of 4 years just to get to this point it's high time I moved on, put the lower level to bed for the time being at least, and started to focus on the upper level so that's what I'm going to do.
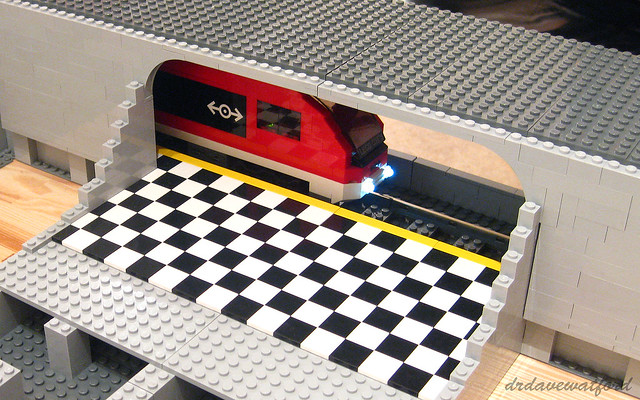

With the lower track loop now fully enclosed I figured it was high time to power up the track and get the subway train running. You can see a brief video clip below of my modified 7938 Passenger Train running around the lower track loop at about 2/3 speed; click here to view the clip on YouTube if you can't access the embedded video on your device.


Wednesday, 4 April 2012

Whoops...

Honestly, what was I thinking ? Infrared remote control requires line of sight in order to operate the device - it won't work through walls. So if you place the device that you wish to control, for instance a LEGO train, in a place without line of sight to the controller, say in a long, enclosed section of railway tunnel, then it won't work. Duh.


Above (as with all the pictures, click to enlarge) you can see where I'd got to with my LEGO city layout the last time I blogged about it; eventually the whole loop of track will be fully enclosed, and the plan is to ultimately run an extended 5-car version of Set 7938 Passenger Train on this loop. Problem is that the standard, unmodified train is operated by infrared remote control, so for the majority of its progress around the enclosed loop of track I won't be able to control it. Whoops.... So what to do ? Well it's thankfully not an insurmountable problem, but it has once again necessitated an unplanned excursion into my wallet for what I think is the optimal solution.

For those of you of a more tender age, it's probably time for a quick history lesson. Since the appearance of LEGO trains in the mid-nineteen sixties, the company has utilised a variety of methods for making trains move by themselves. Initially it was 4.5V motors powered by huge on-board battery boxes. Then in the late sixties LEGO introduced a system of 12V motors running on electrified track; this system gave rise to some of the most iconic and revered trains that LEGO have ever produced, not least Set 7740 Inter-City Passenger Train (below).


This 12V system endured for two decades, eventually being phased out in the early nineties when LEGO transitioned to a system of 9V motors running on a different, moulded type of electrified track. This 'era' ran until 2006, and the introduction of the Remote Controlled, or RC, system which reverted to non-electrified track and motors once again powered by on-board battery boxes. Importantly, however, as the name suggests trains could for the first time be controlled remotely without the need for a physical connection between train and operator. The RC system was short-lived, however, giving way to the Power Functions-based system a few years later. This PF system, which is what LEGO currently sells, also employs non-electrified track, motors powered by on-board battery boxes and infra-red remote control which requires line of sight in order to control the train. Bringing things back to the present, it's this PF system which is used by the train I plan to use in my underground track loop, and hence my little problem....

So the solution ? 9V. Despite having been officially phased out by the LEGO company a while ago now, 9V is still probably the standard for AFOL builders of public LEGO train displays. The track is no longer produced by LEGO and is relatively expensive on the secondary market, as are the motors, but critically for me, train control is via a speed regulator attached to a section of track by wires so there's no need for line of sight, nor is there the potential for batteries to run out with the train stuck deep in a section of tunnel.... Talking of public train displays, and the observation that most seem to employ 9V, there's also another possible advantage - when I finally complete my layout and my attention shifts to the question of public display, if I use 9V track then it raises the possibility of linking my layout with that of someone else to produce a much larger collaborative build.

Anyway, once I'd sourced (and paid for....) the required quantity of dark bley 9V track, it took no time at all to replace the existing track in my layout with the 9V alternative and wire it up to a speed regulator. You can see where I've currently got to with my layout in the pictures below (click to enlarge); use of a wired system is certainly messier and less elegant, but it"s a compromise I'm willing to make in this case.


The other thing I needed to do, of course, was to convert my train from PF to 9V. Having previously had few dealings with 9V beyond buying a couple of old 9V sets for my collection, I approached this task with some trepidation. I needn't have worried, however - it was incredibly simple. From the outside, the standard 9V motor seems to be pretty much identical to the PF motor included with Set 7938 Passenger Train, so it was literally a matter of disconnecting the PF motor from the battery, removing it from the train chassis, and attaching the 9V motor in its place. I could have stripped out the PF remote receiver and battery box at this point given they were no longer needed to make the train move, but decided instead to retain the PF components to power and control the front and rear lights of the train instead.


You can see the train running on the newly laid 9V track loop in the (decidedly ropey) video clip below, complete with PF-powered front and rear lights. These are turned off and then back on again about halfway through the clip using the remote control.


So another small step forwards, then - ever onwards !

<-- LEGO City Layout : previous blog entry                  LEGO City Layout : next blog entry -->

Wednesday, 18 January 2012

One step back and two steps forward....

You could be forgiven for thinking that I'd given up on my city layout, last the subject of a blog posting almost 6 months ago. I'm well aware that things have gone rather quiet on that front, and apologies to those who've e-mailed me asking for progress reports. To be fair, my activities came to a grinding halt not as a result of unforgiveable sloth, but as a consequence of not having the pieces I needed to proceed and the delays I encountered while trying to source them. To my delight, however, I eventually took delivery of a few thousand light bley bricks of various sizes at the end of November, and it was game on....

City Layout : Lower Level on LDD
For those of you that haven't been following along, here's the story so far : the design of the lower level of my layout is done and has been consigned to LDD (screen grab above - click to enlarge). I've cleared sufficient space for the layout in my study, found some tables of an appropriate size to support it, and started to lay down some baseplates and railway track. While waiting for a large order of parts, I experimented with brick-built roads, which I decided to go with, and investigated the possibility of linking the upper and lower levels of the layout by way of a inclined loop of track (see picture below - click to enlarge) which I eventally decided not to do. And now you're caught up with everybody else....


Having rejected the notion, I have to confess that it was still with a somewhat heavy heart that I dismantled the lengthy section of inclined track and supports, thus stripping things back to the bare bones of basically just a loop of track on a bunch of 16 x 32 baseplates (below). I loved the idea of linking the two levels of the layout, but given the relatively small area I have to work with, it just wasn't practical and would have seriously limited what I could have built on the upper level, so it got the boot.

As you were....back to basics
Once the debris had been cleared, there was one final thing to figure out before I could start building in earnest. Having previously convinced myself that a one-stud clearance between the track and the outer tunnel walls of the lower level would be sufficient to allow my subway train of choice (the red Passenger Train) to be comfortably accommodated during its travels round the loop, I started to wonder whether it wouldn't in fact be better to give myself the option of using other trains as well, for the sake of variety if nothing else. Predictably, a one stud clearance wasn't nearly enough to allow most other trains I own to travel round the track, specifically at the corners where at least a 2 or 3 stud clearance was needed. Cue another delay while I pondered whether to just press on as planned and restrict myself to only using the red Passenger Train in the tunnels for all eternity, or whether I should bite the bullet and increase the clearance to give me more options. In the end, I decided to do the decent thing and increase the clearance between the track and the outer tunnel walls from one to three studs; this of course rendered my LDD mock-up somewhat obsolete and meant that I'd be to some extent flying blind. It also meant that the edges of the layout would overhang the tables by around 4 cm on each side. While this doesn't sound like much, only time will tell whether the loss of support around the edges will turn out to be a problem....

Having made my decision, I could finally get building. A combination of dark bley 32 x 32, 16 x 32 and 16 x 16 baseplates were used for the corners and held together with dark bley tiles; as well as loosely holding the baseplates together, the tiles also serve as support for the curved track sections. The curved sections are only attached at their very ends to the baseplates via a couple of 1 x 2 plates, but having run the red Passenger Train round and round the loop with my little boy more times than I care to recall, this hasn't been a problem thus far.


Below you can see the first few light bley bricks that I put into place. Having waited so long for these bricks to arrive, it was strangely exciting to be finally using them in earnest.....


From a very early stage I've planned for the layout to be modular. This'll allow for easier disassembly and subsequent reassembly, and hence potentially enable me to eventually display it at AFOL events if it turns out OK. The sections will be joined to each other via the track connections plus a few technic pins which fit into holes in the adjoining wall sections as you can see below. The intent is not to produce a strong join, merely to hold the sections in place and prevent them from moving around too much, while making it relatively easy to pull the different sections apart when desired.


A few subsequent build pics can be seen below (click to enlarge); it was actually pretty liberating to be able to temporarily stop scratching my head about design issues and instead just do some building and watch my LDD mock-up start to come to life.


The pictures below (click to enlarge) reveal where I'm at currently - an enormous amount still to do to complete the lower level, of course, but it's a start at least. The rear right corner section has reached the required height, and next it's just a case of building the walls up to the same height all the way round. Reassuringly, the red Passenger Train is comfortably accommodated within the tunnel and can move without obstruction; I suspect that this would also be the case for all the other trains that I own, with the notable exception of Emerald Night which needs an obscene amount of space when it negotiates curves, certainly more than I'm willing to provide it with....


As an aside, you can see from some of the pictures above that I'm afflicted by that scourge of AFOLs the world over - storage issues. I've had to resort to using the area to the right of the layout for 'temporary' set storage while I make alternative arrangements. I guess that subsequent layout progress reports will reveal whether I've been successful in doing this or not. I'm not a gambling man, but if I was, I unfortunately know where I'd place my bet....


Further updates to follow, as and when I have more to show you.

<-- LEGO City Layout : previous blog entry            LEGO City Layout : next blog entry -->

Wednesday, 3 August 2011

Change of Plan ?

I've always found the phrase "The Devil finds work for idle hands" a bit creepy, but I have to admit that it can sometimes be true. Well, metaphorically at least.

You may recall that work on my LEGO City layout came to a grinding halt a month or so back as I was waiting on some specific pieces that I needed to proceed. Then came the frantic rush to complete a number of LEGO Star Wars UCS sets in time for the Brickish Association LEGO show at the UK National Space Centre. That's now done and dusted, however, so my mind has returned to the work at hand, namely making some progress on my City layout. Problem is, the awaited Light Bley bricks still haven't arrived, and thus my 'idle hands' have had to busy themselves with something else. More specifically, I've started to re-examine some of the layout design choices I made initially, and as a result experiment with some alternatives....

Firstly, the track layout. The original plan was to have a completely enclosed lower loop of track running within the lower level of the layout, with an independent upper loop of track plus sidings etc. running at ground level. Then some bright spark suggested that it would be really cool if there was some way of linking the lower and upper track loops together so that a train could travel between the lower and upper levels of the layout. While twiddling my thumbs waiting for my missing pieces to arrive, I started thinking this suggestion over, and decided that it would indeed be cool if I could carry this off. It was however quickly evident that it probably wouldn't be as simple as it sounded.... After picking the brains of a few people on the Brickset Forum, the consensus seemed to be that in order for a LEGO train to be able to reliably negotiate a gradient, it would be inadvisable for the track to rise by more than one plate in height for every standard section of track. Given that the upper level of my layout will be around 13 bricks higher than the lower level, that's nearly 40 track sections required to get a train from the lower level to the upper level. Still, I sensed a challenge, so got cracking trying to see how it might work, and you can see the results of my experiment below; click to enlarge the pics.

Before.......
......and after !


As you can see, a whole circuit of inclined track was required to raise the level by just 13 bricks ! The gradient looked pathetically shallow to me, and I initially thought that the "one plate per track section" advice would turn out to be too conservative, but I soon discovered that it was spot on - my Emerald Night struggled to negotiate the curved track sections at anything other than full speed due to insufficient traction between the wheels and the track. You can see Emerald Night hauling herself up and down the slope in the short video clip below.


In practice, Emerald Night won't be used on the lower section of track - she won't fit comfortably within the tunnels which will enclose the lower loop, and hence wouldn't have to negotiate the gradient anyway. My choice for the lower loop is the train from Set 7938 Passenger Train with a couple of extra coaches bolted on for good measure, and it's this train which would have to scale the gradient if I decide to go with it, so my next job is to unseal the box, build it, and see how it fares on the uphill section.

Set 7938 Passenger Train - my choice for the underground tunnels
Including a link between the track loops might seem like a good idea, but it would substantially impact the design of the layout above ground. As the train negotiates the gradient, more and more of it would appear above ground level, meaning that I'd need to somehow accomodate a cutting running pretty much the entire length of the uphill section. This in turn would dramatically reduce the usable area for building on at ground level unless I can find a way of adequately landscaping over the cutting and building on top. It seems a daunting prospect for a relatively modest reward, but I'll keep mulling it over, and if anyone has any good ideas then I'd be delighted to hear them....

The other potentially significant design change I've been contemplating concerns the road system at ground level. Early on during the design process, MOC builder extraordinaire legoloverman aka Pete asked me whether I'd be using brick-built roads in my layout. My response was that it'd be nice to do, but that I wanted to try and keep things relatively simple to start with so as to maximise my chances of actually getting the layout built. I won't quote his response here, but suffice to say he was not in agreement..... Even so, I went ahead with the plan to use standard LEGO road plates in my design (click pic below for a reminder).


I've recently started to question that decision, however. Occupying a maximum area of 2.25m x 1.25m, my layout really isn't that big, and use of road plates would I think waste precious space, particularly as a result of excessively wide pavement areas. Also, the road plates are very inflexible - if you don't want a straight, curve, 'T' junction or crossroads then tough..... Finally, brick-built roads would look less generic and, I suspect, just better full-stop (or 'period', if you're an American). So time for another experiment, then ! There are a number of useful resources on the Web for anyone considering brick-built roads, and a number of techniques from simple to highly complex (you can get a taste here). After some enjoyable messing around, the result of my road building experiment can be seen below (click pics to enlarge).

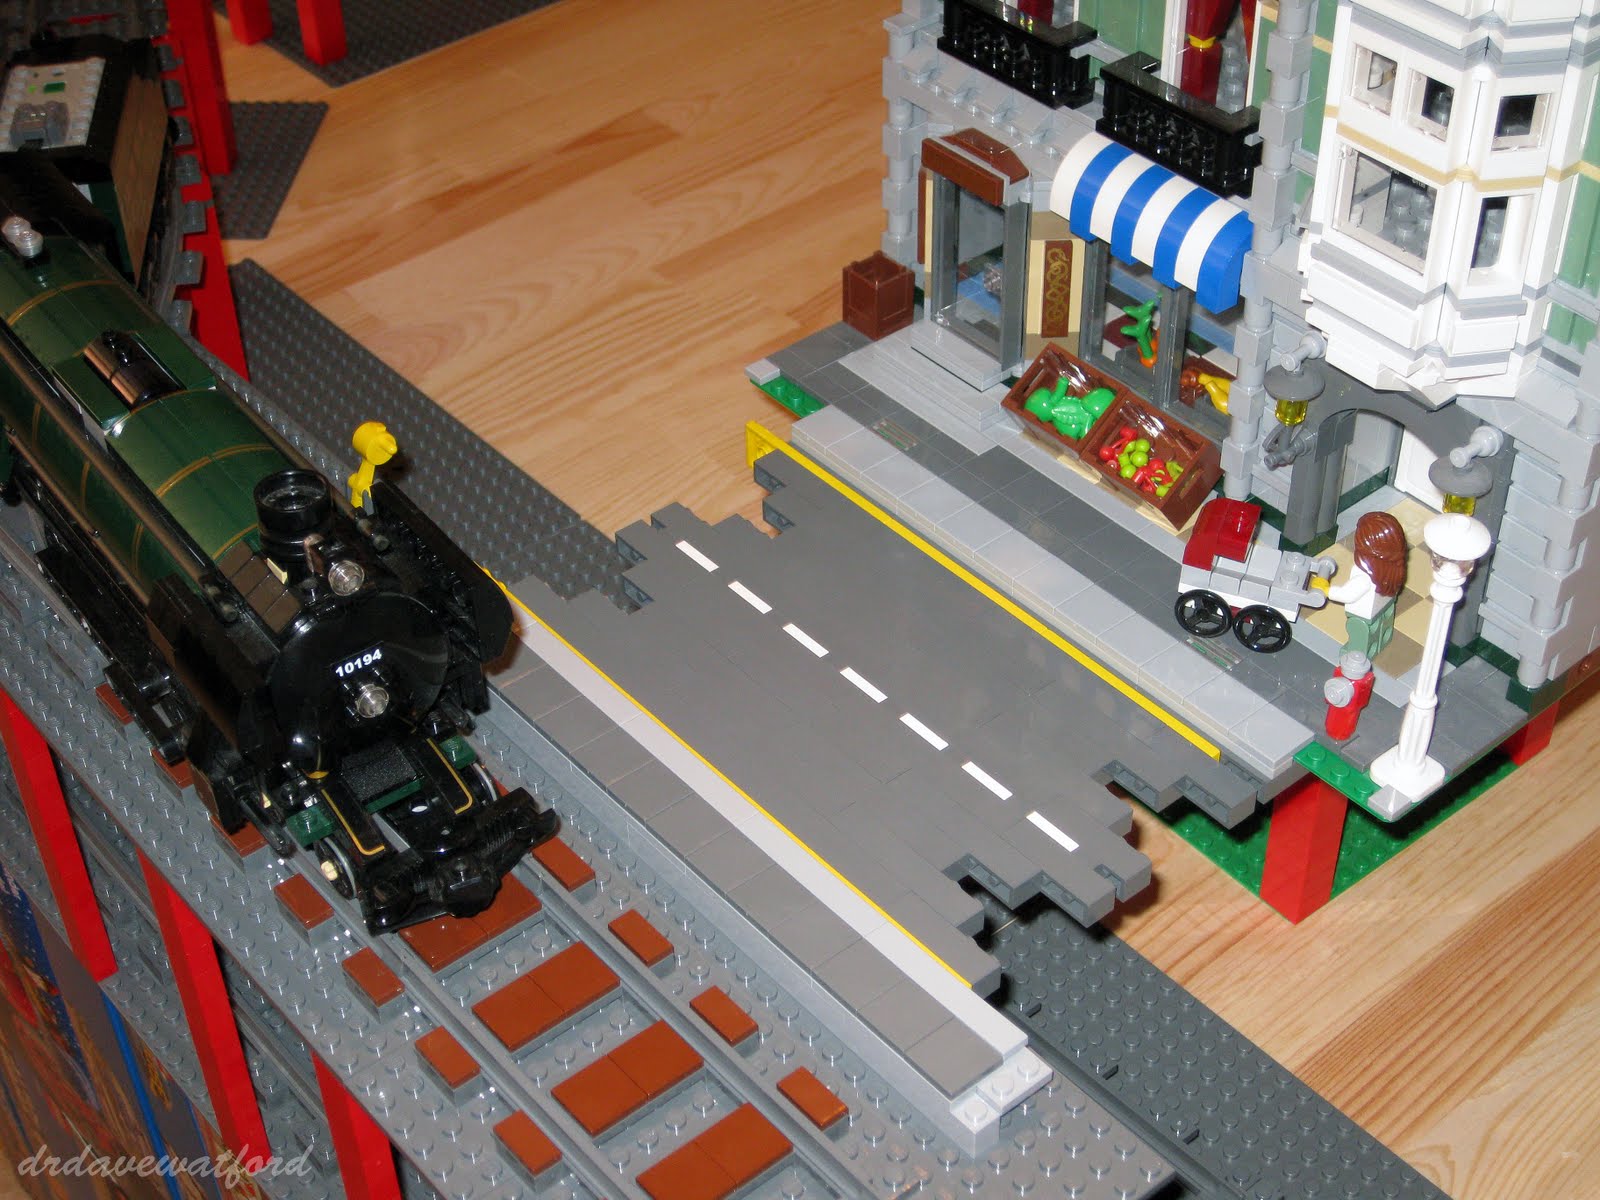
Experimenting with brick-built roads, with help from Green Grocer...


Emerald Night pays a visit

So will I change tack and use brick built roads instead ? Well, I'm not sure yet, to be honest - they certainly look good to me, and the section I attempted wasn't too hard to build or integrate with other aspects of the layout (although to be fair I haven't attempted to build a junction or a curve yet...). It would however require one hell of a lot of Dark Bley bricks, not to mention a handy number of white and yellow plates, all of which I'd have to source. I'm definitely leaning towards doing this, however....

And as for linking the upper and lower track loops ? Well, once again it's a nice idea, but I'm wary of the impact that this would have on my building area at surface level, so unless I or any of you can come up with a viable workaround I'll probably not run with this idea. We shall see !

<-- LEGO City layout : previous blog entry        LEGO City layout : next blog posting -->

Monday, 13 September 2010

Who needs a train set ?

When I was a kid, I had a train set. I loved it, but it was fiddly and fragile (admittedly in part because it was an N-gauge set which is quite small scale). Another problem was that additional locomotives and coaches were really expensive. To hold the rails in place, my dad nailed some track down on a large wooden baseplate, and I spent many happy hours watching my 2 locomotives and 5-6 coaches going round in circles.

I was reminded of this when I recently took delivery of one of the new LEGO trains. Set 7939 Cargo Train is actually not just a cargo train at all - it's a complete LEGO train set in a box, consisting of a locomotive, 3 freight coaches and freight for them to carry, a cargo loading crane, an articulated lorry, and an oval of track plus 2 sets of points and extra track to make a couple of sidings.


Set 7939 Cargo Train - as good as a traditional train set ?

Critically, the set also contains a motor, an infra-red receiver and a remote control unit, so unless I'm missing something, the set basically contains everything and more than a similarly-priced 'proper' train set might contain. It got me wondering why anyone would actually buy a 'proper' traditional train set anymore. 

Some would argue that a major downside of LEGO trains versus a traditional train set is a lack of realism. The trains and rolling stock from a traditional train set certainly look a lot more like 'real' trains and rolling stock, as do the various trackside buildings that you can buy. There's also not much choice if you go down the LEGO route - I think that there are only three LEGO trains (7939 Cargo Train, 7938 Passenger Train and the magnificent 10194 Emerald Night Steam locomotive) and 2 dedicated trackside buildings (a station and a level crossing) currently available at retail, against literally hundreds from a company such as the much-loved Hornby who specialise in train sets. Even if you factor in the many retired LEGO trains, coaches and trackside buildings which can still be obtained via Ebay and Bricklink, a company like Hornby still offers more choice.


The beautiful LEGO Emerald Night locomotive and coach

The big upside of a LEGO train set is versatility, however. Once you get tired of playing trains, you can take the set apart and use the parts for something else, so it's unlikely to become obsolete. Someone once wrote that LEGO is the ultimate recyclable toy, and its certainly less likely to be left gathering dust somewhere than a traditional train set. The realism gap is also starting to close - just click on the picture of Emerald Night above and take a close look if you don't think LEGO trains can look authentic. I have to say I was astonished by the level of detail on this set, and the love that was lavished on it by the designer(s) is obvious. LEGO trains will never entirely match the level of realism that Hornby et al can offer, but the difference is nowhere near as glaring as it used to be.

When I was a kid, the LEGO trains looked much less realistic than they do now (although I did love my Set 171 Train Set without Motor......) and they couldn't be controlled remotely, so my traditional train set did the job much better. If I was a kid now, however, I suspect I might be tempted to choose a LEGO train set over a traditional set given the improved realism, ability to control the train remotely and the fact that it obviously integrates with other LEGO (both the pieces, of course, and also as a whole as part of a LEGO town). Perhaps therefore the LEGO organisation should consider working a bit harder to capture some of the traditional train set market, as their efforts in this area seem a bit half-hearted to me - relatively few products and little marketing spend. You can't even buy extra coaches or rolling stock as standalone items at present which is a major issue for enthusiasts. The LEGO train-related products that are available are great, but more choice really wouldn't go amiss...