Showing posts with label 3-in-1. Show all posts

Wednesday, 13 July 2016

Dino-mite....

Regular readers of Gimme LEGO will know that I'm rather partial to a LEGO dinosaur, so when the chance recently arose for me to fill a gap in my LEGO dinosaur collection I quickly pounced. Set 4998 Stegosaurus was released back in 2008 just as I was emerging from my LEGO Dark Ages, and it disappeared from shelves the following year just as I was getting ready to buy it. Thanks to the wonders of eBay, however, it's now in my possession, albeit a few years later than originally planned....


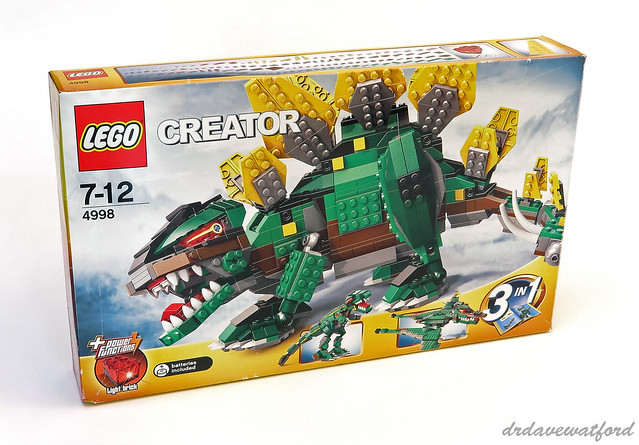
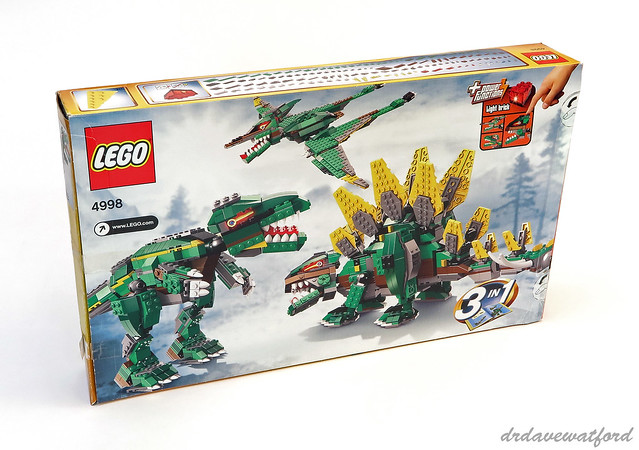
One reason that I always intended to track this set down is that it's a Creator 3-in-1 offering and thus includes the parts and instructions to construct not just one but three different brick-built dinosaurs, although not all at the same time unfortunately. A large image of the headline Stegosaurus model takes pride of place on the front of the box (above), with the secondary pterodactyl and Tyrannosaurus rex builds relegated to small panels beneath. We're provided with large images of all three builds on the back of the box (below) together with a small panel top right which illustrates how the light brick included in the set is incorporated into the three models.

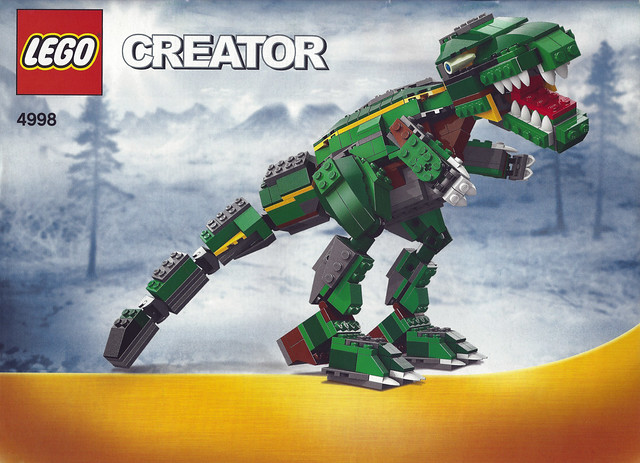
Despite my copy of the set being pre-owned the box has survived relatively unscathed, not least because the previous owner thankfully avoided opening the set using the thumb tabs provided. The set includes three substantial instruction booklets, with each dinosaur getting its own booklet; you can see the cover of the booklet containing the Tyrannosaurus rex instructions below. At 84 pages from cover to cover the booklet for the Stegosaurus is comfortably the longest. A variety of adverts are spread across the three booklets, and an inventory of parts contained within the set can be found in the pterodactyl instruction booklet.

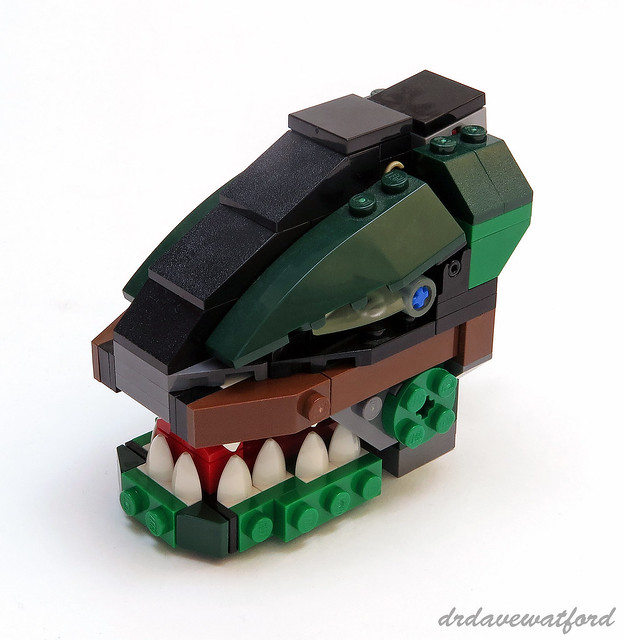
Given that it's the headline build I decided to start with Stegosaurus. Construction begins with the head, and specifically the lower jaw which articulates with the rest of the head via a couple of hinge plates thus enabling the mouth to be opened. The light brick referred to on the front and back of the box is a 2 x 3 x 1 1/3 light brick containing a red LED and it's mounted in the middle of the head. It's a sobering thought that the real Stegosaurus, which could grow up to 9m in length and weigh over five tonnes, had a disproportionally small brain estimated to be not much bigger than the size of a walnut. So barely larger than a light brick then....  A small hinge mechanism covered with a couple of black 2 x 2 tiles is constructed towards the back of the head; when the rear-most tile is pressed the light brick illuminates, and if you're lucky the hinge mechanism sticks in the "on" position so that the light brick remains illuminated when you take your finger away; I'm not sure whether this is intentional or not, but it's welcome nonetheless. Despite the age of the set, and my copy being pre-owned, the light brick still works fine so the battery is obviously still viable - impressive. The eyes of the Stegosaurus consist of a pair of glow-in-the-dark Bionicle 1 x 3 teeth which can only be found in five sets in this colour; the eyes glow red when the light brick is illuminated. The top of the head is nicely contoured with dark green left and right 6 x 2 wedges which can be found in fewer than 10 sets in total.

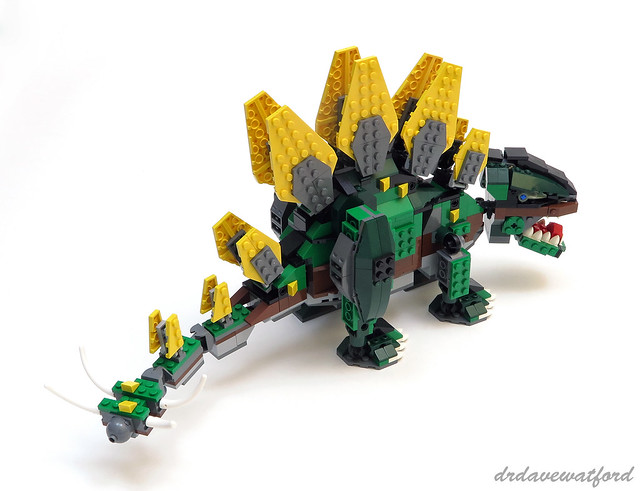
The body of the Stegosaurus consists of two sections, with the smaller front body section next to be built. A dark green modified Technic 2 x 2 brick with rotation joint socket, which can only be found in six sets in this colour, is embedded on either side of this section and provides an attachment point for the front legs which will be built later, while the head attaches to another dark green modified Technic 2 x 2 brick with rotation joint socket embedded at the front, Once attached, the head can be angled left and right to around 45 degrees, and it can also rotate around its midline, but no up or down movement is possible. The foremost of Stegosaurus' characteristic bony dermal plates, which are represented by a variety of yellow wedge plates, are attached to the top of this section and are angled forward by way of a tilted modified 2 x 2 plate with pin holes. The larger, rear body section connects to the front section via 2 x 4 hinge plates with articulated joints which you can see here and here; while the two halves of the joint require an unexpectedly hard push to click together there's relatively little friction between the elements once connected so the joint moves very freely. Similar to the front body section, modified Technic 2 x 2 bricks with rotation joint socket are embedded on either side of the rear body section to provide an attachment point for the the hind legs, while three pairs of large dermal plates are mounted on the top of the rear section of the body and angled appropriately as you can see in the picture below.
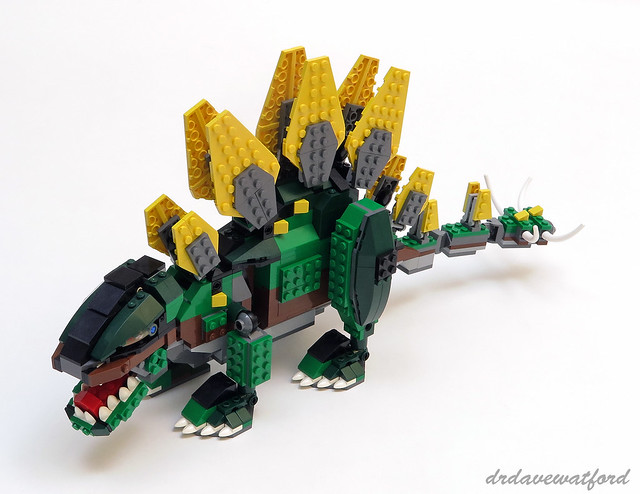

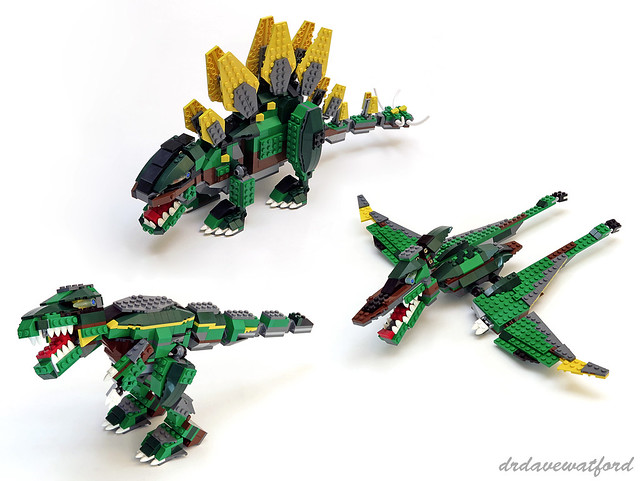
With the body completed it's time to build the legs. While the hind legs are substantially larger than the front legs, all four feet are the same and all four legs articulate in a similar fashion, allowing a degree of flexion and extension at the shoulders and hips, and also some adduction and abduction in the case of the front legs in particular. Furthermore, each ankle incorporates a rare dark green Technic 2 x 2 brick with rotation joint half ball which has only ever appeared in three sets and which allows the feet to be rotated, flexed and extended at the ankles. More rare dark green elements make an appearance in the form of dark green 6 x 2 and 4 x 2 wedges which make up the thighs of the hind legs. Last to be built is a tail consisting of three distinct segments, two of which feature dermal plates on their upper surface. The tail segments are connected to each other and the rear body section using the same lax hinge joints that are used to connect the body sections together. Four tail spikes, represented by white dinosaur tail end sections, are mounted on the rearmost tail segment; this distinctive defensive arrangement has come to be known as a thagomizer which on a real Stegosaurus apparently included anything from four to ten spikes. The completed model is larger than I expected - more than 40 cm from nose to tail - and it looks quite impressive. That having been said, it should probably be acknowledged that LEGO has employed considerable artistic license from a design perspective - in reality, Stegosaurus was a herbivore and had small, peg-shaped teeth, so the modified 1 x 1 plates with tooth elements used to represent the teeth aren't a good representation of the real thing. Furthermore, the whole head is altogether too large and aggressive for this likely placid herbivore, and the arrangement of the bony plates is wrong as well - these were characteristically arranged in an alternating pattern down the dinosaur's back. Even so, it's a Creator 3-in-1 set we're talking about here rather than a UCS display set, and regardless of the inaccuracies the model is still immediately recognisable as a Stegosaurus and looks pretty good. Furthermore, the model can also be posed to some extent thanks to multiple articulation points, so not a bad effort overall.


And so to the first of the alternate builds, a pterodactyl. Once again the build commences with the head, which is huge in relation to the body, not to mention utterly terrifying.... The long, tooth-filled lower jaw is hinged at the back which allows the mouth to be opened. The light brick is once again incorporated into the head; it's activated by pressing down on the beast's cranial crest which projects upwards and backwards from the head. Once again a pair of glow-in-the-dark Bionicle 1 x 3 teeth represent the pterodactyl's eyes and glow red when the light brick is activated. The pterodactyl's body is tiny, and as was the case for the Stegosaurus the head is attached to the body by way of a rotation joint which allows the head to be angled left and right and also rotated around its midline.


The wings are comprised of three sections, the largest of which attach on either side of the body via a pair of rotation joints which allow the wings to be tilted upwards or downwards. The hind limbs are incorporated into the large wing sections, although in reality they would actually have emerged from the body; they project backwards and terminate in a pair of modified 1 x 1 plates with tooth. The mid-section of each wing attaches to the inner section via hinges comprising modified 1 x 2 plates which allow it to be angled upwards or downwards. The outermost wing section attaches to the rest of the wing by just one stud which allows it to be rotated forwards and backwards, and with the wings completed we're done. While the finished build is just about recognisable as a pterodactyl, it's not a great representation of the subject matter and it isn't going to win any design awards. Still, at least the head is suitably fearsome, and the model is certainly robust enough to swoosh if you're that way inclined, so it's not all bad I suppose.


The last of the three builds is a Tyrannosaurus Rex. Many aspects of the build predictably mirror what we've seen with the previous two models, including the hinged lower jaw and copious sharp teeth, the illuminating eyes, and the use of a rotation joint to attach the head to the body which enables the head to be angled left and right and also rotated around its midline.
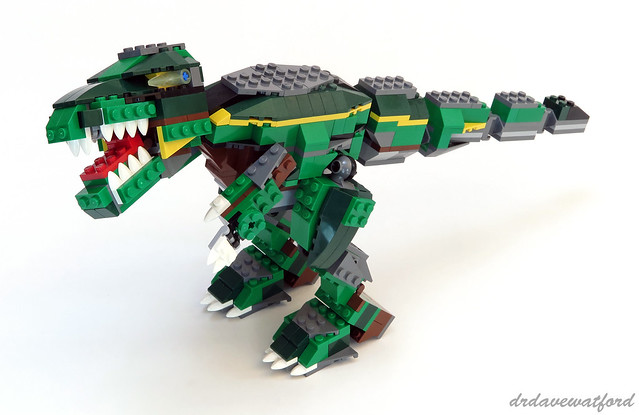

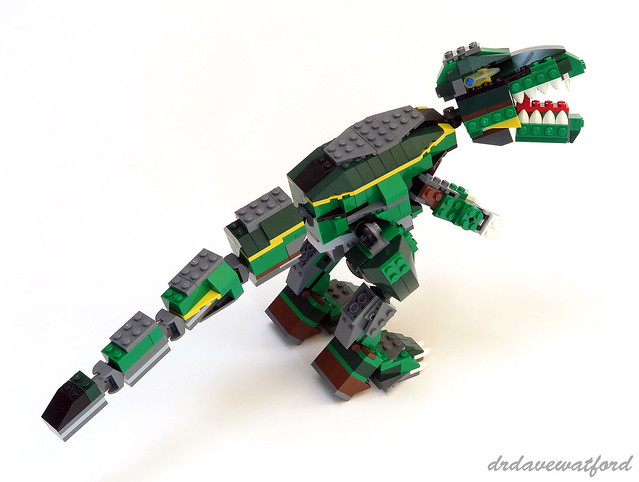
At first glance the body looks a little undersized compared with the large head, but on the basis of artists impressions of Tyrannosaurus rex I think it's actually pretty much spot on. The tail is made up of four distinct sections joined together by the same 2 x 4 hinge plates with articulated joints that were used to create the Stegosaurus tail; such is the size and weight of the head relative to the body that only by attaching the tail can you stop the legless beast from toppling forward. The powerful legs are made up of a nunber of sections which are joined together in something approximating a zig-zag pattern via the use of rotation joints; although the arrangement looks a bit haphazard the legs actually do a pretty good job of supporting the weight of the rest of the model and also allow the beast to be posed to some extent. The puny arms are last to be built; they look rather blocky and untidy, but can at least be raised and lowered. Overall I really quite like the finished Tyrannosaurus rex - it's well proportioned, the head looks great, the multiple points of articulation offer some flexibility when displaying the model, and it even comes complete with a yellow go-faster stripe.....

This is just one of a number of brick-built tyrannosaurids that LEGO have produced over the years, with other examples to be found in Set 4507 Prehistoric Creatures and Set 6914 Prehistoric Hunters. As luck would have it I just so happen to have the latter built and on display at home, and you can see it alongside the completed Tyrannosaurus rex, which completely dwarfs it, in the picture below.
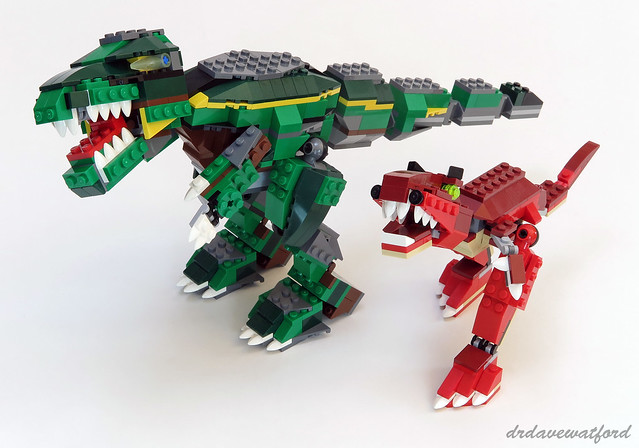

Over time I seem to be increasingly ambivalent about many of LEGO's licenced themes and their focus on minifigures at the expense of the actual builds. On the flipside, however, I'm increasingly relishing the generally simpler pleasures of the Creator theme, and I thoroughly enjoyed building this Creator 3-in-1 set. Sure, the models are relatively crude, but in addition to the enjoyable building experience I think that the Stegosaurus and Tyrannosaurus rex actually look pretty good, and I'll be keeping the latter assembled and on display for the time being I think.

Set 4998 Stegosaurus was released back in 2008 at a recommended retail price of £36.19 / US$49.99. Despite being retired from sale in 2009 the set can still be aquired relatively cheaply; my pre-owned, boxed, complete example of the set was recently purchased from eBay for less than £30, although if you're looking for a new, sealed copy then you'll pay upwards of £80 on Bricklink at time of writing.

Tuesday, 22 April 2014

(Even More) Spoiled for Choice

A while back I reviewed a book called Amazing Vehicles by Nathanael Kuipers and Mattia Zamboni. I thought it was an interesting concept - a book containing building instructions for ten lovingly-designed vehicles, each of which could be built in their entirety from the parts contained in just one fairly small, inexpensive LEGO set - Set 5867 Super Speedster. At the time I was frustrated to discover that my copy of the set was buried at the bottom of a cupboard somewhere and thus inaccessible, but undaunted I teamed up with my then-5 year old to raid his LEGO collection and find the necessary parts to build a multi-coloured version of one of the models in the book.


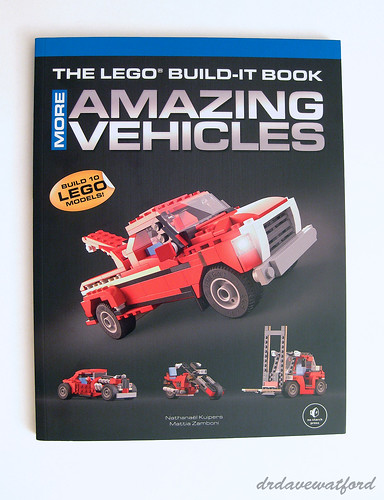
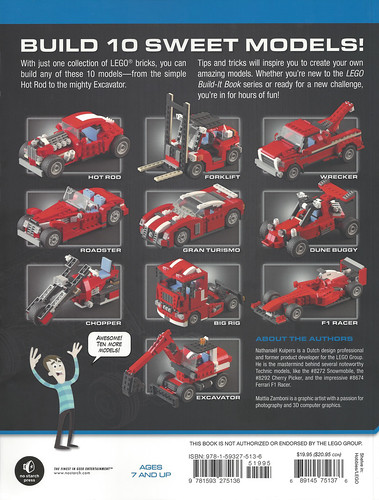
Having given Amazing Vehicles an enthusiastic thumbs up at the time, I was pleased to hear that Nathanael and Mattia had released a follow up - More Amazing Vehicles - a few months back, and I recently got around to picking up a copy which I managed to find for less than a tenner including shipping. The book (front cover above) closely mirrors the first volume in appearance, format and layout which is perfectly fine by me - if it ain't broke then don't fix it. Nathanael has impressively managed to come up with another ten vehicle designs which use the same parts palette as the designs in the first book, namely the contents of Set 5867 Super Speedster. The designs, which you can see on the back cover of the book below, are graded according to construction difficulty, and as was the case for the first book, a set of Mattia's beautifully-realised building instructions is included for each model. In addition to the building instructions, the book also contains building and design tips to help the reader realise their own original vehicular designs.


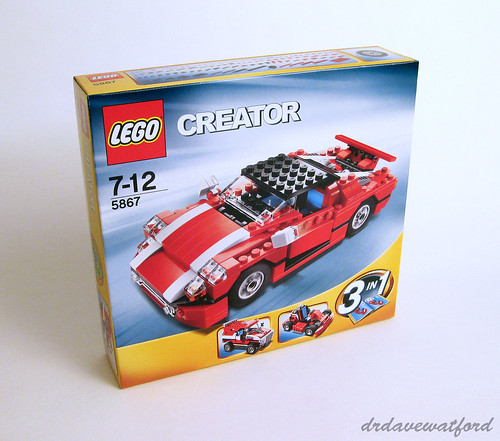
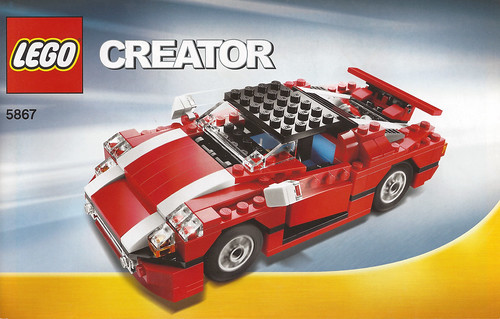
I once again need to commend Nathanael on the quality of his vehicle designs. The majority of designs on offer are excellent, so much so in fact that I finally pulled my finger out, braved my storage chaos, and dug out my sealed copy of of Set 5867 (below) from its inaccessible exile so that I could build a few of them.


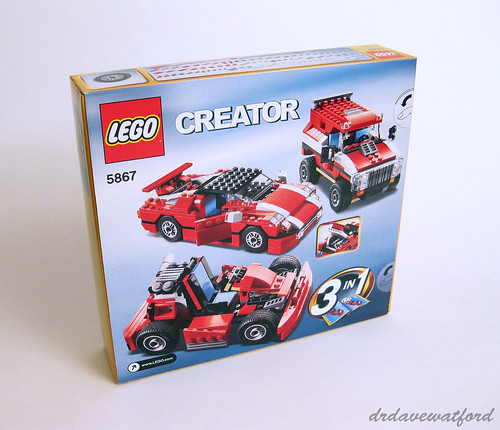
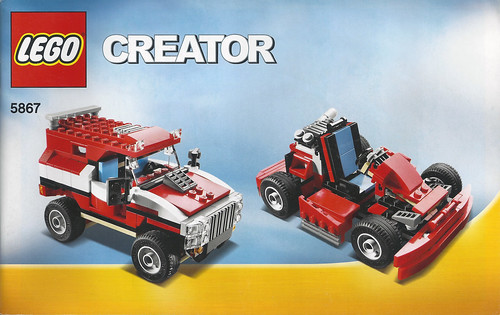
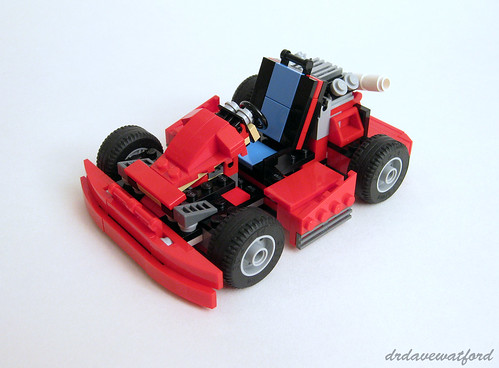
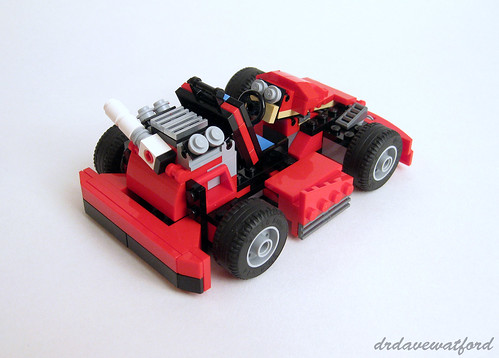
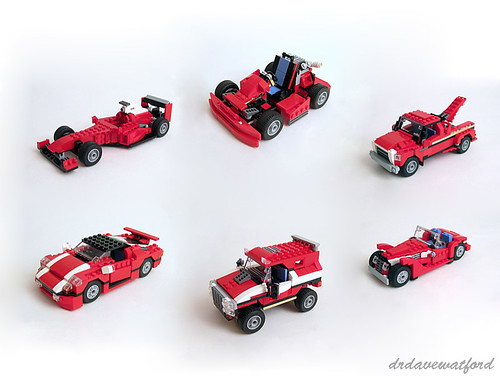
The parts donor for the models, Set 5867 Super Speedster, is one of LEGO's Creator 3-in-1 sets; these sets contain instructions to build three different 'official' models from the parts provided, although alas not all at the same time. Having literally dusted the set off and taken a close look at it, it occurred to me that the three 'official' models - the Super Speedster itself, an SUV and a Kart - weren't half bad either. I therefore decided to build and review those three models as well, in addition to my pick of the designs from the More Amazing Vehicles book.


The box opens via a couple of thumb tabs (or just a sharp knife, depending on your preference). It contains 4 unmarked bags of parts and a couple of instruction booklets. There's no DSS. The instruction booklets (covers below) are compact and chunky; the thinner of the two booklets contains the building instructions for the primary model (the Super Speedster), an inventory of parts, and advertising for a couple of other 2010 Creator 3-in-1 sets, the LEGO Club and the Creator microsite (www.creator.LEGO.com). The other instruction booklet contains building instructions for the SUV and the Kart and that's all.


The set contains 278 parts, most of which are relatively common; only a couple of elements - a red curved 2 x 4 x 2/3 slope without studs and a trans-clear 33 3 x 6 slope which forms the windscreen of the Super Speeder - stand out as being harder to find. For reasons that I'll discuss later this is definitely a good thing.

I decided to build the kart first. This was a quick, fun build - it can't have taken me much more than 15 minutes or so to put together - and you can see the results below (click pictures to enlarge). Personally, I think it looks great - low and squat with some nice little details such as the foot pedals at the front and the exposed engine at the back - and it was a good taste of things to come.


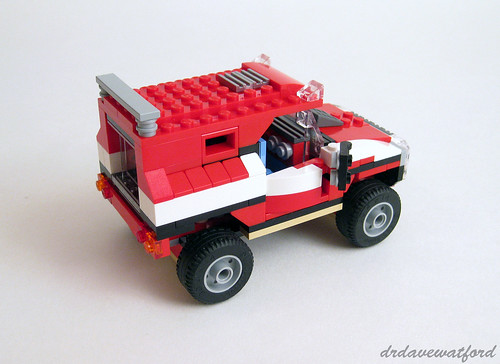
Next up was the SUV. These days when I think SUV I generally think Chelsea Tractor, but in this case it was more reminiscent of some of the vehicles that compete in the Dakar Rally. This was another fairly quick and simple build, although perhaps a little more involved than the Kart. It looks pretty good from the front, sporting an imposing engine grille and clever use of clips to orient the windscreen vertically with studs facing forwards. The cockpit is spacious and features opening doors. The built-up rear section looks a bit clunky, suggesting that compromises had to be made as a result of the limited parts palette, but otherwise it's a respectable effort I reckon.


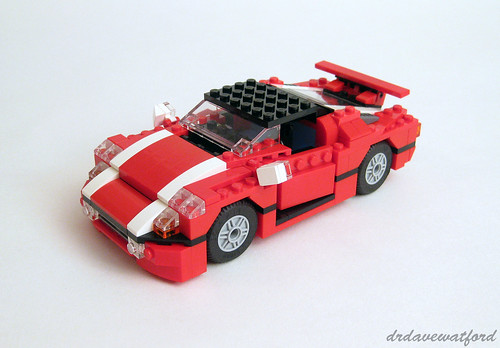
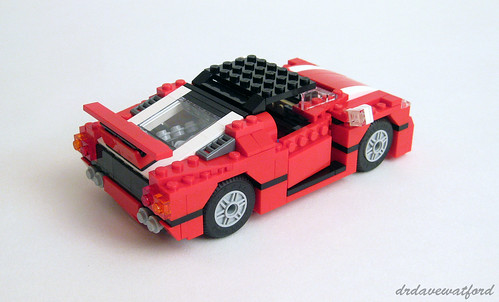
The primary model, the Super Speedster, is a lengthier and more involved build than the two alternate models, although it still took less than 30 minutes to put together. Having built it, my immediate reaction was that the publicity photographs and box art don't do it justice - it looks more impressive "in the brick". I think the back looks particularly good and quite Ferrari-esque; there's even a transparent (rear) engine cover as seen on Ferraris such as the 430, F40 and Enzo, beneath which you can see what looks like an eight cylinder engine. Although I'm not so keen on the 'stepped' bonnet or the way that the doors aren't flush with the bodywork (this seems to be a deliberate design feature rather than an unavoidable workaround), the Super Speedster is a decent effort overall and I like it.


In addition to looking pretty good, the Super Speedster has a number of play features which can be seen in the picture below (click to enlarge). Best of these is the rear engine cover which lifts up to expose the engine. In addition to this, the doors open, as does the bonnet.


Overall I thought that all three 'official' models were pretty good - fun to build, decent-looking, unpretentious and, in the case of the Super Speedster at least, incorporating a few play features. It's not often that I can give the thumbs up to all three models in a Creator 3-in-1 set, but in this case I'm delighted to be able to do so.

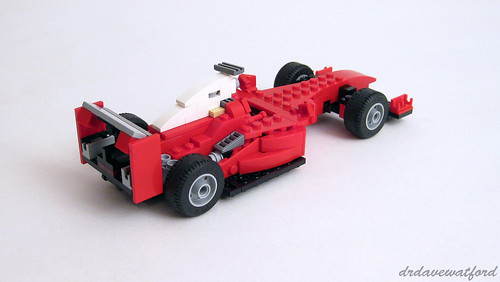
Having built, photographed and then disassembled all three 'official' models from Set 5867 it was time to dive into some of Nathanael's original designs from More Amazing Vehicles. I was immediately drawn to the F1 Racer so decided to start with that one. Compared with the 'official' models the build took me longer and was more fiddly and complex. It's quickly evident that the F1 racer isn't an 'official' LEGO build on the basis of some of the advanced building techniques utilised in its construction and the relative fragility of the finished model; studs are facing in literally all directions, and some seriously ingenious design work has gone into it. The bodywork is nicely contoured and sleek, little details have been expertly captured, and it's really not at all obvious that the designer has been restricted to a limited parts palette, such is the elegance of the design.


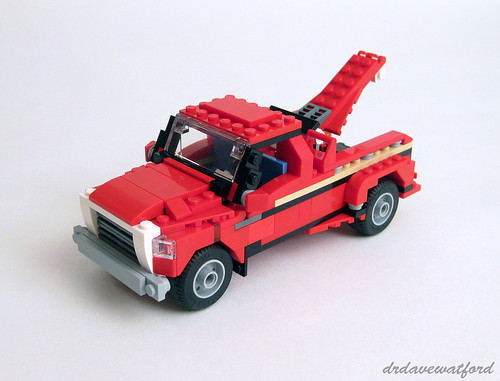
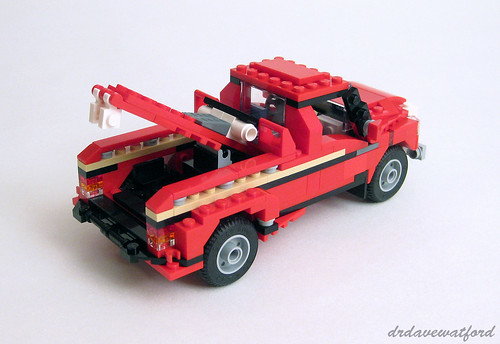
The next Kuipers original I chose to build was the Wrecker. Like the F1 Racer this was a fiddly build at times and also fragile in places. Also, compromises that had to be made as a result of the limited parts palette were perhaps more evident with the Wrecker than they had been with the previous models, notably in the passenger compartment, where one of the seats is lacking a cushion and the dashboard is messy. Even so, the finished model still looks excellent, particularly from the front, and some of the building techniques employed are ingenious. There's also a rudimentary play feature built in - the boom at the back can be raised and lowered.


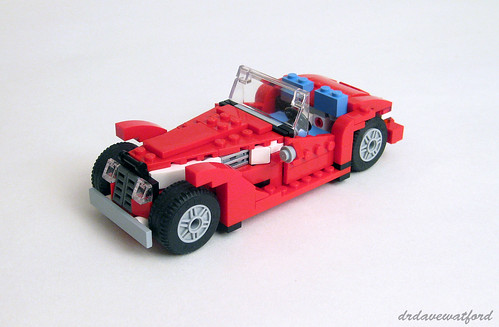
In order to get this posting finished within a reasonable timeframe I figured I'd have to limit myself to building, photographing and briefly describing just three models from More Amazing Vehicles in addition to the three 'official' models from Set 5867. Having built the F1 Racer and the Wrecker it was genuinely difficult to decide which of the remaining models to choose as I wanted to build almost all of them. I eventually plumped for the Roadster, although will almost certainly build at least a couple more at some point. The Roadster (below - click to enlarge) was a quicker build than the F1 racer or the Wrecker. Once again it looks good from the front, and the interior looks great. I think that the back leaves a bit to be desired, however, looking rather unfinished to my eye. Also, the rear wheels snag slightly on the bodywork, and I did wonder whether I'd made a mistake during construction but it seems not. Notwithstanding my criticisms, it's another nice-looking model overall and was well worth building.


Honestly, I'm wondering whether there's any better value for money for a LEGO fan than a copy of Set 5867 plus Amazing Vehicles and More Amazing Vehicles; having thoroughly enjoyed building the three 'official' models and admired the results, I then spent an extremely enjoyable couple of hours building the three additional models above from More Amazing Vehicles and in truth I could have quite happily carried on and built the rest of them too if I'd had the time. I really can't praise the vehicle designs too highly - to be able to come up with so many excellent designs using a fairly limited parts palette takes some serious skill, and I'd love the authors to repeat the trick using parts from a different set - I'd buy that book like a shot (No Starch Press please note, if you're reading....).


Really the only fly in the ointment, apart of course from the need to dissassemble each model before building the next one, is that Set 5867 is now retired and no longer available at retail. You can certainly track down a copy via the likes of Bricklink or eBay, but prices are generally higher than you'd expect for a recently-retired Creator set, and I suspect that this might be driven by owners of Amazing Vehicles and/or More Amazing Vehicles looking for a copy. If you're put off by the price of the set on the secondary market, an alternative stategy is to just source the parts needed to build the models via Bricklink or Brickowl, and you can find a parts listing in both books to facilitate this. It'd be a bit of a pain, but as previously stated the vast majority of the necessary elements are at least widely available and fairly inexpensive so this is certainly a viable alternative to buying the set.

Monday, 7 April 2014

Old School

Time to dip into my ever-growing build queue this week.... Set 31011 Aviation Adventures caught my eye as soon as pictures started to leak onto the internet in 2012, and it was of course part of the 2013 Creator line-up which got the nod as my theme of the year in the 2013 Gimme LEGO Awards. I've been meaning to build this set for months, and I finally got round to it. Did it live up to my expectations ? Read on to find out....


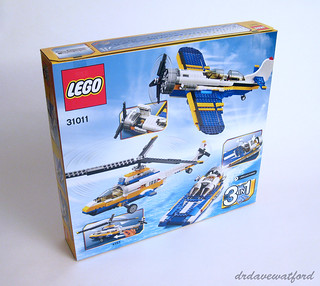
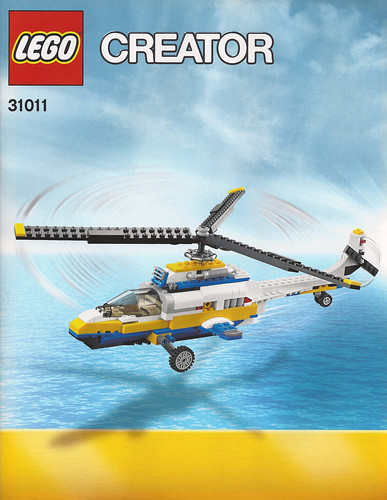
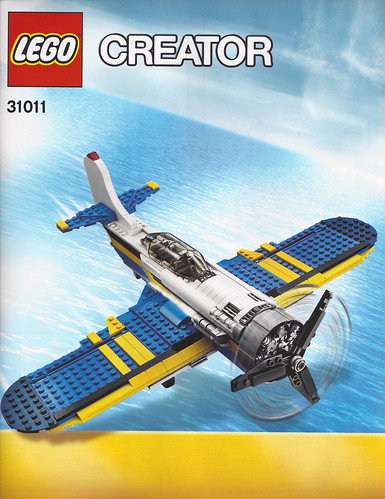
The box is around 38 cm by 35 cm and quite heavy for its size thanks to the 618 pieces contained within. The front of the box (above) is dominated by an image of the primary model, an airplane, with the secondary models - a speedboat and a helicopter - and the Creator 3-in-1 logo relegated to a series of small windows beneath. There's also a boxout top right which highlights the main play feature of the airplane. The back of the box gives the three models approximately equal billing, highlighting a play-feature of each. Overall, the understated, clean and minimalist branding and artwork is perfectly suited to the Creator theme.


The box contains 8 un-numbered bags of parts and 3 instruction booklets; I never get tired of seeing the instruction booklets nice and flat in their own bag with a cardboard backing. There's no DSS. The instruction booklets are A4 sized, and there's one for each of the featured models. The 84-page booklet for the airplane contains nothing but building instructions, while an inventory of parts and advertising for the 2013 Creator sets and LEGO Club are split between the significantly shorter speedboat and helicopter instruction booklets.


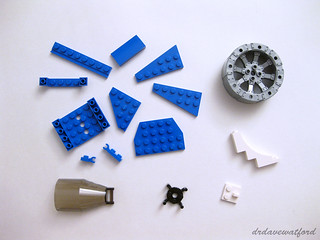
You can see a selection of some of the more noteworthy elements that are included in the set in the picture above (click to enlarge). Consistent with this being a Creator set, most of the constituent elements are fairly commonplace - the set is a good source of standard blue plates, for instance. That having been said, there are a few elements, most of which are blue slopes and wedges of various types, which are noteworthy by virtue of their relatively infrequent inclusion in sets; all bar one of the elements in the picture above can be found in less than ten sets in total. Rarest of the lot is the flat silver wagon wheel which is unique to this set, while the white 1 x 5 x 4 inverted arch is included in just two sets including this one, and the trans black windscreen has appeared in just three sets to date. A full inventory of parts can be found in the instruction booklet for the speedboat, and you can also find the parts inventory online here.


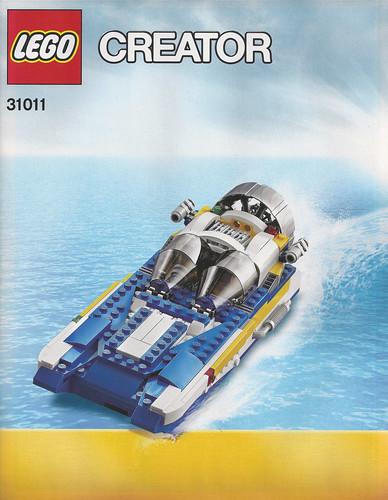
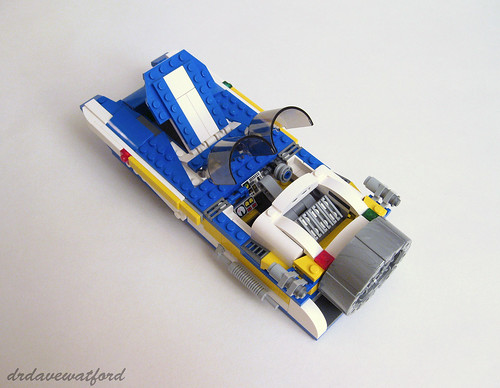
The first model I built was the speedboat, and you can see the cover of the instruction booklet above. LEGO has designated this the most basic of the three models, and I think the build is probably best described as a "good, old fashioned' building experience' which utilises lots of plates and basic bricks in 'traditional' LEGO colours and calls upon relatively few specialised parts. The fact that the part selection in this set is heavily geared to the primary model means that there's a lot of 'making do' involved in the secondary models; the compromises inherent in having to make the best use of the parts available took me back to my long lost childhood.... This is particularly evident in the mid-section of the hovercraft which, beneath the skin, is a patchwork of parts and colours that no right-minded builder would have used given a choice. Up until fairly late in the build I couldn't really see this model coming together very well at all, but the end result (picture below - click to enlarge) is better than I expected.


The back of the model is dominated by a huge fan which would seem to be far better suited to an airboat than a speedboat, but I'm no expert so I'll give LEGO the benefit of the doubt. The fan rotates, which I guess counts as a rudimentary play feature.


The main play feature of this model, apart of course from zooming it around on your carpet at home (there are six boat studs attached to the underside to reduce friction), is a simple mechanism for opening the speedboat's twin canopies. The canopies are popped open by pressing on the trio of flat silver modified tiles with grille located just in front of the rear fan (picture below - click to enlarge). There's also what LEGO describes as a luggage compartment in front of the cockpit which has a hinged lid that can be opened and closed.


As a fairly simple introductory build the speedboat does the job, although it's not really a design to sit and endlessly admire; good job too as no sooner had I built and photographed it then it was time to break the model down and get to work on the helicopter.


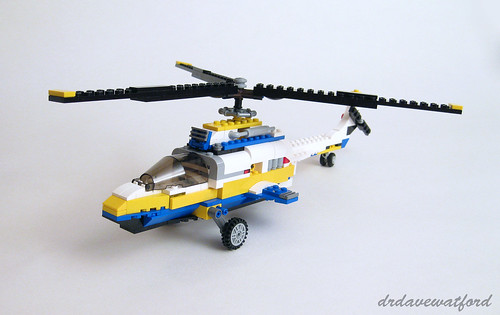
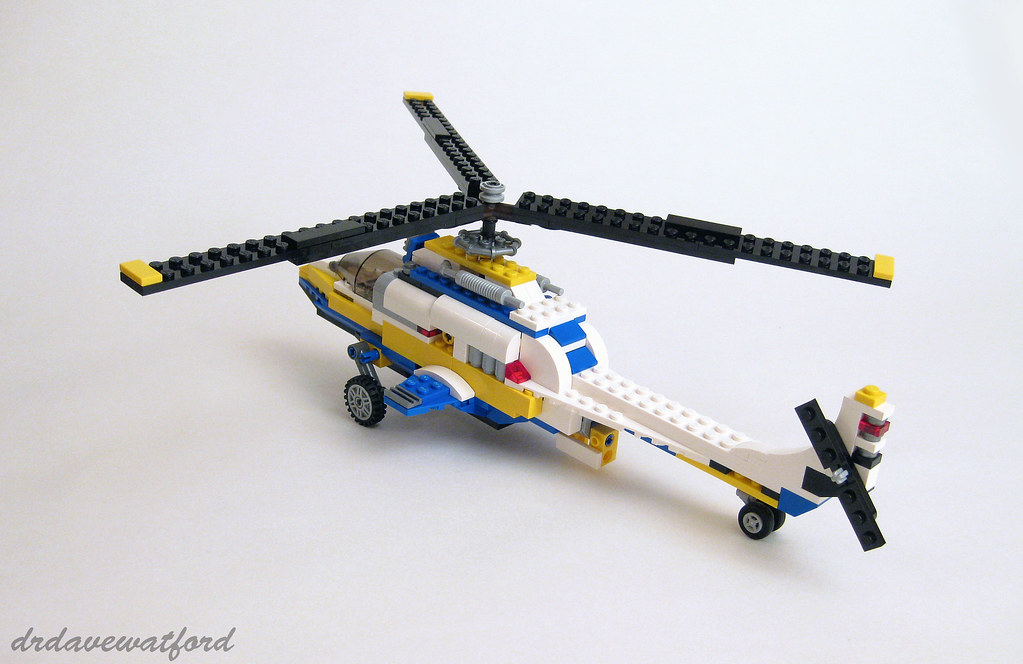
LEGO have designated the helicopter as 'Medium Build' in terms of build time and complexity. It was actually a pretty quick build - construction time didn't feel appreciably longer than that of the speedboat - and the build was fairly simple. I suspect therefore that it may have been classified as medium difficulty purely by virtue of the Technic mechanism that it includes. As was the case for the speedboat before, there were a substantial number of elements left over once the model was finished, and you can see the finished model below (click picture to enlarge).


If I'm honest, it doesn't look particularly great. Aside from the relatively unmemorable overall design, there's a distinct lack of polish close up, with awkward gaps left showing in various places, an at times untidy use of colour, and a somewhat messy feel overall. Look for instance at the helicopter's tail in the picture below, with its multi-coloured stack of 1 x 1 elements at the back, or even the 2 x 2 plate-sized gap just above the rear wheel.


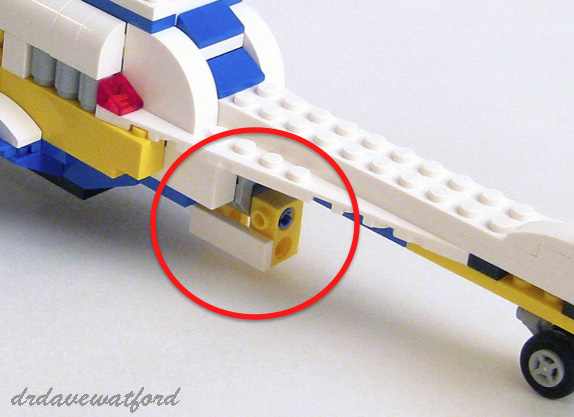
One thing that the helicopter does have going for it compared with the speedboat is a more complex Technic mechanism; slide the protruding structure circled in red in the picture below backwards and forwards a few times and the main helicopter rotor spins quickly, building momentum and continuing to spin for a while afterwards even when you stop. It's a good way of exposing newcomers to the joys of Technic, not to mention making the model more interesting.
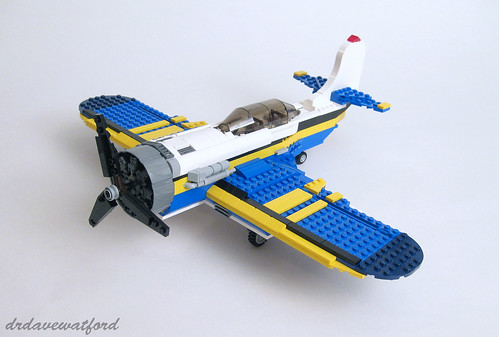

Having checked out the secondary builds I was more than ready to crack on and tackle the main attraction - the airplane. It was this that had caught my eye in the early publicity photos, and I'd been looking forward to seeing if it was as good "in the brick" as it looked in the pictures.


I'm delighted to report that I wasn't disappointed. The airplane is a proper build - substantial enough to be spread over a couple of leisurely hours, and with only a few tiny extra elements left over at the end. In terms of the part count, at 618 elements I guess it ranks as one of the bigger aircraft that LEGO have ever released; off the top of my head I could only think of four - Set 10024 Red BaronSet 10177 Boeing 787 Dreamliner, Set 10124 Wright Flyer and Set 10226 Sopwith Camel - that have a higher piece count. The airplane is solid, robust and surprisingly heavy.


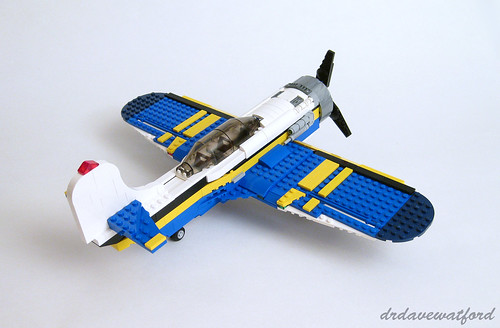
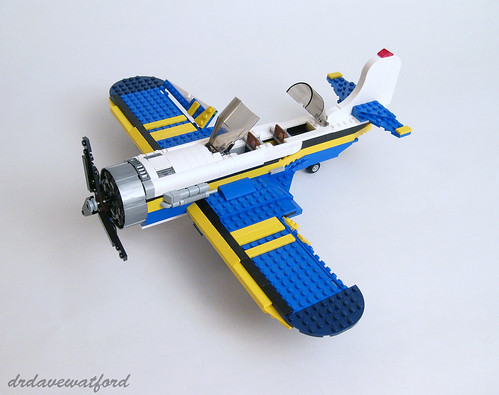
I think it looks as good in the brick as it does in pictures. It's a decent size - a little over 33 cm long and with a wingspan of around 40 cm - and it's well proportioned to my eye. The front is particularly nicely realised - the flat silver wagon wheel makes a perfect engine cowling - and the curved front of the fuselage flows elegantly back from the cowling over the wings and around the cockpit, while the tail is nice and curvy. Eight radial pistons fit neatly inside the engine cowling behind the propeller, and a pair of detailed exhausts are attached to opposite sides of the fuselage. If I have a criticism it's that the studded wings maybe jar a little against the studless fuselage, but it's a minor gripe and overall I think it's a great-looking model.


There are a number of notable play features. Front and centre is the mechanism for spinning the propeller which is similar to that found in the helicopter and which is activated by sliding the rear wheel of the airplane backwards and forwards; there's even a small hatch just behind the engine cowling which opens to reveal the inner workings of the mechanism. The front and rear sections of the canopy are hinged and lift up, and the rear section of the canopy also slides backwards to allow easier access to the cockpit. The cockpit itself features a flight stick, a couple of printed elements to simulate the airplane's instruments, and there's seating for two minifigures within (not provided). Both wings feature ailerons which can be manually angled upwards or downwards as you can see in the picture below (click to enlarge).


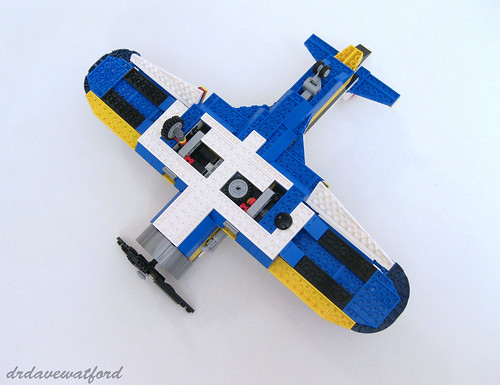
The underside of the airplane features additional moving parts, namely a working undercarriage which is more than strong enough to comfortably bear the weight of the finished model. The picture below (click to enlarge) shows one wheel retracted into the wing and the other wheel extended. The underside of the wings look a little messy; this could have been easily remedied with the addition of a few more white plates, but it's a minor complaint. This view gives you a better look at the rear wheel which you slide forwards and backwards to spin the propeller.


Overall this set provides the classic Creator experience. You get a reasonable number of parts for the money, although some will no doubt bemoan the lack of minifigure(s), and the primary model in particular is an enjoyable build with a ton of interesting play features. You're also getting a significantly extended building experience by virtue of the three sets of building instructions included. The two secondary models - the speedboat and helicopter - are OK but nothing special. The primary model is however excellent in my opinion and I'd have happily bought this set for the airplane alone. As of April 2014 the set is widely available in stores. While it retails for £49.99 / $59.99 I picked up my copy from Amazon at a significant discount, and at time of writing the set is 26% off RRP at Amazon's UK site and 20% off RRP at Amazon's US site so there's no need to pay RRP if you shop around. Unreservedly recommended.